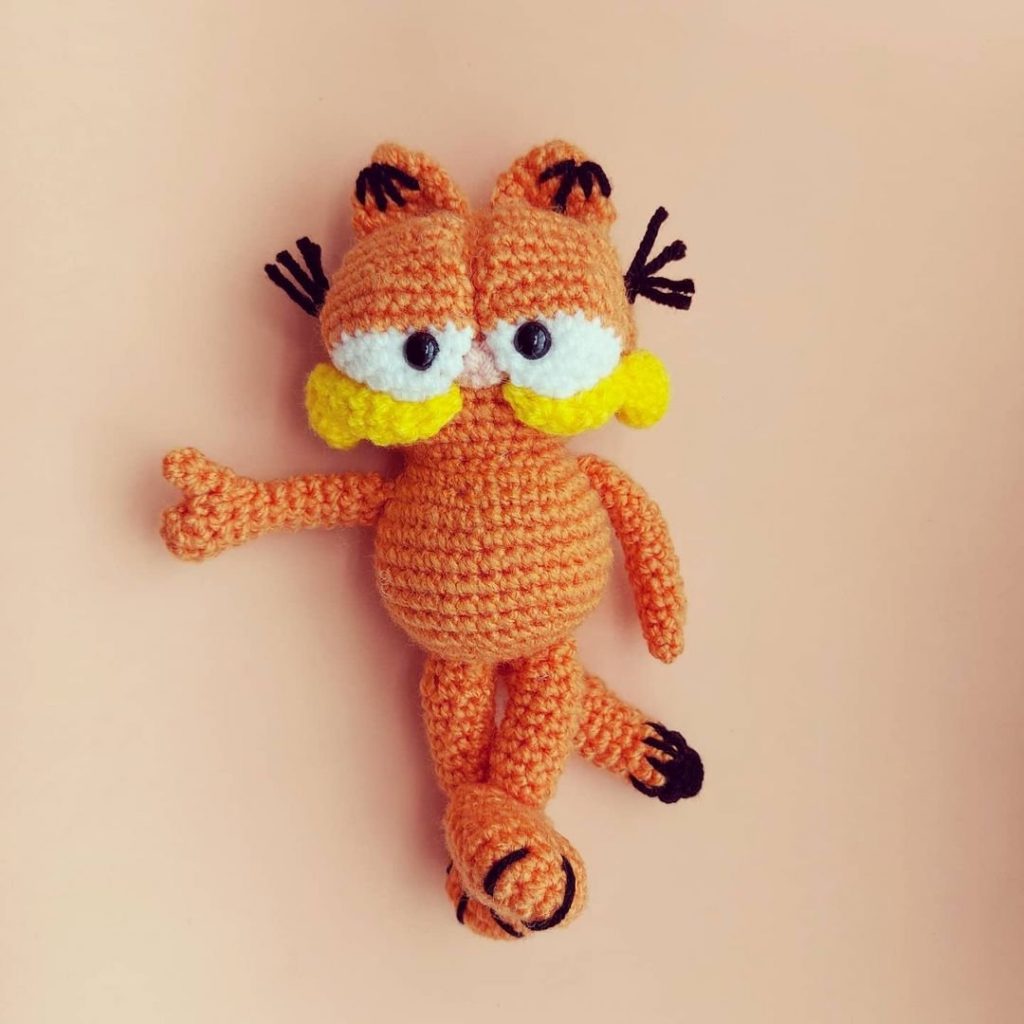
Garfield Free Crochet Pattern
Hello amigurumi lovers and beautiful visitors, I wanted to share the free amigurumi patterns for you here. In my article I will share 1 pattern and how to make it for you. At the end of my article, I will share amigurumi patterns that can generate ideas for you.
This pattern is for intermediate crocheters.
Supplies: 5mm Crochet Hook, Stuffing, Scissors, Tapestry Needle, Safety Eyes
Yarn: 4/Medium Weight in Colors: Orange, Black, Light Yellow, Light Pink, and White
This pattern requires a bit of skill when it comes to sewing on/detail stitching.
You will need to cleanly attach his eyes and eyelids, sew his ears together once already sewn on the head, and sew his black
hairs on his body.
The key is to sew slowly and undo anything that you find “messy” looking. It just takes practice!
Stuff gradually throughout making every piece.
Head (In Orange):
The head will work into the body, so it is all one piece.
Ch 11
Row 1: Sc in 2 ch from loop, sc in next 9
Row 2: Turn to the other side of chain and sc in next 9 st
Row 3: Inc in next st and add st marker. Sc in next 10 st, inc in next st, sc in last 8 st (22)
Row 4: Sc, inc in next st, sc in next 11 st, inc in next st, sc in last 8 st (24)
Row 5: Sc 2, inc in next 2 st, sc in next 10 st, inc in next 2 st, sc in last 8 st (28)
Row 6: Sc 3, inc in next 3 st, sc in next 10 st, inc in next 3 st, sc in last 9 st (34)
Row 7: Sc 3, inc in next 4 st, sc in next 13 st, inc in next 4 st, sc in last 10 st (42)
Row 8: Sc around (42)
Row 9: Sc 4, inc in next 6 st, sc in next 15 st, inc in next 6 st, sc in last 11 st (54)
Row 10-15: Sc around (54)
Row 16: Sc 9, Inc in next 6 st, sc in next 22 st, inc in next 6 st, sc in last 11 st (66)
Row 17-20: Sc around (66)
Row 21: Sc 11, dec 6 times, sc in next 21 st, dec 6 times, sc in last 10 st (54)
Row 22: Sc 10, dec 4 times, sc in next 19 st, dec 4 times, sc in last 9 st (46)
Row 23: Sc around (46)
Row 24: Sc 10, dec 3 times, sc in next 17 st, dec 3 times, sc in last 7 st (40)
Row 25: Sc 10, dec 2 times, sc in next 16 st, dec 2 times, sc in last 6 st (36)
Row 26: Sc 4, dec in next st, sc in next 3 st, dec in next st, sc in next st, dec in next st, sc in next 2 st, dec in next st, sc in next
3 st, dec in next st, sc in next 3 st, dec in next st, sc in next 4 st, dec in next st, sc in last 2 st (29)
Row 27: 3 sc, dec twice four times. Sc in last sc (21)
Row 28: sc, inc all around (31)
Row 29: Sc 2, inc all around (41)
Row 30: Sc 11, inc in next 8 st, sc 12, inc in next 8 st, sc 2 (57)
Row 31-32: Sc around (57)
Row 33: Sc 27, inc, sc 3, inc, sc 3, inc, sc 3, inc, sc 17 (62)
Row 34-42: Sc around (62)
Row 43: Sc 32, inc in next 12 st, sc 17 (73)
Row 44-47: Sc around (73)
Row 48: Sc 6, dec twice around, sc in last 3 (59)
Row 49: Sc 5, dec twice sc in last 5 (47)
Row 50: 4 sc, dec twice around, Sc in last 7 (37)
Row 51: 4 sc, dec twice around, Sc in last 5 (29)
Row 52: 3 sc, dec twice around, Sc in last sc (21)
Row 53: 2 sc, dec twice around, sc in last 3 sc (15)
Row 54: * 1 sc, dec twice* all around (9)
Row 55: Dec all around and sew shut
Ears (In Orange Make 2):
Row 1: 6 sc in magic ring (6)
Row 2: inc all around (12)
Row 3-4: Sc around (12)
Row 5: inc, sc around (18)
Row 6-7: Sc around (18)
Row 8: inc, sc 2 around (24)
Row 9: Inc, sc 3 around (30)
Row 10-11: Sc around (30)
Finish off
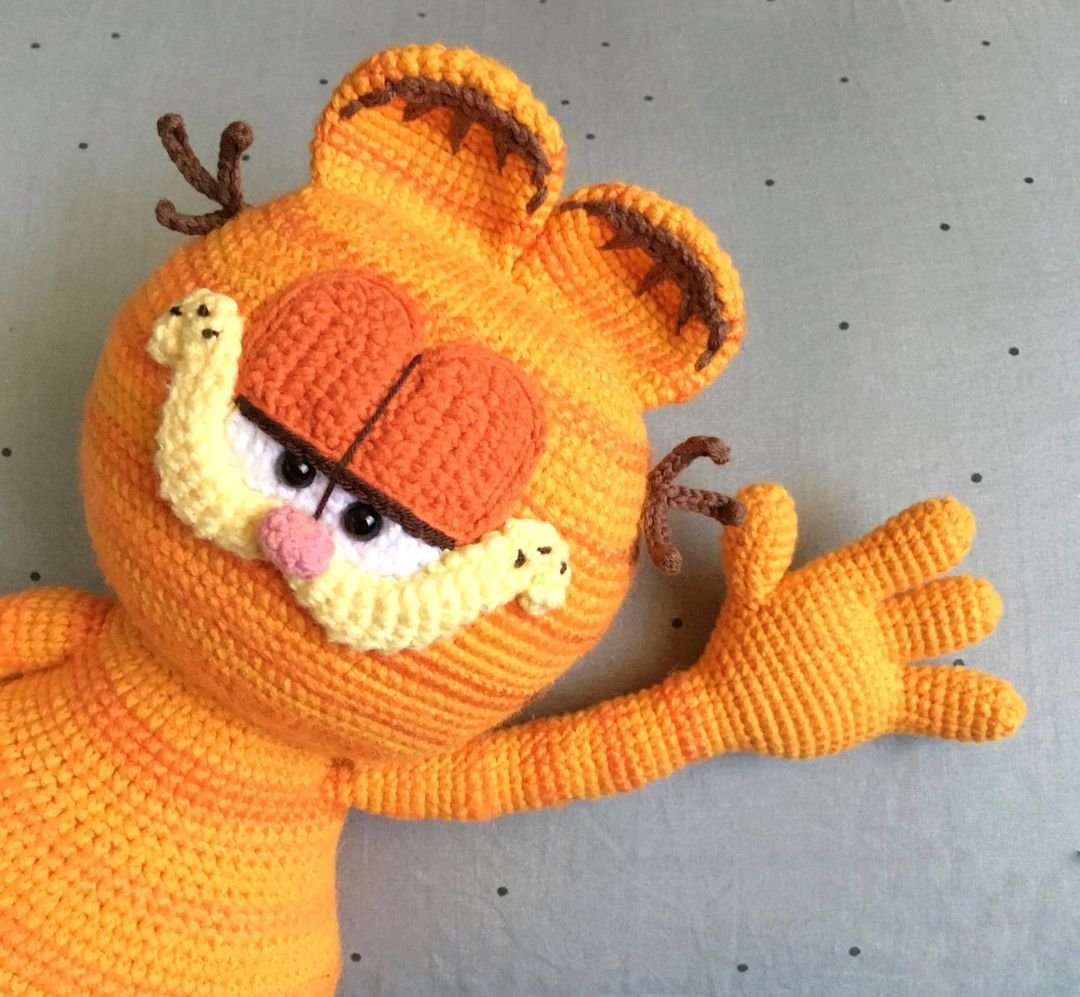
Stuff and sew onto head. After attaching to the head, closely sew the back part of the ears together, as it looks more like
Garfield’s chubby ears rather than traditional separate cat ears.
Now in black, sew black fur lines on the ears
Eyes: (Make 1)
Row 1: In white, Ch 15
Row 2: Sc in 2 chain from hook and sc across
Row 3-9: Turn, ch 1, sc across
Finish off
Eyelids in Orange: (Make 1)
Row 1: Ch 15
Row 2: Sc in 2 chain from hook and sc across
Row 3-6: Sc across
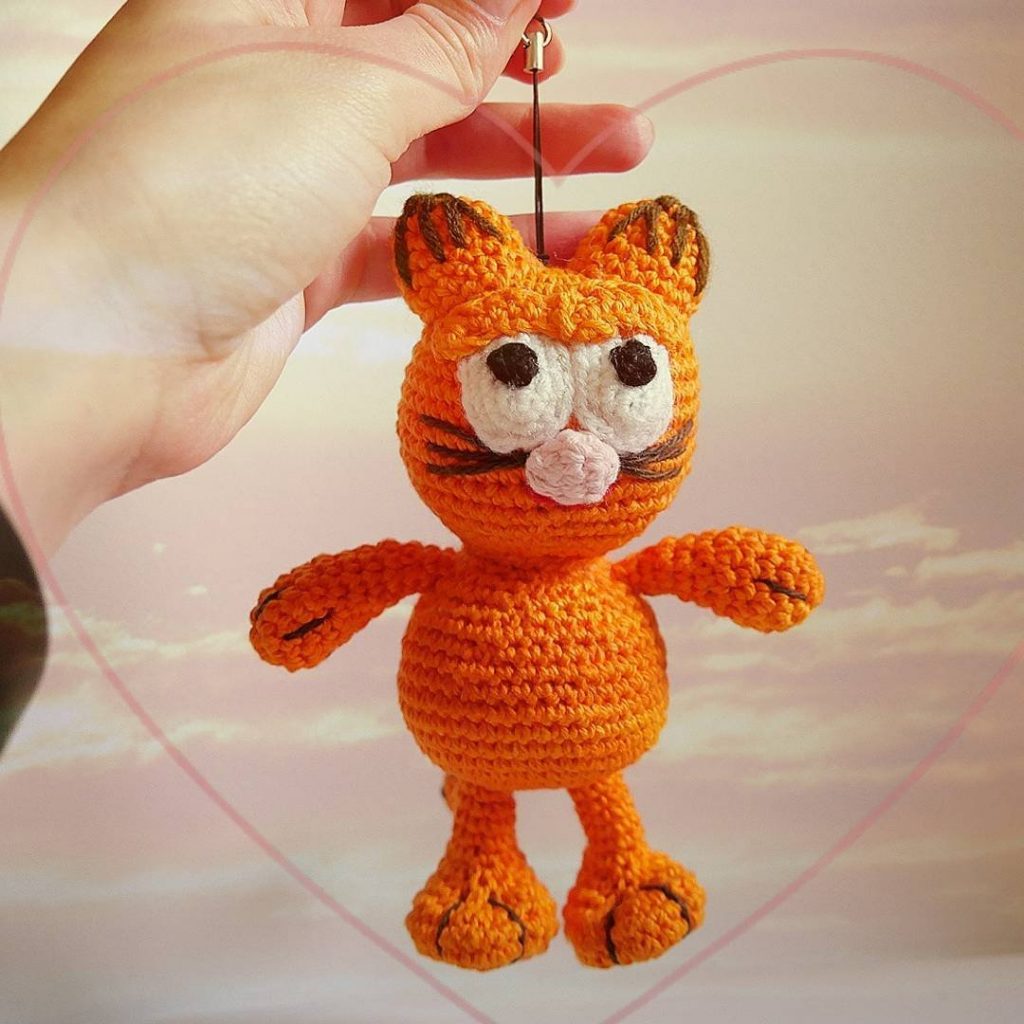
The eyes require no stuffing. Pin down and sew on the white eyes first, then pin down and sew on the orange eyelids on top
of the white eyes.
Then sew black yarn in the middle to separate the eyes. Pull the yarn a bit tight to make the eyes appear not flat.
Mouth:
(Make 2 in Light Yellow)
Row 1: Ch 13
Row 2: Sc all around on chain, both sides (23)
Row 3: Sc around (23)
Row 4: Sc around in back loops only (23)
Pin beneath eyes. Make sure there is room for the nose between the mouths.
Circle Cheek in Light Yellow:
(Make 2)
Row 1: 6 sc in magic ring (6)
Row 2: Inc all around (12)
Row 3: Sc around in back loop only (12)
Finish off and pin above the each mouth
Nose:
Row 1: In light pink, 6 sc in magic ring (6)
Row 2: Inc all around (12)
Row 3: Sc around in back loop only (12)
Finish off and pin between the two mouths.
Now make any placement adjustments and sew on once you’re happy with where everything is placed. Refer to my pictures
to get best placement.
Sitting leg:
Row 1: In orange, Sc in magic ring (6)
Row 2: Inc all around (12)
Row 3: Sc, inc all around (18)
Row 4: 2 sc, inc around (24)
Row 5: 3 sc, inc around (30)
Row 6: 4 sc, inc around (36)
Row 7-12: Sc around (36)
Finish off. Sew onto the body, more towards the front of the body so when you sit him down he will be stable. Stuff leg when
it is close to being sewn shut.
It looks like this when pinned to the body.
Now we make the foot.
Foot:
(Make 2)
Row 1: In orange, 6 sc in magic ring (6)
Row 2: Inc all around (12)
Row 3: sc, inc around (18)
Row 4: 2 sc, inc around (24)
Row 5-9: Sc around (24)
Row 10: 2 sc, dec around (18)
Row 11: Sc around (18)
Row 12: 1 sc, dec around (12)
Finish off. Sew closer to the body rather than too far out on the leg. This will help him be stable. Stuff when close to sewing shut.
Sew toe indentations in black.
Fingers:
(Make 8, 4 fingers for each hand. DO NOT finish off 4th finger)
Row 1: In orange, 6 sc in magic ring (6)
Row 2: Inc in next 3 st, sc in next 3 st (9)
Row 3-4: Sc around (9)
After making the 4 finger, DO NOT finish off. We will connect it to the other fingers to work into the hand.
Hand:
Row 1: Take 4 finger and sc into any stitch of the 2 finger.
Row 2: Loosely slst into next 5 sc of the 2 finger. Sc into any stitch of the 3 finger.
Row 3: Sc in next stitch. Add a stitch marker to the sc you just made. Sc around. (27)
(Row 3 Note) We are working around all 3 fingers now. Check your stitch count after this row
Row 4: Dec, Sc next 11 st, Dec, Sc next 12 st (25)
Row 5: Sc around (25)
Row 6: Sc in next st, dec in next st, sc in next st, line up the thumb to the and and sc in both the hand and thumb at the same time. Sc in next st in thumb, dec 3 times on the thumb, Sc in the next st, working back on the hand sc in next st, dec, sc 6 times. (22)
Row 7: Sc, dec 7 times, sc in last sc. (15)
Row 8: Sc, dec 5 times (10)
Row 9: Repeat Dec, Sc 3 2 times (8)
Row 10-13: Sc around (8)
Tail:
Row 1: In black, 6 sc in magic ring (6)
Row 2: Inc all around (12)
Row 3: Sc, inc all around (18)
Row 4: 2 sc, inc around (24)
Row 5: 3 sc, inc around (30)
Row 6: Sc around (30)
Switch to orange
Row 7: Sc around (30)
Row 8: Sc 5, dec around. Sc in last 2 (26)
Row 9-11: Sc around (26)
Row 12: 4 sc, dec around, sc in last 2 (22)
Row 13-15: Sc around (22)
Row 16: 3 sc, dec around, sc in last 2 (18)
Row 17-21: Sc around (18)
Row 22: 2 sc, dec around, sc in last 2 st (14)
Row 23-24: Sc around (14)
Finish off and stuff.
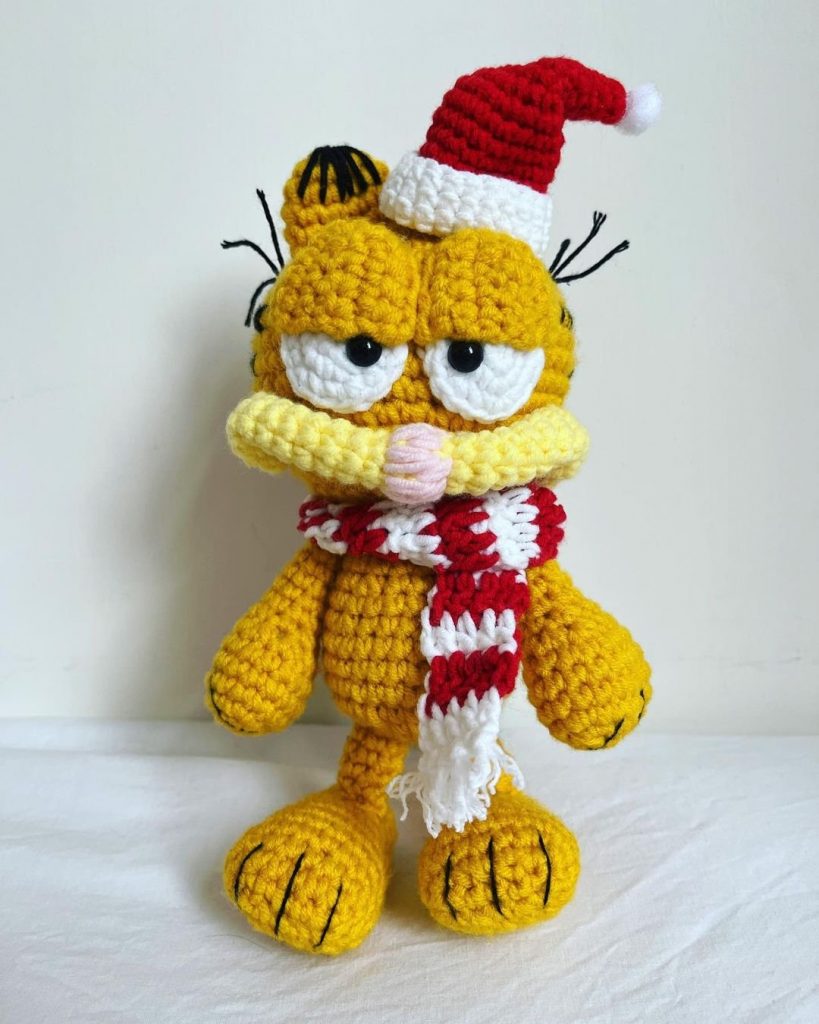
After sewing on all body pieces, sew on black fur. I looked at photos of Garfield on Google and my books for reference. He
has these patches on his legs, sides of his head, his back, and end of his tail.
All Finished.
Feel free to tag me (@freeamigurumii) in your photos on Instagram or Facebook if you’d like!