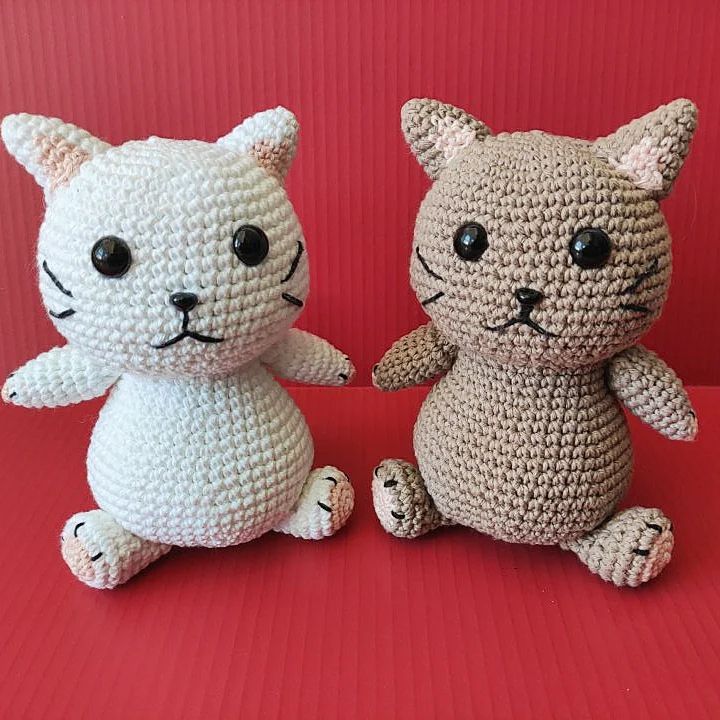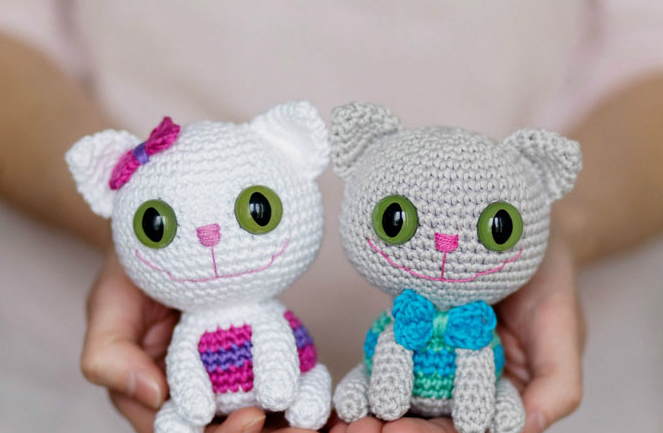
Cats Amigurumi Crochet Pattern
Hello amigurumi lovers and beautiful visitors, I wanted to share the free amigurumi patterns for you here. In my article I will share 1 pattern and how to make it for you. At the end of my article, I will share amigurumi patterns that can generate ideas for you.
Materials and tools:
– This toy was knitted with DROPS Muskat cotton yarn (50 g/100 m). You will need approximately:
70 m of color A
9 m of color B
9 m of color C
– pink floss
– green safety eyes with slit pupil (18 mm)
– polystyrene filler (or another of your choice)
– 2.5 mm hook
– row marker, scissors, sewing pins and a needle
Conditional abbreviations:
vp – air loop
conn. Art. – connecting column
sc – single crochet
psn – half-column
ssn – double crochet
n – loop, loops
(N) – number of loops after completing the row
N ch – tie the indicated number of ch
N sb – tie one sc in the next number of loops
[… ] xN – repeat the steps indicated in brackets N times in a row of
approx. – increase (tie 2 sbn in the indicated loop)
decreasing. – invisible decrease (tie 2 columns together in 1, inserting the hook only behind the front walls of the next two loops and knitting 1 sc from two elongated loops)
Ears (2 pieces)
in Color A
Row 1: Amigurumi ring with 3 sc and slip a loop (3)
Row 2: [inc.] x3 (6)
Row 3: [inc., sc] x3 (9)
Row 4: [ 2sc, appr.] x3 (12)
Row 5: [sc, appr., 2sc] x3 (15)
Row 6: [appr., 4sc] x3 (18)
Fold the ear and knit 8 connecting columns behind the front walls of the loop through both layers , covering the hole (see Photos 1 and 2). Fasten the thread and leave a long end (20 cm) for sewing.
Head
Color A. Knitting of the head starts from the top.
Row 1: Amigurumi ring with 6 sc and slip a loop (6)
Row 2: [inc.] x6 (12)
Row 3: [inc., sc] x6 (18)
Row 4: [2sc, inc.] x6 (24 )
Row 5: [sc, inc., 2sc] x6 (30)
Row 6: [inc., 4sc] x6 (36)
Row 7: [2sc, inc., 3sc] x6 (42)
Row 8: [4sc, inc., 2sc] x6 (48)
Row 9 – Row 17: sc in each. n (48)
Row 18: [dec, 6sc] x6 (42)
Row 19: [2sc, dec, 3sc] x6 (36)
Insert safety eyes between rows 11 and 12, leaving 8 sts (7 holes) between the eyes . Securely fasten the eyes with washers inside the head.
Row 20: [4sc, dec] x6 (30)
Row 21: [sc, dec, 2sc] x6 (24)
Row 22: [dec, 2sc] x6 (18)
Stuff the head.
Place the ears on the sides between rows 4 and 11 and attach them with sewing pins to determine the correct position. Sew ears to head.
Embroider the nose between the eyes with embroidery silk. Make small horizontal stitches. Try to make stitches the same length and as close to each other as possible. Keep the thread tight after each stitch and try to keep the thread tension even.
Start embroidering the mouth below the nose, from the middle.
Add more filler if necessary.
Row 23: [sc, dec] x6 (12)
Row 24: [dec] x6 (6)
Fasten the thread and hide the end inside the head.
Body
Color A
Knit the body from the bottom.
Row 1: Amigurumi ring with 6 sc and slip a loop (6)
Row 2: [inc.] x6 (12)
Row 3: [inc., sc] x6 (18)
Row 4: [2sc, inc.] x6 (24 )
Row 5: [sc, inc., 2sc] x6 (30)
Row 6: [inc., 4sc] x6 (36)
Change the color of the yarn to B in the last sc of row 6. To do this, insert the hook into the last loop, pull up the loop in color A, work yarn in color B over and pull it through the loops in color A.
Row 7 – Row 8: sc in each. n (36)
Change color to C in the last. row 8.
Row 9: [dec., 4sc] x6 (30)
Row 10: sc in each. n (30)
Change color to B in the last. row 10.
Row 11: sc in each. n (30)
Row 12: [2sc, dec, sc] x6 (24)
Change color to A last. row 12. Fasten all the free ends of the threads inside the body.
Row 13: sc in each. n (24)
Row 14: [dec., 6sc] x3 (21)
Fill the body.
Fasten the thread and leave a long end (30 cm) for sewing.
Front legs (2 pcs)
in Color A
Row 1: Amigurumi ring with 6 sc and slip a loop (6)
Row 2: [inc., 2sc] x2 (8)
Row 3 – Row 8: sc in each. n (8)
Stuff the foot. Use scissors or something long and thin to stuff the foot with stuffing. Do not fill the foot to the very edge (Row 8).
Row 9: [dec, 2sc] x2 (6)
Fold the top of the foot and knit 3 sc, closing the hole. Fasten the thread and leave a long end (20 cm) for sewing.
Hind feet (2 pcs)
in Color A
Row 1: Amigurumi ring with 6 sc and slip a loop (6)
Row 2: [inc., sc] x3 (9)
Row 3 – Row 8: sc in each. n (9)
Stuff the foot. Use scissors or something long and thin to stuff the foot with stuffing. Do not fill the foot to the very edge (Row 8).
Row 9: [dec, sc] x3 (6)
Fold the top of the foot and knit 3 sc, closing the hole. Fasten the thread and leave a long end (20 cm) for sewing.
Tail
Color A
Row 1: Amigurumi ring with 6 sc and slip a loop (6)
Row 2 – Row 10: sc in each. n (6)
Do not stuff the tail. Fold the top of the tail and knit 3 sc, closing the hole. Fasten the thread and leave a long end (20 cm) for sewing.
Finish Gathering
Front Legs
Place the front legs on the front of the body (the back of the body is where you did the color change) between rows 12 and 14. Sew on the legs. Attach the legs to the body with a few stitches down the middle so they don’t protrude forward. Fasten the thread and hide the ends inside.
Hind legs
Place the hind legs on the sides of the body between rows 4 and 7. Sew on the legs. Attach the legs to the body with a few stitches down the middle so they don’t protrude forward. Fasten the thread and hide the ends inside.
Tail
Place the tail in the center of the back of the body. Sew on the tail. Fasten the thread and hide the end inside.
Head
Attach the head to the body with a few sewing pins to determine the correct position. If you are satisfied with the result, sew on the head. Fasten the thread and hide the end inside.
Bow
Color B
Knit on both sides of the warp chain
ch 11 (the slip knot you start with counts as the 1st ch)
Row 1: dc in the 4th ch of the hook, dc, sc, conn. Art., sbn, psn, ssn, 3 ch and conn. Art. in the 1st ch, (pull the first ch well by pulling the end of the thread, and continue to knit from the back of the chain), ch 3, dc, dc, sb, conn. Art., sbn, psn, ssn, 3 ch and conn. Art.
Fasten the thread and hide the end inside.
Sew a bow on the head (or under the chin to make a cat-boy) with thread color C. Sew the bow to the head with a few stitches over the middle of the bow. Fasten the thread and hide the end inside.
Feel free to tag me (@freeamigurumii) in your photos on Instagram or Facebook if you’d like!
All Finished.