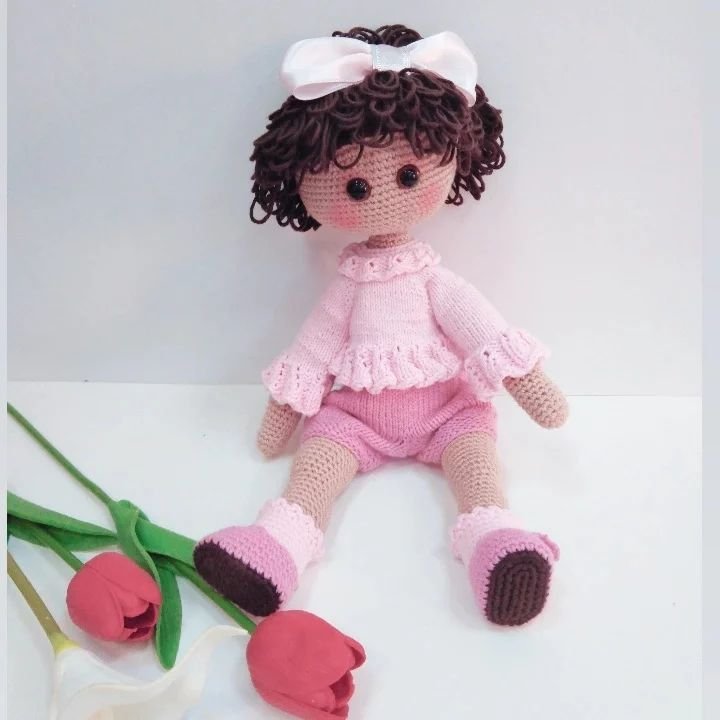
Braided Baby Girl Free Pattern
Hello amigurumi lovers and beautiful visitors, I wanted to share the free amigurumi patterns for you here. In my article I will share 1 pattern and how to make it for you. At the end of my article, I will share amigurumi patterns that can generate ideas for you.
BRAIDED MATERIALS FOR BABY GIRLS
We supply our Nako Diamond 10284, 11253 , 208, 6733, 11255 yarn in a total of 5 colors and 1 ball . Since we will make amigurumi , our needle, that is, our crochet tip is 2.2.
Accessory Materials
— 8 mm safety eye
— 1 meter 1.5 mm power cable
– about 64-65 cm of wire for legs and body (we curl the ends with a crow’s nose)
-about 25-26 cm of wire for the arms (we bend the ends with a crow’s nose)
— paper or electrical tape
— bead fiber
— felting needle
— Crow nose and side chisel
TERMS WE USE
Sh – magic ring
x – frequent needle
v – increase (2 frequent needles in the same hole)
a – decrease (pinch in two holes and exit at once)
zn – chain
dc – double handrail
dcv – double handrail increase
hdc – single railing
cc – loop shift
w – same 3 sc in the hole
blo – knit from the back loop
flo – knit from the front loop
HEAD RECIPE
1 – sh (6)
2- 6v (12)
3- ( x, v) * 6 (18)
4 – x, v, (2x, v) * 5, x (24)
5 – ( 3x, v) * 6 (30)
6 – 2x, v, (4x, v) * 5, 2x (36)
7 – (5x, v) * 6 (42)
8 – 3x, v, (6x, v) * 5, 3x 48)
9-16- (48)
NOTE: Eyes 14-15. It is attached by leaving 8x between the rows. Nose is embroidered between 16-17 rows
17- 3x, a, (6x,a)*5, 3x (42)
18- (5x,a)*6(36)
19- 2x,a,(4x,a)*5 ,2x (30)
20- (3x,a)*6 (24)
21- x,a, (2x,a)*5, x (18)
22- (x,a)*6 (12)
23- 6a (6) (thread the thread for sewing) leave long)
HANDLES(2 Pieces)
1- sh(6)
2- (6)
3- (x,v) )(9)
4-5- (9)
6- (x,a) (6)
7-25 (6)
FEET + LEGS (2 Pieces)
1- sh (6)
2- (6)
3- (x,v) (9)
4-5- (9)
6- (x,a) (6)
7-35- (6)
BODY
1- Legs are joined with 5 ch (22)
2- Sides are increased by one (24)
3- (3x,v)*6 (30)
4- 15- (30)
16 – (3x,a)*6 (24)
17- 18 – (24)
NOTE: Here we start filling fiber.
19- (2x,a)*6 (18)
20-26- (18)
27- (Adding the arms to the body) 5x, 6x from the arm, 9x, 6x from the arm, 4x (30)
28- (30)
NOTE: We insert the wires and fill the fiber
29- (3x,a)*6 (24)
30- (2x,a)*6 (18)
31- (x,a)*6 (12)
32- 6a (6)
33-36- (6)
NOTE: We sew the head to the body
DRESS
1- 20 ch
2- dc from 3rd ch (18)
3- 2 ch turn 3 dc, (dcv,dc)*6, 3 dc (24)
4 – 1ch turn 24x
5 – 2ch turn 4 dc, 4 ch 5th hole 8 dc, 4 ch 5th hole 4 dc
6- Each hole dc (24)
7-8- (24) (We connect both ends with cc at the end of the row)
9- dc (25)
10- 3 dc each hole
11-17- In each hole dc
18- (We are making edge lace with white thread) 1 ch, 1 hdc in the same hole, cc- we continue in this way until the end of the row
NOTE: You can sew buttons on the back of the dress. Or you can sew the side completely open at the back.
COLLAR: We do the same with the white thread as the hem of the hem.
DRESS SLEEVE
1- We get 10 x by taking a loop between them and combine them with cc
2- 2 zn 10 dc
3- 9 – 10 dc
10- We make edge lace with white thread.
BOOTS(2 Pieces)
1- (with green thread) 5 ch
2- 2.den itibaren v,2x,w,2x,v (11)
3- we break the v,3x,3v,3x,v, cc (16) rope
NOTE: We also do it with white yarn from the same piece.
4- From the middle of the heel part with the green rope
We combine the two parts by starting cc.
5-6- (16) (we combine with cc at the end of the rows)
7- 6x,2a,6x ,cc (14)
8- 5x,2a,5x , cc (12)
9-13-(12)
14- With white thread(12)
15- With green rope (12)
BABY HAIR TRANSPLANT
Cut the same size rope to the desired length for the hair.
Starting from the middle of the head, it is fixed to the head with a felting needle.
Then the ropes are fixed on the lower sides as desired.
A curly look is obtained by opening the layers of the last rope.
With green rope, a chain is drawn according to the head and a hair band is made.
(If you don’t want to use a felt needle, you can fix the hair directly on the head)
BAG RECIPE
1-12 znx
2- 10 dc from 3rd Zn
3-7- 10dc
8- 7 dc subtracting from the sides
Let ‘s connect the edges with 9- cc
Pull the chain of the desired length.
Let’s make the bag handle
Let’s sew a button on the front
Feel free to tag me (@freeamigurumii) in your photos on Instagram or Facebook if you’d like!
All Finished.