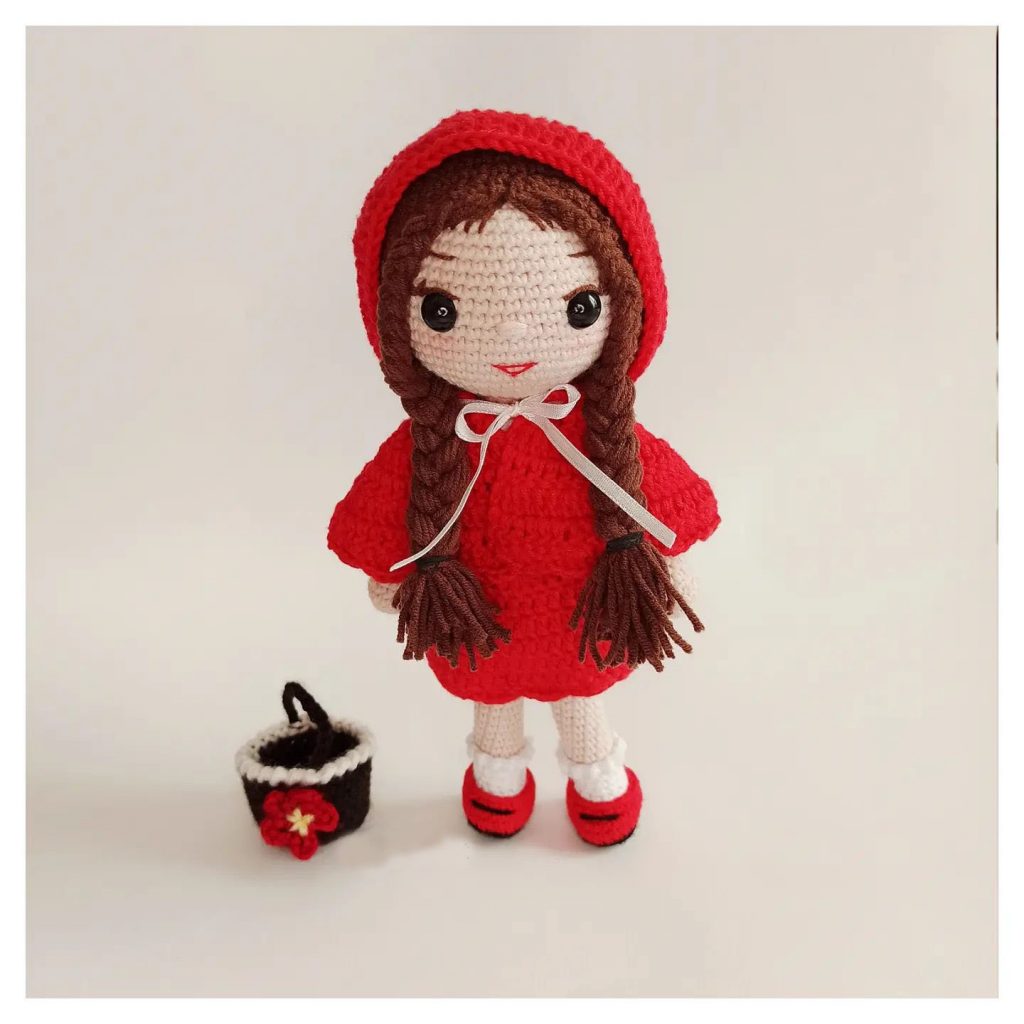
Amigurumi Little Red Riding Hood Pattern
Hello amigurumi lovers and beautiful visitors, I wanted to share the free amigurumi patterns for you here. In my article I will share 1 pattern and how to make it for you. At the end of my article, I will share amigurumi patterns that can generate ideas for you.
Amigurumi Abbreviations
- si : frequent needle
- a : Increment
- e : decrement
- dc: double handrail,
- dca : double handrail increase
- Blo Knitting from posterior lobe
Making Amigurumi Little Red Riding Hood
Little Red Riding Hood Head Recipe
1) 6sc in magic ring
2) 5a =12sc
3) (1s, 1a)* 6 =18s
4) (2s, 1a)* 6 =24s
5) (3x, 1a)* 6 =30s
6) (4x, 1a)* 6 =36s
7) (5s, 1s)* 6 =42s
8) (6s, 1s)* 6 =48s
9) (7s, 1s)* 6 =54s
10) (8s, 1s)* 6 =60s
10-19) 60sc
20) The eyes are placed between the 18th and 19th rows, leaving 10 spaces 12 mm
21-25) 72sc
26) 15s, (1s, 1s) *6, 6s (1h, 1s) *6 , 15s =60s
27) (8s, 1e)* 6 =54s
28) (7s, 1e)* 6 =48s
29) (6s, 1e)* 6 =42s
30) (5s, 1e)* 6 =36s
31) (4s, 1e)* 6 =30s
32) (3s, 1e)* 6 =24s
33) (2s, 1e)* 6 =18s
Little Red Riding Hood Feet
We start with your red,
1) chain 9, 7sc from the 2nd, turn 3s into the last chain, 6sc to the end, 1 a to the chain
2) 1a, 6sc, 3a, 6sc 2a =24
3) 1a, 9sc, 3a, 9sc 2a =30
4) 30s
5) 30sc, BLO
6) 30s
7) 8sc, 7sec, 8sc, 23x
8) with white 23s
9) 5sc, 6 decrements 6s, = 17sc
10) 15x, 1 deduction = 16x
11-13) 16sc
14) From FLO, pull 2 chains into each si into each si until the end of the row.
15) switch to skin color , knit 16 of BLO
16-36) We draw 4 chains without breaking the rope of the second leg, which we knit 16 of, and combine it with the first leg.
Little Red Riding Hood Body
1) 4sc on 16 chains, 4sc on 16sc chains = 40sc
2) 8sc , 1sc, 18sc, 1sc, 12sc, =42sc
3-12) 42sc
14) (4x, 1e)*6 = 30x
15-26) 30sc
27) (3x, 1e)*6 = 24h
28) 24s
29) (2x, 1e)*6 = 18s
30) (1s, 1e)*6 = 12s
31-34) 12sc
Little Red Riding Hood Arms
1) 6sc into magic ring
2) 6a, 12sc
3-33) Leave the thread long to sew 12 stitches
Little Red Riding Hood Hair
1) 6sc into the magic ring
2) 6a, =12sc
3) (1s,1s) *6=18s
4) (2s,1a) *6 = 24s
5) (3x,1a) *6 = 30s
6) (4x,1a) *6 = 36s
7) (5x,1a) *6 = 42s
8) (6s,1s) *6 = 48s
9) (7x,1h) *6 = 54s
10) (8x,1a) *6 = 60s
11) (9s,1s) *6 = 66s
12) (10x,1a) *6 = 72x
13-21) 72sc
Cut 72 pieces of 30 cm long rope ae leave one rope each
Little Red Riding Hood Dress
1) We start with 38 chains
2) We go back and sink into the 7th chain and make 32 in total.
3) (2sc, 1a) 40 sc till end of row
4) Skip 5s, 6 chains, 8 sc, 14 sc, 6 chains, 8 sc, 5 sc
5) 5sc chain, 6sc, 14sc, chain, 6sc, 5sc = turn 36s
6) 1 chain turn 36
7-16) Join 1 chain 36.
17) 3 chains in each loop with FLO
18) (BLO in red) each si dca )
19) 2 dc 1 dca to end of row
20-25) 1 dc over each stitch
Little Red Riding Hood Cape:
The upper part of:
1 ) pull 64 chains back to
2) Starting from the 3rd chain, 1 dc = 62 dc into each chain
3-10) Cut the 62 cd rope long, join the two ends and straighten it
Under Part
1) attach the thread to the lower part of the part that is joined by sewing ae make 40 ae return
2) Turn dca =60 dc into 2 chains each
3) 2 chains turn 60 dc
4) 2 chains turn 60 dc
5) 2 chains turn 60 dc
6) 2 chains turn 60 dc
Feel free to tag me (@freeamigurumii) in your photos on Instagram or Facebook if you’d like!
All Finished.