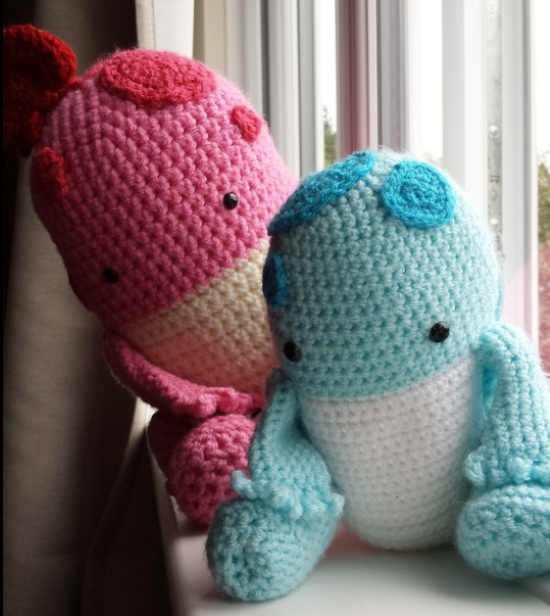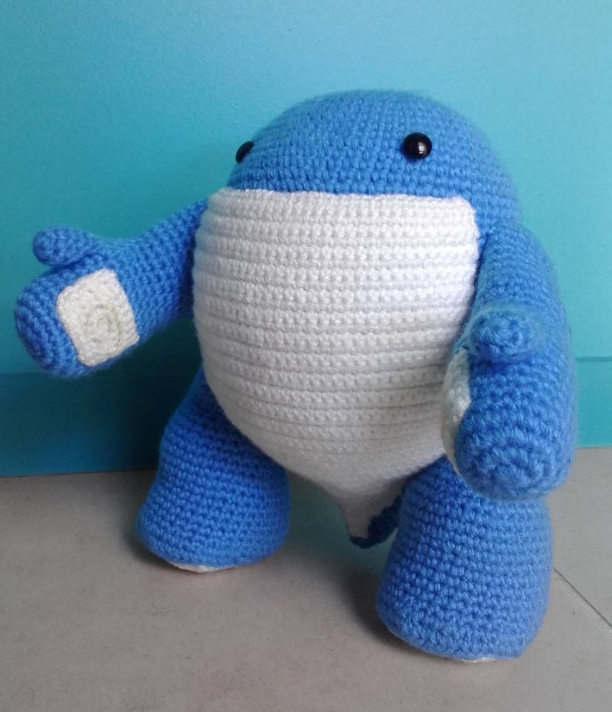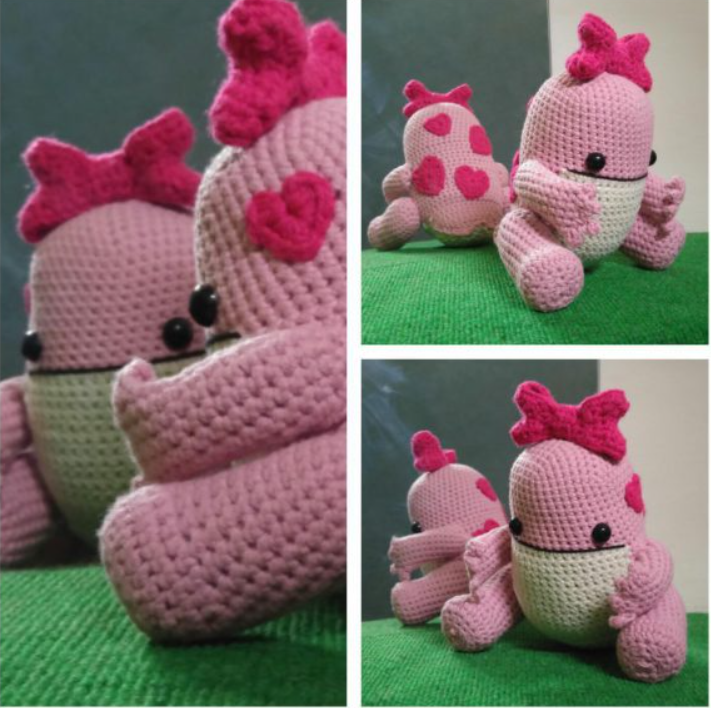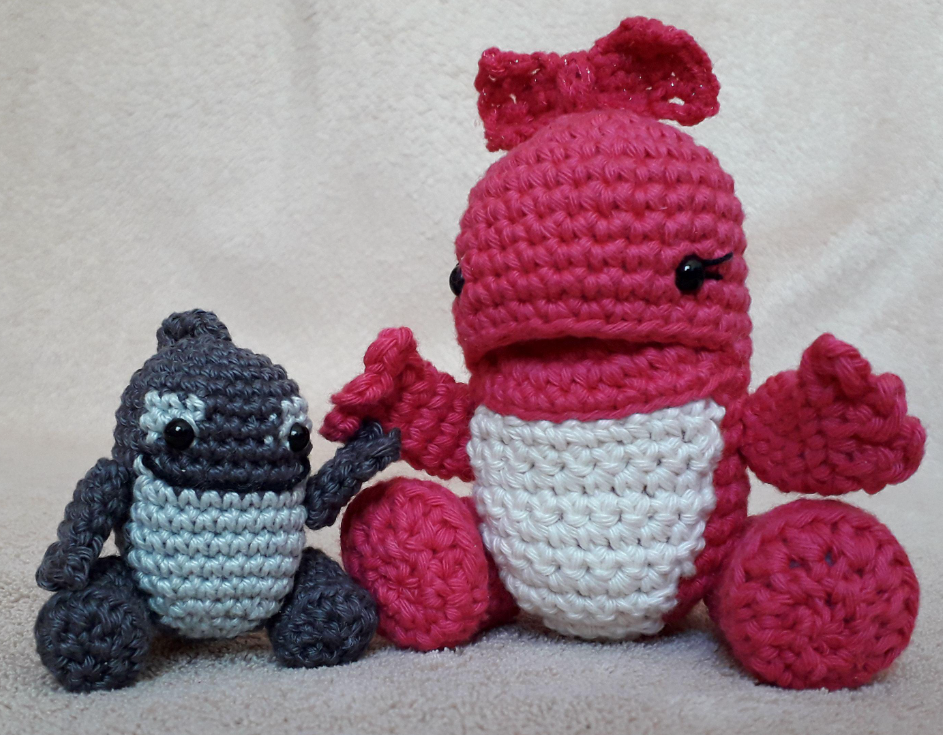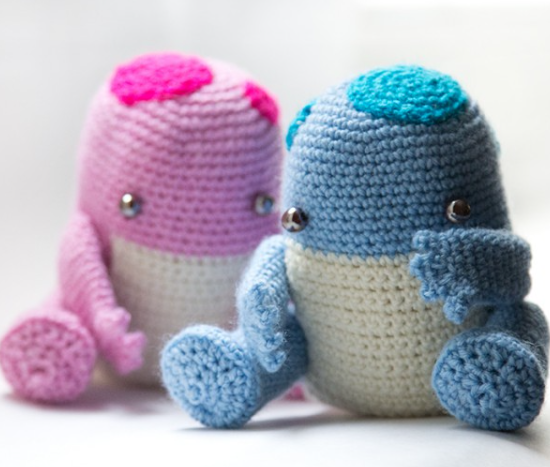
Toy Guild Wars 2 Amigurumi Crochet Pattern
Hello amigurumi lovers and beautiful visitors, I wanted to share the free amigurumi patterns for you here. In my article I will share 1 pattern and how to make it for you. At the end of my article, I will share amigurumi patterns that can generate ideas for you.
All parts of the baby quaggan are knitted in a circle in a spiral.
In order not to lose the end of the row, use a thread marker in a contrasting color.
In brackets after the description of the row, the number of loops that should be obtained in the end is indicated.
Legend:
vp – air loop
st – column
pst – half-column
2 in 1 – knit 2 columns in 1
column of the previous row
Body
1 row. 6 ch, connect into a ring. (6)
2 row. 2 st in 1 whole row. (12)
3rd row. (1 st, 2 st in 1) * repeat the entire row. (18)
4th row. (2 st, 2 st in 1) * repeat the entire row. (24)
5 row. (3 st, 2 st in 1) * repeat the entire row. (30)
6 row. (4 st, 2 st in 1) * repeat the entire row. (36)
7 row. (5 st, 2 st in 1) * repeat the entire row. (42)
8 row. (6 st, 2 st in 1) * repeat the entire row. (48)
9 – 18 row knit in columns in a circle. (48)
Now we need to leave a gap for the abdomen (it will be
a different color). To do this, mark the current loop,
count 16 loops from it (not counting the current one) back and
mark the 17th.
19 – 33 row we continue to knit in columns from one marker to another, unfolding the canvas at the end of the row. (32)
Let’s take care of the tail. Its width will be 18 loops and markers will help us here again. We retreat 7 loops from the edges and get 18 loops between the markers.
You can cut the thread and start knitting directly from the marker, or you can knit 7 loops to the marker with half columns.
Further, from the marker to the marker, we knit as follows: we knit the 34th row with columns for the back edge of the loop of the previous row (this will allow our tail to bend in the right direction). (18)
34 – 36 row knit in columns. (18)
Now start dec 2 sts per row.
37 row. 1 tbsp, 2 tbsp together, 12 tbsp, 2 tbsp together, 1 tbsp. (16)
38 row. 1 tbsp, 2 tbsp together, 10 tbsp, 2 tbsp together, 1 tbsp. (14)
39 row. 1 tbsp, 2 tbsp together, 8 tbsp, 2 tbsp together, 1 tbsp. (12)
40 row. 1 tbsp, 2 tbsp together, 6 tbsp, 2 tbsp together, 1 tbsp. (10)
41 row. 1 tbsp, 2 tbsp together, 4 tbsp, 2 tbsp together, 1 tbsp. (8)
42 row. 1 tbsp, 2 tbsp together, 2 tbsp, 2 tbsp together, 1 tbsp. (6)
43 row. 1 tbsp, 2 tbsp together, 2 tbsp together, 1 tbsp. (4)
44 row. 1 tbsp, 2 tbsp together, 1 tbsp. (3)
45 row. 3 tbsp together. (1) Front legs 1 row. 6 ch, connect into a ring. (6) 2 row. 2 st in 1 whole row. (12) 3 – 14 row knit in columns in a circle. (12) At this stage, the foot can be stuffed, but you can not stuff it in principle.
Now we will make a palm and fingers. We “flatten” the part in half (see photo). Now we have 2 loops on the folds and 5 pairs of loops (as in the second picture).
(2+2*5=12)
15 row. 3 ch, columns in 2 and 3 ch from the hook, then 1
pair. Thus we got the first finger.
We knit 2 pairs, 3 ch, columns in 2 and 3 ch from the hook, then again the second pair (we got the second finger).
We knit 3 and 4 pairs, 3 ch, columns in 2 and 3 ch from the hook, then again 4 pairs (we got 3 fingers).
We knit a 5 pair, 3 ch, columns in 2 and 3 ch from the hook, then again a 5 pair (we got 4 fingers).
Hind legs
1 row. 6 ch, connect into a ring. (6)
2 row. 2 st in 1 whole row. (12)
3rd row. (1 st, 2 st in 1) * repeat the entire row. (18)
4 – 13 row with columns in a circle. (18)
Now divide the loops in half (9 + 9) using markers (see photo). The first half will be the toe, the 2nd half will be the heel.
14 row. 2 in 1, 1 st, 2 in 1, 1 st, 2 in 1, 1 st, 2 in 1, 1 st, 2 in 1;
the remaining 9 loops are in columns. (14+9)
15 row. 4 st, 2 in 1, 1 st, 2 in 1, 2 in 1, 1 st, 2 in 1, 4 st; the remaining 9
loops are in columns. (18+9)
16 row. 18 st behind the back edge of the loops of the previous row, 9 st. (18+9)
17 row. (2 in 1) * 9 times behind the back edge of the loops of the previous row; 9 st. (9+9).
18 row. (1 st, 2 st together) * the whole row. (12).
We stuff.
19 row. (2 st together) * the whole row. (6).
Pull and cut the thread. The tip can be pushed inward.
Spots Spots
are knitted with yarn of a darker shade. You need to tie 1 large, 2 medium and 3
small. For the largest one, you need to knit all 4 rows, for the middle one – 3, for the small one – 2.
1 row. 6 ch, connect into a ring. (6)
2 row. 2 st in 1 whole row. (12)
3rd row. (1 st, 2 st in 1) * repeat the entire row. (18)
4th row. (1 st, 2 st in 1) * repeat the entire row. (27)
Belly
We take beige yarn, make a loop on the hook and fasten it to the clearance on the details of the torso with the front side facing us. It is worth starting with the loops marked with a marker, i.e., the extreme loops of the back.
Thus, the width of the belly will be 18 loops. In principle, you can immediately cling to the edges of the back, but I don’t like the way the seam looks, so I just tie the canvas of the belly and then sew it to the edges of the back.
1 row with columns is shown in the picture on the right. (18)
2 – 15 row knit in columns. (18)
16 row in columns but behind the leading edge of the loops of the previous row. (18)
17 – 26 row with columns. (18)
Next, we knit according to the tail pattern from the details of the torso.
27 – 30 row knit in columns. (18)
Now start dec 2 sts per row.
31 row. 1 tbsp, 2 tbsp together, 12 tbsp, 2 tbsp together, 1 tbsp. (16)
32 row. 1 tbsp, 2 tbsp together, 10 tbsp, 2 tbsp together, 1 tbsp. (14)
33 row. 1 tbsp, 2 tbsp together, 8 tbsp, 2 tbsp together, 1 tbsp. (12)
34 row. 1 tbsp, 2 tbsp together, 6 tbsp, 2 tbsp together, 1 tbsp. (10)
35 row. 1 tbsp, 2 tbsp together, 4 tbsp, 2 tbsp together, 1 tbsp. (8)
36 row. 1 tbsp, 2 tbsp together, 2 tbsp, 2 tbsp together, 1 tbsp. (6)
37 row. 1 tbsp, 2 tbsp together, 2 tbsp together, 1 tbsp. (4)
38 row. 1 tbsp, 2 tbsp together, 1 tbsp. (3)
39 row. 3 tbsp together. (1)
Assembly
1. Fasten all end threads.
2. Sew spots, eyes and all 4 paws to the part of the body.
3. From the wrong side, sew the edge of the belly to the edge of the back, while leaving the unsewn part where the tail begins to narrow.
4. Turn out.
5. Stuff a toy.
6. Carefully sew the lower part of the tail (from the abdomen) to the upper (from the body part).
Feel free to tag me (@freeamigurumii) in your photos on Instagram or Facebook if you’d like!
All Finished.