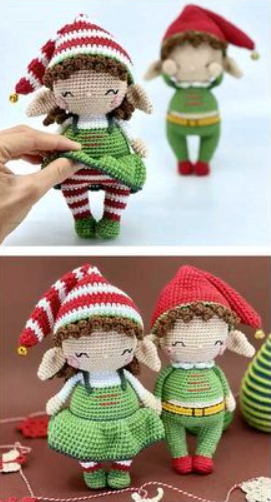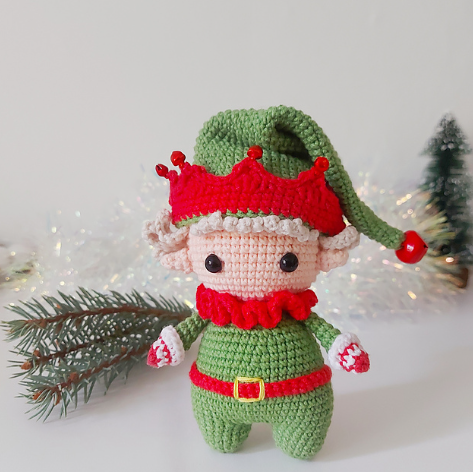
Toy Christmas Elf Crochet Pattern
Hello amigurumi lovers and beautiful visitors, I wanted to share the free amigurumi patterns for you here. In my article I will share 1 pattern and how to make it for you. At the end of my article, I will share amigurumi patterns that can generate ideas for you.
Legend:
sc = single crochet
ch = chain stitch
ss = connecting stitch
dc = double crochet
(#) = number of stitches in row
Boot (2 parts)
Row 1: with a black thread 6 ch, starting from the second loop we knit 4 sbn, 3bn in the last loop. Turn and continue on the opposite side of the initial chain: 3 sc, 3 sc in the last loop (13)
Row 2: 4 sc, 3 increases, 3 sc, 3 increases (19)
Row 3: 6 sc, 3 increases, 7 sc, 3 inc (25)
Row 4: work double crochets behind the back walls of the loops (25)
Row: 5-6: sc in a circle (25)
Row 7: 4 sc, 6 decreases, 9 sc (19)
Row 8: 3 sc , 4 decreases, 8 sc (15)
Row 9-10: sc in a circle (15)
Row 11: Pin the back wall of the next loop, then the connecting column behind the front wall of the same loop, 1 ch. Next, we knit half-columns with a crochet only for the front walls of the loops, we finish the circle with a connecting column (15)
Fasten the thread and thread the end of the thread.
Leg (2 parts)
Slightly turn the cuff of the boot inside out. We attach the thread of the color of the overalls to the back wall of the loop of the 11th row.
Row 1-7: Sc in round (15)
Fasten off and leave a long end to sew up the gap between the legs. Count back 4 sc and mark the 4th loop with a pin. Stuff the detail.
Knit the second leg, stuff, but do not fasten the thread, 2 sl-st, mark the last stob as the end of the row.
Body
We continue to knit from the second leg in a circle (later we attach the first leg).
Row 1: Ch 2, sc in first leg marked with a pin, 14 sc. ch 3, 15 sc in the second leg (35)
Row 2: sc in each ch of the previous row (= 2 sc), 15 sc, 3 increases, 15 sc (38)
Row 3: 17 sc, (2 sc, increase) – 2 times, 15 sbn (40)
Row 4: (4 sbn, increase) – 8 times (48)
Using the thread that you left at the end of the first leg, sew up the gap between the legs.
Row 5-7: Sc in a circle (48)
Row 8: (6 sc, decrease) – 6 times (42)
Row 9: Sc in a circle (42) Row
10: (5 sc, decrease) – 6 times (36)
Row 11: Sc in a circle (36)
Row 12: (4 sc, decrease) – 6 times (30)
Row 13: Sc in a circle (30)
Row 14: (3 sc, decrease) – 6 times (24)
Stuff the piece.
Row 15-20: Sc in a circle (24)
Row 21: (2 sc, decrease) – 6 times (18)
Stuff.
Row 22: (1 sbn, decrease) – 6 times (12)
Row 23-30: sbn in a circle (12)
Stuff the neck very tightly so that it can support the weight of the head.
Row 31: 6 decreases.
Fasten the thread. Pull the end of the thread through the front loops in a circle and pull tight. Fill in the remaining end.
Hands (2 parts) Row 1: skin-colored thread 6 sc in the amigurumi ring (6) Row 2: 6 increases (12) Row 3: (1 sc, increase) – 6 times (18) Row 4-5: sc in a circle (18)
Row 6: Lush 4 dc (4 dc in one loop and with one top), decrease, (1 sc, decrease) – 5 times (12) Row 7: sc in a circle (12) Change yarn to the color of the
overalls
Row
8 -12: sc in a circle (12)
Row 13: (2 sc, decrease) – 3 times (9)
Row 14-21: sc in a circle (9)
Row 22: 4 decreases, 1 sc (5)
Secure the thread. Pull the end of the thread through the front loops in a circle and pull tight. Fill in the remaining end.
Head
Before you start knitting the head, cut out two circles from white felt. These circles are intended for the peephole and should be slightly larger than the pupils (as the pupils, the author uses screwed eyes, the so-called safety eyes, you can see how they look in this post .). Insert the safety eyes into the white felt circles (you need to make a small hole in the middle) and set aside for now.
Row 1: 8 sc in the amigurumi ring
Row 2: 8 increases (16)
Row 3: (sc, increase) – 8 times (24)
Row 4: (2 sc, increase) – 8 times (32)
Row 5: (3 sbn, increase) – 8 times (40)
Row 6: (4 sbn, increase) – 8 times (48)
Row 7: (5 sbn, increase) – 8 times (56)
Row 8-17: sbn in a circle (56 )
Row 18: (5 sbn, decrease) – 8 times (48)
Row 19: (4 sbn, decrease) – 8 times (40)
Row 20: (3 sbn, decrease) – 8 times (32)
Row 21: (2 PRS, decrease) – 8 times (24)
Insert the eyes (already collected) into the head between 15 and 16 rows at a distance of 9 PRS from each other. Fasten them.
Row 22: Dec 12 (12).
Fasten the thread, leave a long end. Stuff the head, but not so tightly that you can then insert the neck inside.
Embroider eyelashes as shown in the picture.
Nose
Sew 3 straight lines (3 stitches) 3 sc between rows 16 and 17 of the head.
Hair
The hair is knitted in elongated loops about 15-16 cm long. We will knit in turn: one row with elongated loops, the other with simple sc, etc. As a result, we get a wig that we sew to the head. The loops will be cut, hairs will turn out.
Row 1: with yellow yarn 8 sc in the amigurumi ring (8)
Row 2: we knit with elongated loops: 2 in each sc (16)
Row 3: (1 sc, increase) – 8 times (24)
Row 4: we knit with elongated loops: (2 sbn, increase) – 8 times (32)
Row 5: (3 sbn, increase) – 8 times (40)
Row 6: knit with elongated loops: (4 sbn, increase) – 8 times (48)
Row 7: ( 5 sbn, increase) – 8 times (56)
Row 8: knit with elongated loops: 56 in a circle.
Fasten the thread, leave a long end for sewing. Pin the wig to the head with pins and sew, cut the loops and make a hairstyle.
Attachıng the head to the body
Follow the instructions in the picture below while sewing the head to the body.
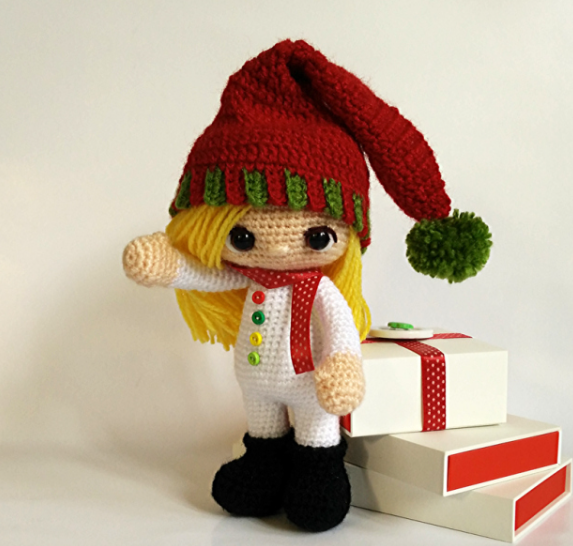
CAP Ribbon is knitted in small rows with turns Row 1: with red yarn cast on 5 ch, from the 2nd loop knit 4 sc, ch, turn (4) Row 2: 4 sc, ch, turn (4) Row 3: with green yarn behind the back walls of the loops 4 sc, ch 1, turn (4) Row 4: 4 sc, ch, turn (4) Row 5: with red yarn behind the back walls of the loops 4 sc, ch 1, turn (4) Row 6: 4 sc, ch, turn (4) Next, repeat rows 3 to 6 until you have 30 strips (each strip = 2 rows). [adrotate group=”5″] We connect a strip of elastic into a ring with connecting posts and then knit in a circle along the edge of the elastic.
Row 1: With red yarn ch 1, 60 sc in each row of elastic, sl-st (60)
Row 2: ch 3, 60 dc, sl-st
Row 3: ch 3, (8 dc, decrease) – 6 times (54 dc), sl-st
Row 4: 3 ch, 54 dc, sl-
st Row 5: 3 ch, (7 dc, decrease) – 6 times (48 dc), sl-st
Row 6: 3 ch, 48 dc, sl-st
Row 7: 3 ch, (6 dc , decrease) – 6 times (42 dc), sl-
st Row 8: 3 ch, 42 dc, sl-
st Row 9: 3 ch, (5 dc, decrease) – 6 times = 36 dc, sl-st
Row 10-12: 3 ch, 36 dc, sl-st
Row 13: 3 ch, (4 dc, decrease) – 6 times (30 dc), sl-st
Row 14-16: 3 ch, 30 dc, sl-st
Row 17: 3 ch, (3 dc, decrease) – 6 times (24 dc), sl-
st Row 18-20: 3 ch, 24 dc, sl-st
Row 21: 3 ch, (2 dc, decrease) – 6 times (18 dc), sl-st
Row 22: 3 ch, 18 dc, sl-st
Row 23: 3 ch, (1 dc, decrease) – 6 times (12 dc), sl-st
Row 24: 3 ch, 12 dc, sl-st
Row 25: 3 ch, (decrease) – 6 times (6 dc), sl-st
Cut thread and thread the end. Make a pom pom with green yarn.
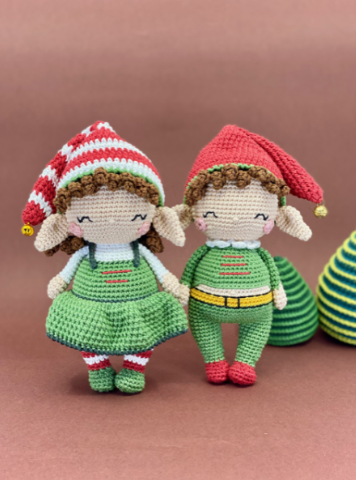
It remains to sew handles and buttons on the jumpsuit and the knitted amigurumi elf is ready! Dress up our elves and post pictures in the comments!!!