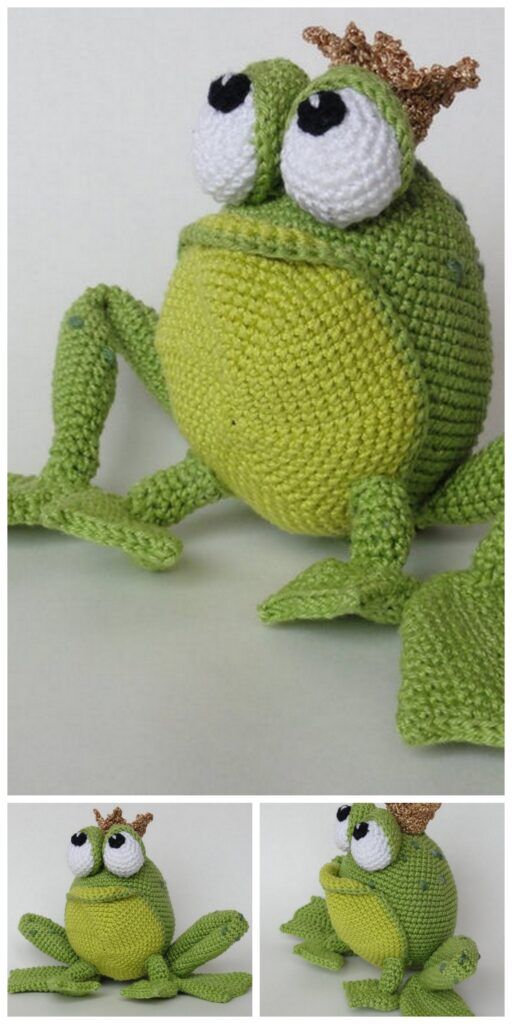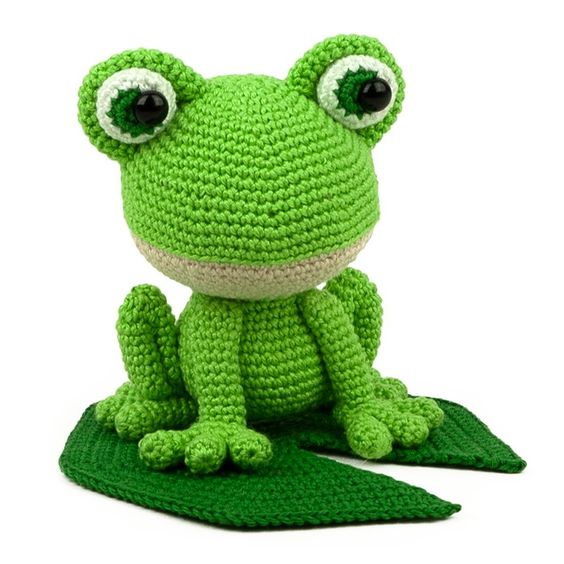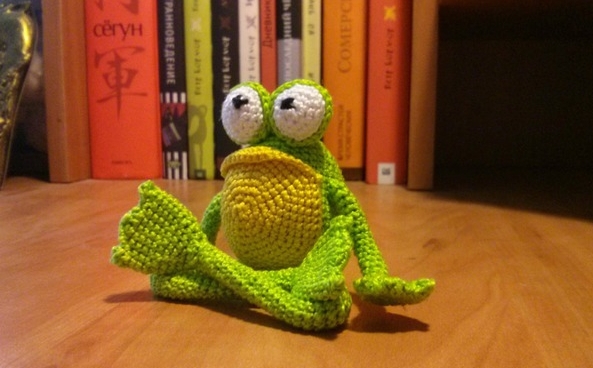
Toy Frog Amigurumi Crochet Pattern
Hello amigurumi lovers and beautiful visitors, I wanted to share the free amigurumi patterns for you here. In my article I will share 1 pattern and how to make it for you. At the end of my article, I will share amigurumi patterns that can generate ideas for you.
To knit a frog you will need:
Iris: white, green, yellow
Hook (I have a clover 1.25)
Wire for the frame
Torso:
1. Amigurumi ring – 6 p
2. appr. * 6 times – 12 p
3. sc, appr. * 6 times – 18 p
4. 2 sc, appr. * 6 times – 24 p
5. 3 sc, appr. .* 6 times – 30 p
6. 4 sbn, appr. * 6 times – 36 p
7. 5 sc, appr. * 6 times – 42 p
8. 6 sc, appr. * 6 times – 48 p
9. – 16 rows sc – 48 p
insert the wire for the upper paws approximately in this row
17. 6 sc, decrease * 6 times – 42 p
18. sc – 42 p
19. 5 sc, decrease * 6 times – 36 p
20. sc – 36 p
21. sc – 36 p
22. 4 sc, decrease * 6 times – 30 p
23. sc – 30 p
24. 3 sc, decrease * 6 times – 24 p
25. 2 sc, decrease * 6 times – 18 p
26. sc, decrease * 6 times – 12 p
27. decrease * 6 times – 6 p
to close the loops.
As you knit, insert the wire for the upper and lower legs and fill with filler.
Stomach (yellow thread):
1. Amigurumi ring – 6 p
2. appr. * 6 times – 12 p
3. sc, appr. * 6 times – 18 p
4. 2 sc, appr. * 6 times – 24 p
5. 3 sc, inc. * 6 times – 30 p
6. 4 sc, inc. * 6 times – 36 p
7. 5 sc, inc. * 6 times – 42 p
8. 6 sc, inc. * 6 times – 48 p
9. 7 sbn, appr. * 6 times – 54 p
10. sbn – 54 p
Eyes 2 parts:
Inner eye. White thread
1. Amigurumi ring – 6 p
2. appr. * 6 times – 12 p
3. sc, appr. * 6 times – 18 p
4. 2 sc, appr. * 6 times – 24 p
5. 2 sc, decrease .* 6 times – 18 p
6. sbn, decrease * 6 times – 12 p
7. decrease * 6 times – 6 p
Stuff with filler as it closes.
Outer eye. Green thread
1. Amigurumi ring – 6 p
2. appr. * 6 times – 12 p
3. sc, appr. * 6 times – 18 p
4. 2 sc, appr. * 6 times – 24 p
5. sc – 24 p
6. 10 sb, decrease, 10 sb, decrease. – 22 p.
Close. Insert the white piece into the green one. Sew along the edge. Embroider black pupils.
Upper legs 2 parts:
Long part: cast on 6 loops, close in a circle and knit sc for 16 rows.
Fins:
1. Amigurumi ring – 4 p
2. appr. * 4 times – 8 p
3. sc, appr. * 4 times – 12 p
4. 2 sc, appr. * 4 times – 16 p
5. sc – 16 p
6. sbn – 16 p
7. connecting column, sbn, dc, sbn * 4 times – 16 p
Close.
Lower legs 2 parts:
Long part: cast on 6 loops, close in a circle and knit sc for 35 rows.
Fins:
1. Amigurumi ring – 4 p
2. inc. * 4 times – 8 p
3. sc, inc. * 4 times – 12 p
4. 2 sc, inc. * 4 times – 16 p
5. 3 sc, inc .* 4 times – 20 p
6. sb – 20 p
7. sb – 20 p
8. sb – 20 p
9. sb – 20 p 10.
sb – 20 p
11. connecting column, half-column with a crochet, dc, half-column double crochet, connecting column *4
times – 20 p
Close.
We outline the positions of the eyes. Next, sew on the belly. The tummy is not
completely sewn, on top we leave a third not sewn for twisting the lip.
We sew on the eyes, if necessary, we shift them relative to the tummy, we embroider
the pupil on them with black thread.
We sew paws. I will describe on the example of the upper ones. We put the long part of the paws on the wire, stick the wire into the flipper, inside the flippers we bend the wire into a triangle (along the contour of
the flipper), and pull the end back, fix it with tape or electrical tape. We sew the flipper.
We sew long paws to the body and to the flipper.
Feel free to tag me (@freeamigurumii) in your photos on Instagram or Facebook if you’d like!
All Finished.