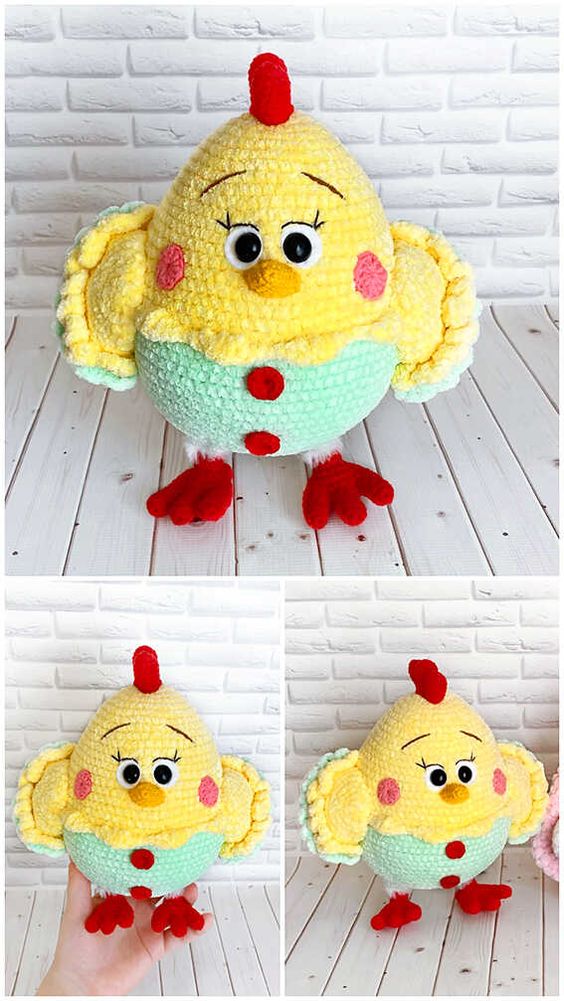
Knitting Easter Chicken Amigurumi Crochet Pattern
Hello amigurumi lovers and beautiful visitors, I wanted to share the free amigurumi patterns for you here. In my article I will share 1 pattern and how to make it for you. At the end of my article, I will share amigurumi patterns that can generate ideas for you.
1.Body
The body – it is the same as that of another knitted toy Janette. To see step-by-step photos, refer to this lesson.
Row 1. Make « magic ring » and 3 air hinges, then tie 13 columns with a cape in the ring and tighten, lock the circle with a connection column ( 14 columns with a cap ). I received a lot of questions about the « magic ring ». Perhaps you prefer to tie a chain of 4 air loops and a column with a cape fourth of the hook ( then the columns with the cape ) or 4 air hinges, a connecting column to close the ring, 3 air hinges and 13 columns with a cap on the ring. All techniques are equally good, I think it depends on preferences.
Row 2. Attach the thread between the two columns with the cape of the previous row, make 3 air hinges of the ascent and a column with a cape in the same place. Knit 2 columns with a cape between each column of the previous row in a circle, execute a connecting column in the 3rd air loop of the lift to close the row. Fence the thread ( 14 pairs of columns with a cape ).
Row 3. Join the thread between two pairs of columns with the cape of the previous row, make 3 air hinges of the rise and 2 columns with a cape in the same place. Make 3 columns with a cape in each interval between two pairs of columns with a cape of the previous row in a circle, execute a connecting column in the 3rd air loop of the lift to close the row. Fence the thread ( 14 groups of 3 columns with a cape ).
Row 4. Now we will work on the upper hinges of each column, not between them. Attach a new thread of a different color to the upper column loop, tie 2 air loops, 2 columns with a cape to the next loop, then 1 column with a cape to the next loop, 1 column with a cape, 2 columns with a cape in one loop, 1 column with a cape, 1 column with a cape, 2 columns with a cape in one loop, 1 half-column with one cloak, 1 air loop, then knit a column without a cape in each loop in a circle. Finish the row by executing the connection column in the 2nd air boom. Do not break the thread.
Row 5. 1 air loop, a column without a cape in each loop in a circle, a connecting column in the 1st air loop of lifting.
Row 6. 1 air loop, semi-column with one cape, in the next 11 loops, 1 air loop, connecting column in the next loop. Tear off the thread, leaving a long ponytail that will be needed to sew two parts together. Let me remind you – you need 2 such parts – front and rear.
2.Beak
Row 1. « Magic Ring » ( see the description above ), 1 air loop and 6 columns without a cape in the ring, do not close this and subsequent rows, continue working in a circle. If necessary, use knitting markers to mark ( personally, I just count loops ) ( 6 )
Row 2. *Column without cape, 2 columns without cloak in the next loop *, repeat from * to * in a circle ( 9)
Row 3. *Column without cape in every 2 subsequent loops, 2 columns without cape in the next loop, repeat from * to * in a circle ( 12 )
Row 4. Column without cape in every loop in a circle. Tear off the thread, leaving a long ponytail.
3.Wings ( do 2 pieces )
Row 1. « Magic Ring » ( description see above ), 1 air loop and 6 columns without a cape in the ring, do not close this and subsequent rows, continue working in a circle. If necessary, use knitting markers to mark ( personally, I just count loops ) ( 6 )
Row 2. *Column without cape, 2 columns without cloak in the next loop *, repeat from * to * in a circle ( 9)
Row 3. *Column without cape in every 2 subsequent loops, 2 columns without cape in the next loop, repeat from * to * in a circle ( 12 )
Row 4. *Column without cape in every 3 subsequent loops, 2 columns without cape in the next loop *, repeat from * to * in a circle ( 15 )
Row 5. Columns without cape in each loop in a circle ( 15 ). Change the thread.
Row 6. Columns without cape in each loop in a circle ( 15 ).
Row 7. Columns without cape in each loop in a circle ( 15 ). Change the thread.
Row 8. *Column without cloak in every 3 loops, 2 columns without cloak tied together in the next loop, repeat from * to * in a circle ( 12 )
Row 9. Column without cape in each loop in a circle ( 12 ).
Row 10. Column without cape in every loop in a circle. Tear off the thread, leaving a long ponytail.
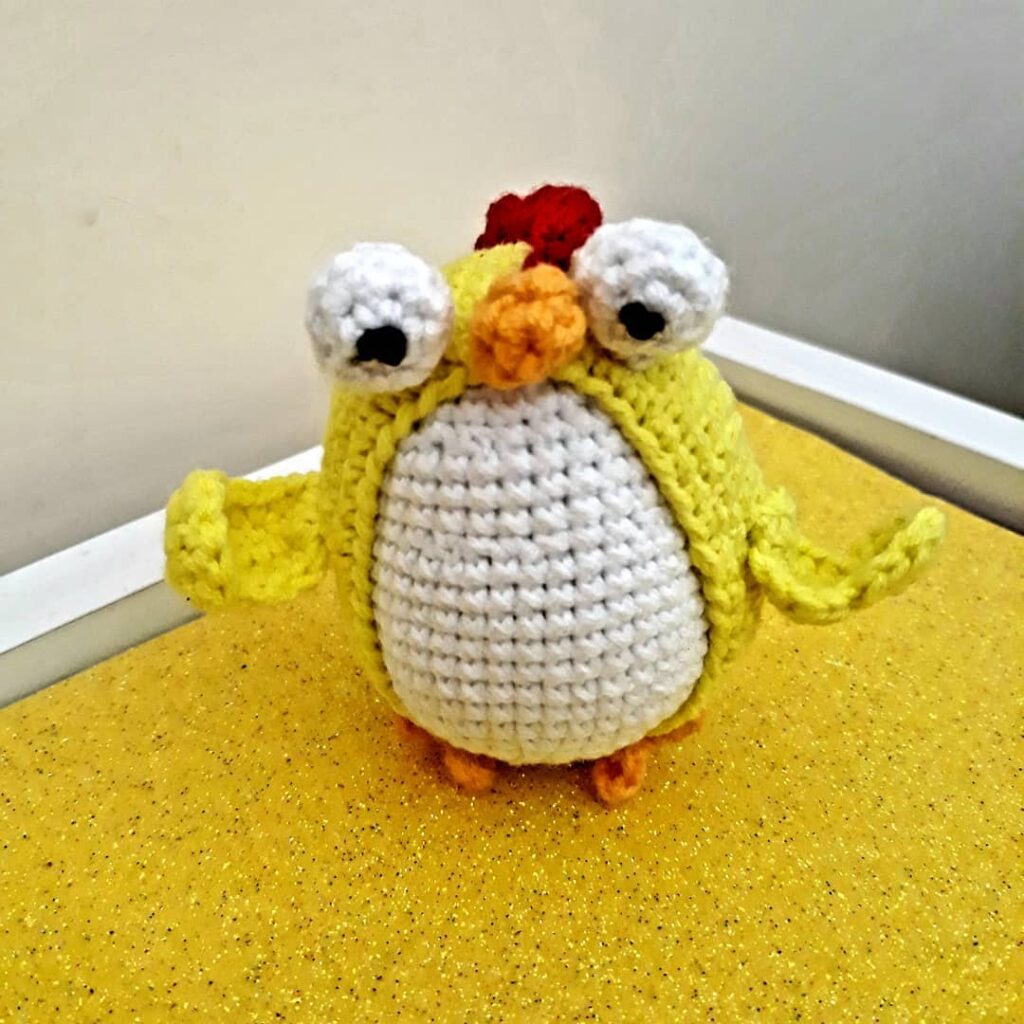
Here are all parts of your Easter chicken and ready … Now you need to combine them.
Place your eyes, fasten them, and sew the beak.
Combining the wear sides, sew the front and back.
Leave a small gap, fill, then finish stitching. It looks very cute!
Sew your wings on a knitted chicken.
Almost done … left to make a small bunch upstairs! Skip through the loop along 2 threads of each color.
Feel free to tag me (@freeamigurumii) in your photos on Instagram or Facebook if you’d like!
All Finished.