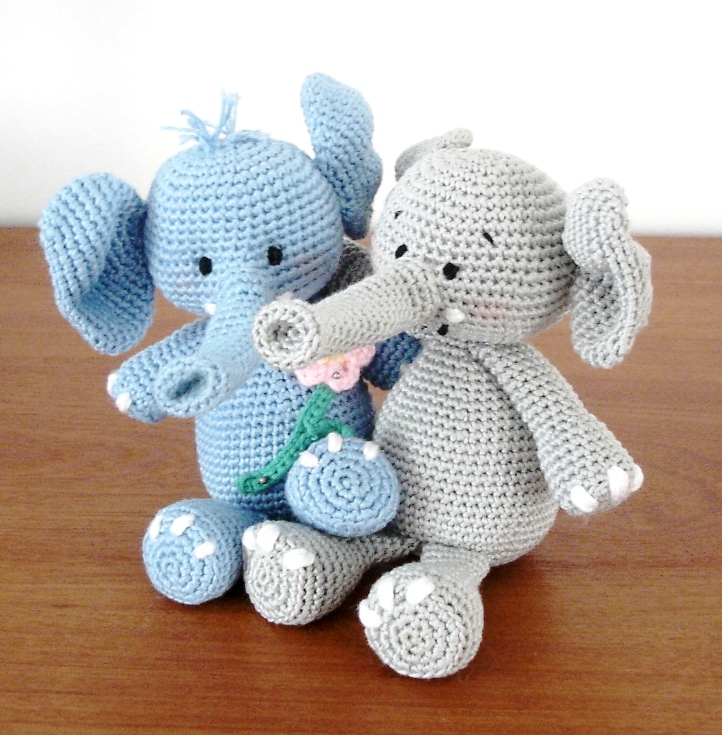
Elephant Amigurumi Crochet Pattern
Hello amigurumi lovers and beautiful visitors, I wanted to share the free amigurumi patterns for you here. In my article I will share 1 pattern and how to make it for you. At the end of my article, I will share amigurumi patterns that can generate ideas for you.
You will need:
- double knit cotton yarn (colors: light blue, pink, sand or gray);
- embroidery thread (colors: black and white);
- hook: 2mm;
- needle with a wide eye;
- filler – polyester.
Abbreviations:
VP – air loop
RLS – single crochet
p – loop
* … * – repeat from asterisk to asterisk the indicated number of times
The product is knitted in a spiral. For ease of counting the number of rows, use stitch markers in the first st of each row. After completing the knitting of each piece of the product, complete the row with SS and cut the thread.
Gauge shown:
1x1cm = 4 rows of 3 sts
1x1inch = 9 rows of 8 sts
Head
Row 1: 6 sc in amigurumi ring (6)
Row 2: 2 sc in each st in a circle (12)
Row 3: *2 sc, sc* – repeat 6 times (18)
Row 4: *2 sc, 2 sc * – repeat 6 times (24)
5 row: * 2 sc, 3 sc * – repeat 6 times (30)
6 row: * 2 sc, 4 sc * – repeat 6 times (36)
7 row: * 2 sc, 5 RLS * – repeat 6 times (42)
8 row: * 2 RLS, 6 RLS * – repeat 6 times (48)
9-12 row: 48 RLS
13 row: * 2 RLS, 7 RLS * – repeat 6 times (54)
If you are using twisted eyes, place them on this row 6 sts apart.
14 row: * 2 sc, 8 sc * – repeat 6 times (60)
15-16 row: 60 sc
17 row: * invisible decrease, 8 sc * – repeat 6 times (54)
18 row: * invisible decrease, 7 sc * – repeat 6 times (48)
19 row: * invisible decrease, 6 sc * – repeat 6 times (42)
20 row: * invisible decrease, 5 sc * – repeat 6 times (36)
21 row: * invisible decrease, 4 RLS * – repeat 6 times (30)
22 row: * invisible decrease, 3 RLS * – repeat 6 times (24)
23 row: * invisible decrease, 2 RLS * – repeat 6 times (18)
Cut the thread and stuff the head with filler.
Ears (2 pcs.)
11 ch
1 row: 9 sc, 3 sc in one p (last loop in the chain), now knit on the other side of the chain, 8 sc, 2 sc in one p (22) 2 row: * 2 sc in one p,
sc * – repeat 10 times (33)
3 row: * 2 sc in one p, 2 sc * – repeat 10 times (44)
4-8 row: 44 sc
9 row: * invisible decrease, 2 sc * – repeat 10 times (33 )
10 row : 33 RLS
11 row: * invisible decrease, RLS * – repeat 10 times (22)
12 row: 22 RLS
13 row: 11 invisible decreases.
Cut the thread, leaving a tail for sewing.
Nose
1 row: 5 sc in the amigurumi ring (5)
2 row: 2 sc in each st in a circle (10)
3 row: *2 sc, sc* – repeat 5 times (15)
4 row: 15 sc for the back wall loops (15)
5 row: 15 RLS for both walls of the loop (15)
6 row: 3 invisible decreases, 9 RLS (12)
7-16 row: 12 RLS
17 row: 3 RLS, 2 RLS in one p, RLS, 2 Sc in one stitch, sc, 2 sc in one stitch, 4 sc (15)
Row 18: 15 sc
Cut yarn, leaving tail for sewing.
Torso
Row 1: 6 sc in the amigurumi ring (6)
Row 2: 2 sc in each st in a circle (12) Row
3: *2 sc, sc* – repeat 6 times (18)
Row 4: *2 sc, 2 RLS * – repeat 6 times (24)
5 row: * 2 RLS, 3 RLS * – repeat 6 times (30)
6 row: * 2 RLS, 4 RLS * – repeat 6 times (36)
7 row: * 2 RLS, 5 sc * – repeat 6 times (42)
8 row: * 2 sc, 6 sc * – repeat 6 times (48)
9-18 row: 48 sc
19 row: * invisible decrease, 6 sc * – repeat 6 times (42 )
20 row: 42 RLS
21 row: * invisible decrease, 5 RLS * – repeat 6 times (36)
22 row: 36 RLS
23 row: * invisible decrease, 4 sc * – repeat 6 times (30)
24 row: 30 sc
25 row: * invisible decrease, 3 sc * – repeat 6 times (24)
26 row: 24 sc
27 row: * invisible decrease , 2 sc * – repeat 6 times (18)
28 row: 18 sc
Cut the thread, leaving a tail for stitching. Stuff the body with filler.
Legs (2 pcs.)
Row 1: 6 sc in the amigurumi ring (6)
Row 2: 2 sc in each p in a circle (12)
Row 3: *2 sc in one p, sc * – repeat 6 times (18)
4 row: * 2 sc in one p, 2 sc * – repeat 6 times (24)
5 row: 24 sc for the back wall of the loop (24)
6-10 row: 24 sc
11 row: * invisible decrease, 2 sc * – 6 times (18)
12-13 row: 18 RLS
14 row: * invisible decrease, RLS * – 6 times (12)
15-16 row: 12 RLS
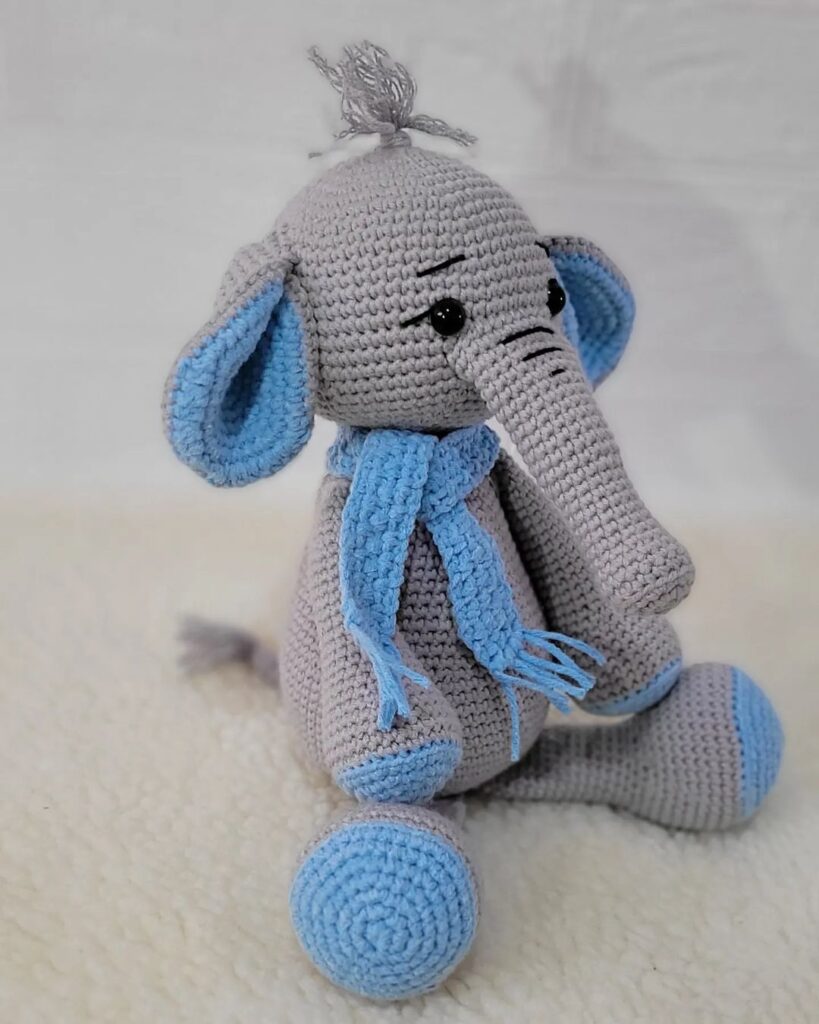
For longer legs, like the presented gray elephant, add 3 more rows. Cut the thread, leaving a tail for sewing. Stuff only the lower parts of the legs (feet) with filler.
Hands (2 pcs.)
Row 1: 6 sc in the amigurumi ring (6)
Row 2: 2 sc in each p in a circle (12)
Row 3: *2 sc in one p, sc * – repeat 6 times (18)
4 row: 18 sc behind the back wall of the loop
5-8 row: 18 sc (for the length of the gray elephant’s arms, add one more row)
9 row: *invisible decrease, sc* – repeat 6 times (12)
10-15 row: 12 sc ( 12)
For the length of the arms, like a gray elephant, add 4 more rows. Cut the thread, leaving a tail for sewing. Fill only the wide parts of the arms (hands) with filler.
Tail
10 ch. Cut the thread by making a small knot at the end. You can leave some threads at the end of the tail by making a small tassel.
Assembly
First, sew the head to the body using the 18 loops remaining on both parts of the product. To start sewing, connect the last loop of the head (where the thread is cut) with the first loop of the body (where the thread begins). Before you completely sew both parts of the product, fill them with filler so that there are no voids between the head and torso and everything looks beautiful. Then carefully examine the amigurumi elephant and choose a place where to sew the trunk.
Sew the trunk neatly over both walls of the loops in a circle.
The arms are sewn on the sides of the body. If the trunk is considered the center of the body, then retreat 5 loops on both sides and sew on the arms.
To sew on the legs, turn the body over and back 7 rows from the middle to the stomach and sew the legs between 7 and 8 rows 3 stitches apart.
Sew the ears on the sides of the head symmetrically to each other down from the 8th to the 13th row.
Sew the tail on the back of the body between rows 7 and 8 (count from the initial ring on the body).
Sew the eyes one row above the trunk, skipping 6 stitches between them. If you are using rolled eyes, place them after the 13th row, skipping 6 sts in between.
Take white yarn or embroidery thread and embroider the tusks. Sew several times in the same loop to create a voluminous circle.
Take black yarn or embroidery thread and embroider the mouth with 2 rows below the trunk, 3 loops long. Make a smile by sewing diagonal stitches on the sides of the mouth.
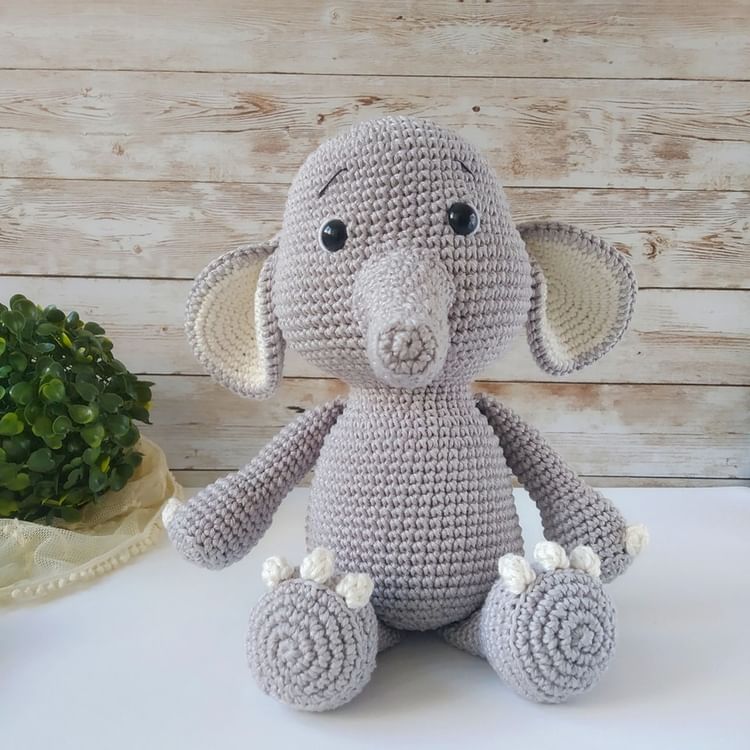
Also embroider paws with white yarn.
Feel free to tag me (@freeamigurumii) in your photos on Instagram or Facebook if you’d like!
All Finished.