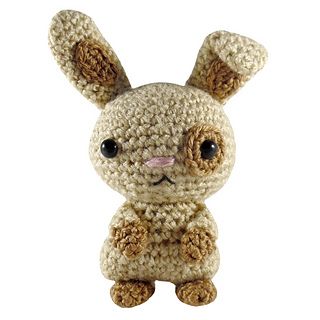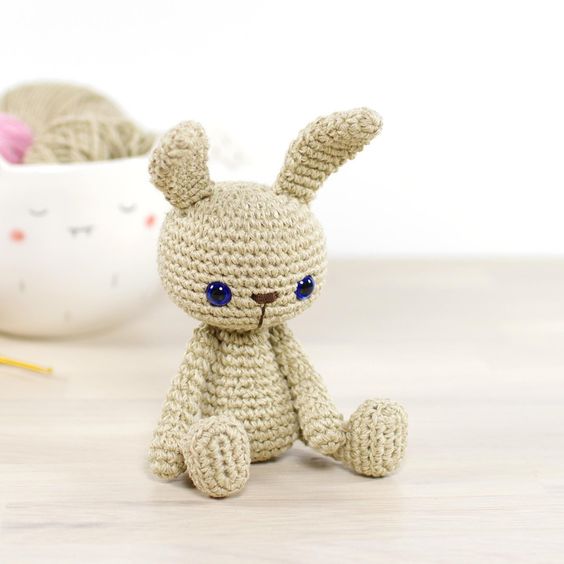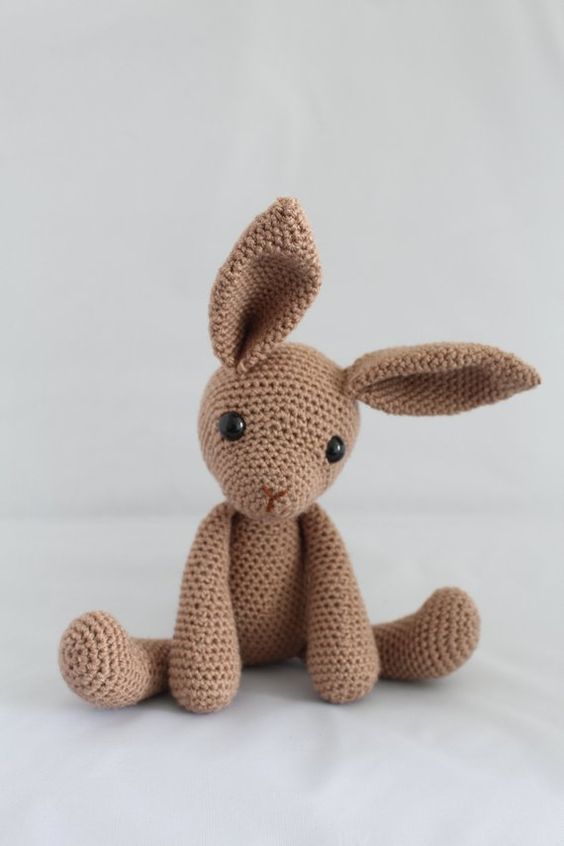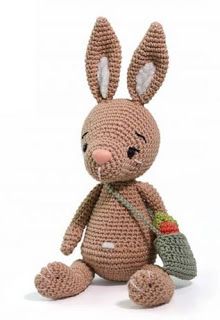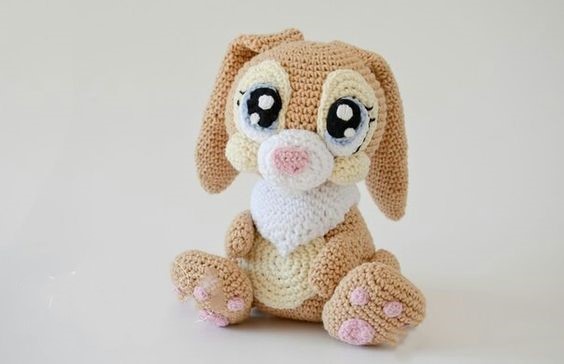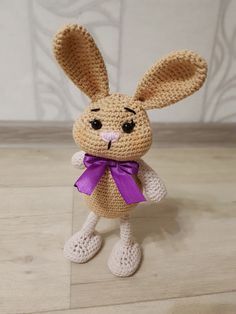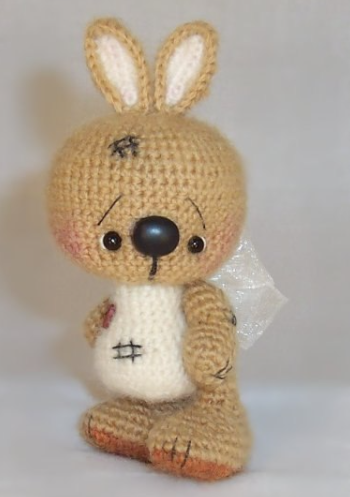
Crochet Bunny Amigurumi Pattern
Hello amigurumi lovers and beautiful visitors, I wanted to share the free amigurumi patterns for you here. In my article I will share 1 pattern and how to make it for you. At the end of my article, I will share amigurumi patterns that can generate ideas for you.
To knit a bunny we need:
— yarn ( 50 gr. = 80 m. );
— hook № 3;
— ( filler for example, );
— some cardboard for the base of the legs;
— beads and buttons for muzzle design.
Designations:
Addendum = 2 tbsp. b / n in one loop of the previous row;
Reduce = skip 1 tbsp. b / n of the previous row, tie 1 tbsp. b / n;
Job description:
Head:
1 row: dial 2 percentage points and lock in the ring. To draw 6 tbsp. b / n [ = 6 tbsp. b / n ]. Next knit in a circle.
2 row: * increase *. Repeat * 6 times [ = 12 tbsp. b / n ].
3 row: * increase, 1 tbsp b / n*. Repeat * 6 times [ = Art. b / n ].
4 row: * increase, 2 tbsp b / n*. Repeat * 6 times [ = 24 tbsp. b / n ].
5 row: * increase, 3 tbsp. b / n*. Repeat * 6 times [ = 30 tbsp. b / n ].
6 row: * increase, 4 tbsp b / n*. Repeat * 6 times [ = 36 tbsp. b / n ].
7-13 rows: unchanged [ = 36 tbsp. b / n ].
14 row: * 4 tbsp. b / n, decrease*. Repeat * 6 times [ = 30 tbsp. b / n ].
15 row: * 3 tbsp. b / n, decrease*. Repeat * 6 times [ = 24 tbsp. b / n ].
16 row: * 2 tbsp. b / n, decrease*. Repeat * 6 times [ = Art. b / n ]. Fill with a filler.
17 row: * 1 tbsp. b / n, decrease*. Repeat * 6 times [ = 12 tbsp. b / n ].
18 row: * decrease*. Repeat * until the hole closes completely.
Torso:
1 row: dial 2 percentage points and lock in the ring. To draw 6 tbsp. b / n [ = 6 tbsp. b / n ]. Next knit in a circle.
2 row: * increase *. Repeat * 6 times [ = 12 tbsp. b / n ].
3 row: * increase, 1 tbsp b / n*. Repeat * 6 times [ = Art. b / n ].
4 row: * increase, 2 tbsp b / n*. Repeat * 6 times [ = 24 tbsp. b / n ].
5-7 rows: unchanged [ = 24 tbsp. b / n ].
8 row: 6 dodges, * 1 tbsp. b / n, decrease*. Repeat * 4 times [ = 14 tbsp. b / n ].
9-11 rows: unchanged [ = 14 tbsp. b / n ]. Fill with a filler.
12 row: * decrease, 1 tbsp. b / n *. Repeat * 6 times [ = Art. b / n ].
13 row: * decrease *. Repeat * until the hole closes completely.
Ear ( 2 parts ):
1 row: dial 10 percentage points and tie Art. b / n in the second loop from the hook, 4 bp / n, 3 half-column s / n, 6 tbsp / n in the last loop. Rotate knitting. 3 half-column s / n, 5 tbsp b / n, 1 connecting loop [ = 23 tbsp ].
2 row: 5 connecting loops, 13 tbsp. b / n, 5 connecting loops [ = 23 tbsp ].
Lower foot ( 2 details ):
1 row: dial 7 bp and tie the Art. b / n in the second loop from the hook, 4 bp bp / n, 3 tbsp. b / n in one loop, turn knitting clockwise, 4 tbsp, 2 tbsp. b / n in the first loop [ = 14 tbsp. b / n ].
2 row: increase, 4 bp b / n, 3 additives, 4 bp / n, 2 additives [ = 20 tbsp. b / n ].
3 row: 4 connecting columns, 10 bp / n 6 connecting columns [ = 20 tbsp. ]
4 row: tie 20 tbsp. b / n for the back wall of the loops of the previous row [ = 20 tbsp. b / n ]
5 row: unchanged [ = 20 tbsp. b / n ]. Insert a cardboard base.
6 row: 3 tbsp b / n, ( decrease, 1 tbsp. b / n ) * 3 times, 8 tbsp b / n [ = 17 tbsp. b / n ]
7 row: * decrease, 1 tbsp. b / n*. Repeat * 6 times [ = 11 tbsp. b / n ]
8-9 rows: unchanged [ = 11 tbsp. b / n ].
Fill with a filler.
10 row: decrease, 3 tbsp b / n, decrease, 4 tbsp [ = 9 tbsp. b / n ]
11 row: unchanged [ = 9 tbsp. b / n ]
12 row: * decrease *. Repeat * until the hole closes completely.
Top foot ( 2 details ):
1 row: dial 4 bp and tie the Art. b / n in the second loop from the hook, 1 bldg.b / n, 3 tbsp. b / n in one loop, turn knitting clockwise, 1 tbsp, 2 tbsp. b / n in the first loop [ = 8 tbsp. b / n ].
2nd row: * 1 bb / n, increase*. Repeat * 4 times [ = 12 tbsp. b / n ].
3 row: unchanged [ = 12 tbsp. b / n ]
4 row: 2 decrease, 8 tbsp. b / n [ = 10 tbsp. b / n ].
5-9 row: unchanged [ = 10 tbsp. b / n ]. Fill with a filler.
10 row: * decrease *. Repeat * until the hole closes completely. I also want to immediately give some advice to those who have already begun to knit:
1. Do not fill your head hard. A heavy head will sweep the center of gravity and the bunny will not stand, but will fall under the weight of his head. In this case, the body and legs should be stuffed more tightly.
2. Put the cardboard base in the legs for stability. When you have tied to 5 rows of legs, cut out 2 parts from the cardboard by the size of the resulting foot and put them in the leg, and only then do the cuts and fill them with a filler.
3. Please note that the 4th row of the legs must be tied only to the back wall of the loop. This moment also greatly affects the stability of the toy, because with this method of knitting, the base of the leg ( stop ) is completely flat.
4. At the assembly stage, first pin your legs to your body with a needle and ensure that the toy stands steadily. Then make a movable filament mount. Pull the strings and check the stability of the toy while standing and sitting. Do not be lazy to redo if the toy is not worth it.
Feel free to tag me (@freeamigurumii) in your photos on Instagram or Facebook if you’d like!
All Finished.