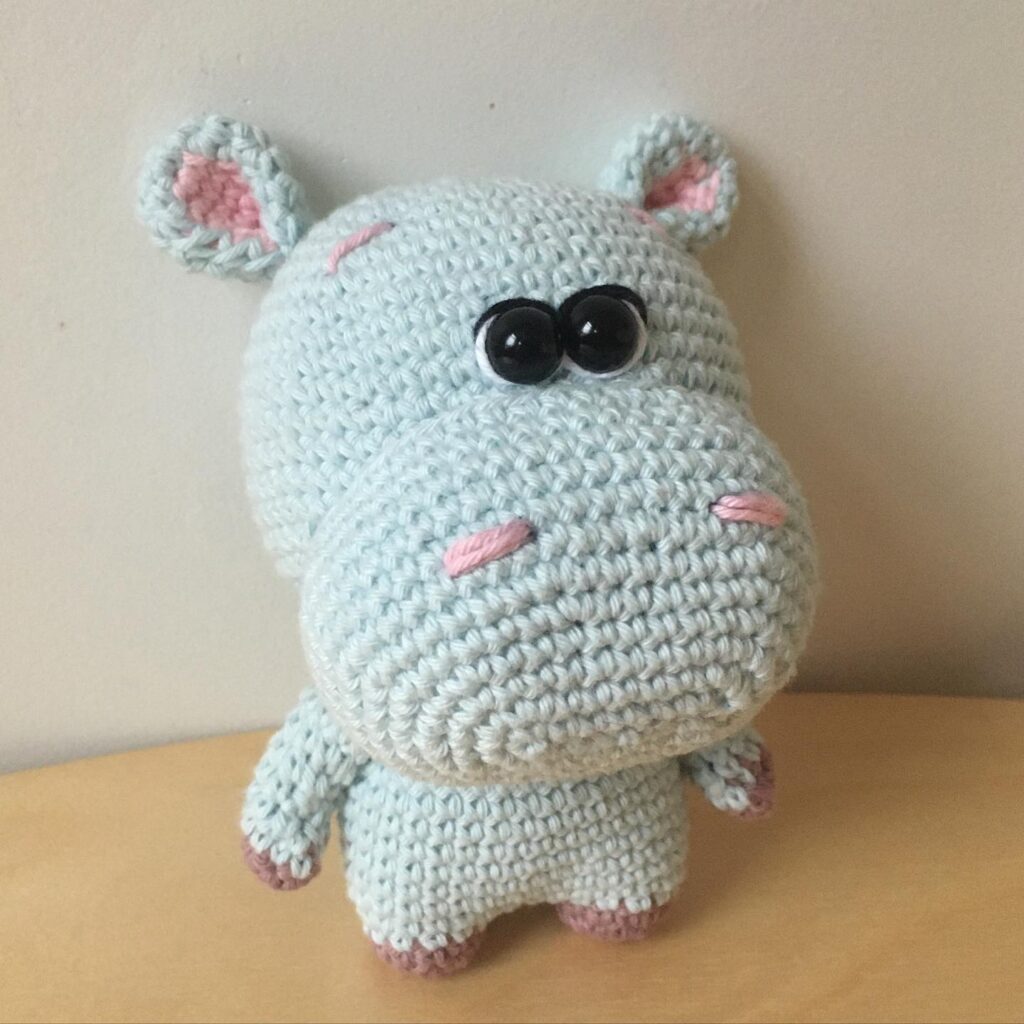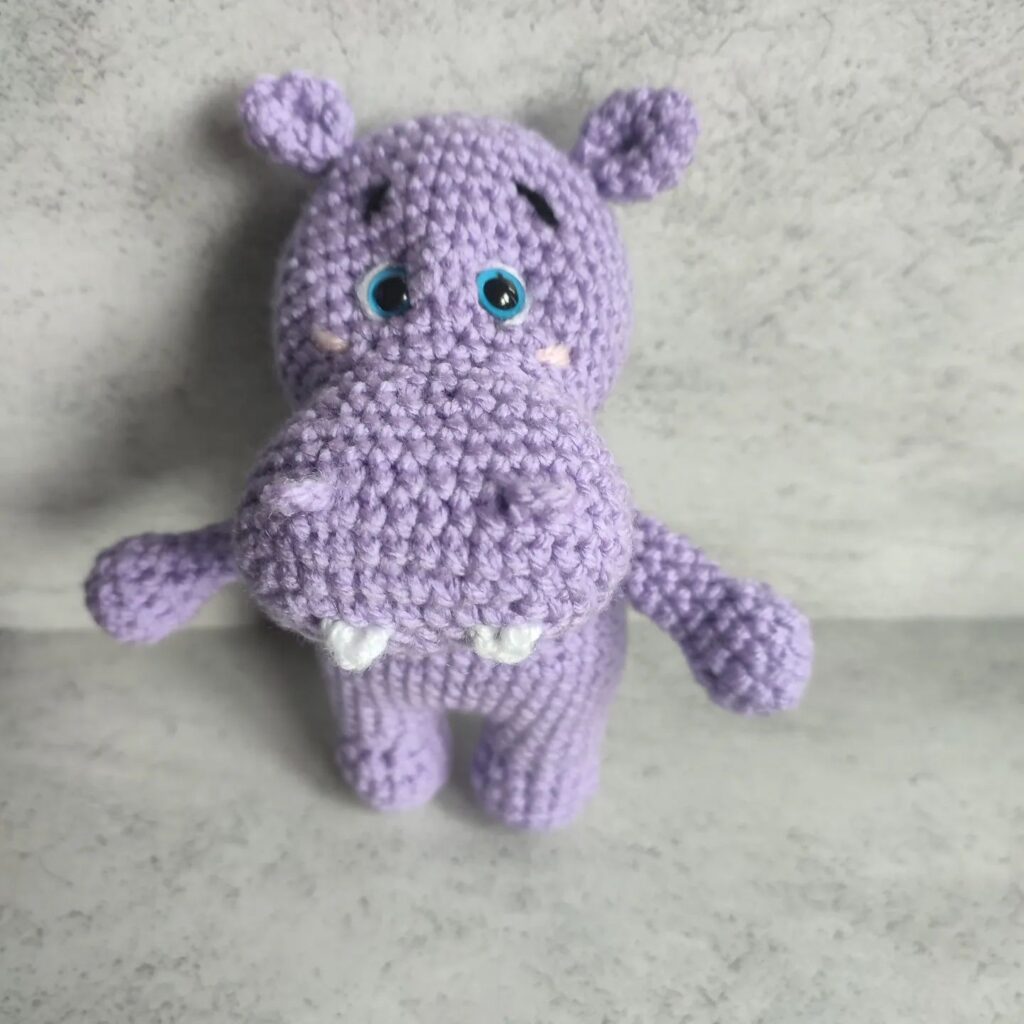
Amigurumi Hippo Crochet Pattern
Hello amigurumi lovers and beautiful visitors, I wanted to share the free amigurumi patterns for you here. In my article I will share 1 pattern and how to make it for you. At the end of my article, I will share amigurumi patterns that can generate ideas for you.
You will need:
Medium yarn (Red Heart Super Saver)
approx 79.5m base color
approx 5.5m secondary color
Note: Hook size and amount of yarn depends on the type of yarn you are using.
Hook 5 mm
Black yarn for the nose, mouth and eyebrows.
Black felt and black floss for the eyes
Large eye needle and sewing needle
Toy stuffing
Plastic pellets or scraps of fabric (optional)
Stitch marker (optional)
Final measurements:
Finished hippo is approximately 18 cm in height depending on the yarn and hook.
Abbreviations:
ch = air loop
conn. Art. = connecting stitch
sc = single crochet
2 sc tog = 2 single crochet tog (Insert hook into st and pull up yarn. Insert hook into next st and pull up yarn. Yarn over, work through all 3 loops on hook.
Please note: most rows do not need to be closed. You can use a stitch marker to mark the beginning of the row.
Head
In base color, ch 2
KR 1: 6 sc in 2nd st from hook. (6 RLS) Conn. st. to close the row. (only this one)
CR 2: (2 SC in each SC) repeat in a circle (12 SC)
CR 3: (SC in the next SC, 2 SC in the next SC) repeat in a circle (18 SC)
CR 4: (SC in the next 2 sc, 2 sc in the next sc) repeat in a circle (24 sc)
CR 5: (sc in the next 3 sc, 2 sc in the next sc) repeat in a circle (30 sc)
CR 6: (sc in the next 4 sc, 2 sc in the next sc) repeat in a circle (36 sc)
CR 7: (sc in the next 5 sc, 2 sc in the next sc) repeat in a circle (42 sc)
CR 8-9: Sc in each sc in a circle (48 sc)
CR 10:(sc in next 5 sc, 2 sc together) repeat around (36 sc)
CR 11: (sc in next 4 sc, 2 sc together) repeat in circle (30 sc)
CR 12: (sc in next 3 sc, 2 Sc tog) repeat in circle (24 sc)
KR 13: (sc in next sc 2, sc 2 together) repeat in circle (18 sc)
Kr 14: (sc in next sc, 2 sc tog) repeat in circle. (12 RLS) Stuff your head.
KR 15: (2 sc together) repeat around (6 sc).
Leave a tail of 46 cm for sewing up the hole in the head. Close the last loop. Sew up the hole.
Note: Work sts as tight as possible in CR 12-15 to avoid small holes.
Body:
Base color 2 ch
KR 1: 6 sc in the second loop from the hook. (6 RLS) Conn. to close the row (only this one)
KR 2: (2 SC in each SC) repeat in a circle (12 SC)
CR 3: (SC in the next SC, 2 SC in the next SC) repeat in a circle (18 SC )
CR 4: (SC in the next 2 SC, 2 SC in the next SC) repeat in a circle (24 SC)
KR 5: (SC in the next 3 SC, 2 SC in the next SC) repeat in a circle (30 SC )
KR 6: (Sc in the next 4 sc, 2 sc in the next sc) repeat in a circle (36 sc) Connect. st. to close the row. (only this one)
KR 7: Sc behind the back walls of the loops in each sc (36 sc).
CR 8-12: Sc in each sc around (36 sc)
CR 13:(SC in the next 3 sc, 2 sc together) repeat in a circle, 1 sc (29 sc)
KR 14: Sc in each sc (29 sc)
KR 15: (sc in the next 2 sc, 2 sc together) 1 RLS (22 RLS)
KR 16: RLS in each RLS (22 RLS), conn. Art. to close this row. Leave a tail of 61 cm for sewing the head to the body. Close the last loop.
Arm: 2 pcs.
In additional color, 2 ch
KR 1: 6 sc in the second loop from the hook. (6 RLS) Conn. Art. to close this row.
CR 2: 2 sc in each sc (12 sc) Art. to close this row. Close the last loop.
Main color
CR 1-4: Sc in each sc in a circle (12 sc)
CR 5: (sc in the next 2 sc, 2 sc together) repeat in a circle (9 sc)
CR 6: (sc in the next sc, 2 sc together ) repeat in a circle (6 RLS) Art. to close this row.
Leave a tail of 30.5 cm for sewing the arms to the body. Close the last loop.
Ear (2 pcs.)
In additional color, 2 ch
KR 1: 6 sc in the second loop from the hook. (6 RLS) Conn. Art. to close this row.
KR 2: (3 RLS in the next RLS, RLS in the next 2 RLS) repeat in a circle (10 RLS) Connect. Art. to close this row. Close the last loop.
With the main color (2 RLS in each of the next 3 RLS, RLS in the next 2 RLS) repeat in a circle (16 RLS) Connection. Art. to close this row. Leave a tail of 30.5 cm for sewing the ears to the head. Close the last loop.
Muzzle
Main color 2 ch
KR 1: 6 sc in the second loop from the hook. (6 RLS) Conn. Art. to close this row.
KR 2: (SC in next 2 SC, 3 SC in next SC) repeat in a circle (10 SC)
CR 3: (SC in the next 2 SC, 2 SC in the next 3 SC) repeat in a circle (16 SC )
KR 4: RLS in with next. 3 sc, 2 sc in each of the next. 4x RLS, RLS next. 4 sc, 2 sc in each of the next. 4x RLS, RLS next. RLS (24 RLS)
KR 5: RLS in next. 5 sc, 2 sc in each of the next. 4x RLS, RLS next. 8 sc, 2 sc in each of the next. 4x RLS, RLS next. 3 sc (32 sc)
CR 6-12:RLS in each RLS in a circle (32 RLS) Art. to close this series. Leave a tail of 61 cm for sewing the muzzle to the head. Close the last loop.
Tail
Main color 2 ch
KR 1: 4 sc in the second loop from the hook. (4 RLS) Conn. Art. to close this row.
CR 2-4: Sc in each sc in a circle (4 sc) Art. to close this row.
Leave a tail of 30.5 cm for sewing the arms to the body. Close the last loop.
Finishing work
1. Stuff the body. Do not sew up the hole. You can add plastic pellets down the body before stuffing to give the toy stability. In this case, I recommend putting the pellets in a small rag bag, otherwise they may fall out through the spaces between the posts. This is not only unpleasant, but also dangerous for young children. (The author cut out 2 circles about 8 cm in diameter, sewed them together, leaving a hole of 2.5 cm, filled the bag with 1/4 cup of pellets, and then sewed up the hole).
2. Sew the head to the body using the back walls of the loops of the last row of the body.
3. Lightly stuff your hands and sew to the body.
4. Fill the muzzle and sew to the head, using the back walls of the loops of the last row of the muzzle.
5. Hide the ends of the threads inside the ears and sew them to the head (between KR 8 and 9). Connect the two bottom corners of the ear together to make the ears pointed.
6. Sew the tail to the body.
7. Sew felt eyes to the face (if desired, the eyes can be embroidered).
8. Embroider eyebrows, nose and mouth (the author used French knots for the nose).
Feel free to tag me (@freeamigurumii) in your photos on Instagram or Facebook if you’d like!
All Finished.