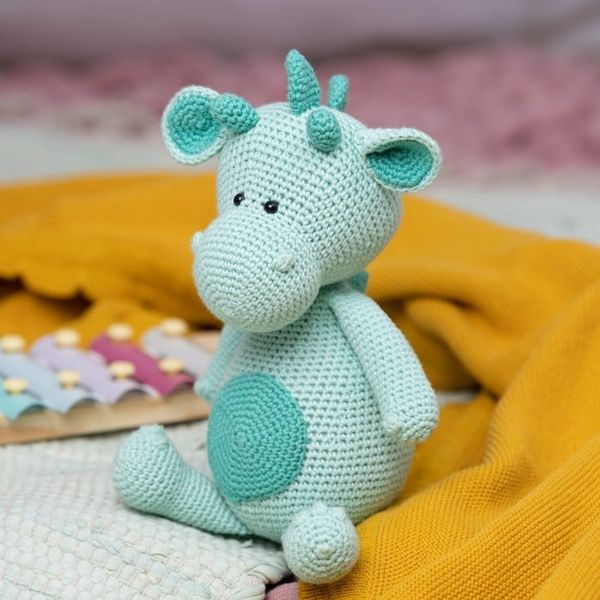
Amigurumi Dragon Free Pattern
Hello amigurumi lovers and beautiful visitors, I wanted to share the free amigurumi patterns for you here. In my article I will share 1 pattern and how to make it for you. At the end of my article, I will share amigurumi patterns that can generate ideas for you.
Skill level: Intermediate
Crochet hook: 2.5 mm
Materials: 1 pair of safety eyes 6 mm, fiberfill, pins, tapestry needle
Yarn: Rainbow Cotton 8/4
Mint (#024) – 2 skeins
Dark Mint (#085) – 1 skein
Abbreviations:
sc – single crochet
dc – double crochet
sl st – slip stitch
bo – bobble stitch (4 half dc together in the same stitch, yarn over and pull the yarn through all stitches on the hook)
inc – increase: 2 sc in the same st
dec – decrease: 2 sc together
(xx) – the number of stitches after ended round
[ ] – repeat instructions within brackets
Head
Color: 024 Mint
Rnd 1: Start with a magic ring. 6 sc in the magic ring
Rnd 2: 2 sc in each st (12)
Rnd 3: [1 sc, inc] x6 (18)
Rnd 4: [2 sc, inc] x6 (24)
Rnd 5: [3 sc, inc] x6 (30)
Rnd 6: [4 sc, inc] x6 (36)
Rnd 7: [5 sc, inc] x6 (42)
Rnds 8-10: 1 sc in each st (42)
Rnd 11: 10 sc, 1 bo, 12 sc, 1 bo, 18 sc (42)
Rnds 12-14: 1 sc in each st (42)
Rnd 15: [5 sc, dec] x6 (36)
Rnd 16: [4 sc, dec] x6 (30)
Rnd 17: [4 sc, inc] x6 (36)
Rnd 18: [5 sc, inc] x6 (42)
Rnd 19: 1 sc in each st (42)
Rnd 20: [6 sc, inc] x6 (48)
Rnd 21: 1 sc in each st (48)
Rnd 22: [7 sc, inc] x6 (54)
Rnd 23: 1 sc in each st (54)
Rnd 24: [8 sc, inc] x6 (60)
Rnd 25: 1 sc in each st (60)
Rnd 26: [9 sc, inc] x6 (66)
Rnds 27-30: 1 sc in each st (66)
Now, attach the safety eyes between rounds 17 and 18 with 6 stitches in between.
Rnd 31: [9 sc, dec] x6 (60)
Rnd 32: 1 sc in each st (60)
Rnd 33: [8 sc, dec] x6 (54)
Rnd 34: [7 sc, dec] x6 (48)
Rnd 35: [6 sc, dec] x6 (42)
Rnd 36: [5 sc, dec] x6 (36)
Rnd 37: [4 sc, dec] x6 (30)
Rnd 38: [3 sc, dec] x6 (24)
Now, stuff the head.
Rnd 39: [2 sc, dec] x6 (18)
Rnd 40: [1 sc, dec] x6 (12)
And stuff the head one last time.
Rnd 41: dec x6 (6)
Now, sew together the last 6 sts. Sew through one of the loops of each of the 6 sts. Pull the
thread to close the hole and weave in the end.
Legs (make 2)
Color: 024 Mint
Rnd 1: Start with a magic ring. 6 sc in the magic ring
Rnd 2: 2 sc in each st (12)
Rnd 3: [1 sc, inc] x6 (18)
Rnd 4: [2 sc, inc] x6 (24)
Rnd 5: 1 sc in each st (24)
Rnd 6: 5 sc, [1 bo, 1 sc] x3,13 sc (24)
Rnds 7-9: 1 sc in each st (24)
Rnd 10: [2 sc, dec] x6 (18)
Rnds 11-24: 1 sc in each st (18)
Cut off the yarn but be careful to leave a long tail for sewing the leg onto the body.
Refer to Assembling to see how to stuff the legs.
Arms (make 2)
Color: 024 Mint
Rnd 1: Start with a magic ring. 6 sc in the magic ring
Rnd 2: 2 sc in each st (12)
Rnd 3: [1 sc, inc] x6 (18)
Rnd 4: 1 sc in each st (18)
Rnd 5: 5 sc, 1 bo, 12 sc (18)
Rnds 6-7: 1 sc in each st (18)
Rnd 8: [4 sc, dec] x3 (15)
Rnds 9-26: 1 sc in each st (15)
Cut off the yarn but be careful to leave a long tail for sewing the arm onto the body.
Refer to Assembling to see how to stuff the arms.
Tummy
Color: 085 Dark Mint
Rnd 1: Start with a magic ring. 6 sc in the magic ring
Rnd 2: 2 sc in each st (12)
Rnd 3: [1 sc, inc] x6 (18)
Rnd 4: [2 sc, inc] x6 (24)
Rnd 5: [3 sc, inc] x6 (30)
Rnd 6: [4 sc, inc] x6 (36)
Rnd 7: [5 sc, inc] x6 (42)
Rnd 8: 1 sc in each st (42)
1 sl st in the first st. Cut off the yarn but be careful to leave a long tail for sewing the tummy onto the body.
Tail
Color: 024 Mint
Rnd 1: Start with a magic ring. 6 sc in the magic ring
Rnd 2: [2 sc, inc] x2 (8)
Rnd 3: 1 sc in each st (8)
Rnd 4: [3 sc, inc] x2 (10)
Rnd 5: 1 sc in each st (10)
Rnd 6: [4 sc, inc] x2 (12)
Rnd 7: 1 sc in each st (12)
Rnd 8: [5 sc, inc] x2 (14)
Rnd 9: 1 sc in each st (14)
Rnd 10: [6 sc, inc] x2 (16)
Rnd 11: 1 sc in each st (16)
Rnd 12: [7 sc, inc] x2 (18)
Rnd 13: 1 sc in each st (18)
Rnd 14: [8 sc, inc] x2 (20)
Rnd 15: 1 sc in each st (20)
Rnd 16: [9 sc, inc] x2 (22)
Rnd 17: 1 sc in each st (22)
Rnd 18: [10 sc, inc] x2 (24)
Rnd 19: 1 sc in each st (24)
Rnd 20: [3 sc, inc] x6 (30)
Rnd 21: 1 sc in each st (30)
1 sl st in the first st. Cut off the yarn but be careful to leave a long piece of yarn to sew the tail onto the body. Refer to Assembling to see how to stuff the tail.
Horn (make 2)
Color: 085 Dark Mint
Rnd 1: Start with a magic ring. 6 sc in the magic ring
Rnd 2: [1 sc, inc] x3 (9)
Rnds 3-5: 1 sc in each st (9)
1 sl st in the first st. Cut off the yarn but be careful to leave a long tail for sewing the horns
onto the body.
Spikes (make 6)
Color: 085 Dark Mint
Rnd 1: Start with a magic ring. 3 sc in the magic ring
Rnd 2: 2 sc in each st (6)
Rnd 3: [1 sc, inc] x3 (9)
Rnd 4: 1 sc in each st (9)
Rnd 5: [2 sc, inc] x3 (12)
Rnds 6-7: 1 sc in each st (12)
Fold it to make the spike become flat and join the edges crocheting 5 sc. Cut off the yarn but be careful to leave a long tail for sewing the spikes onto the head/body.
Ear inside (make 2)
Color: 085 Dark Mint
Rnd 1: Start with a magic ring. 6 sc in the magic ring
Rnd 2: 2 sc in each st (12)
Rnd 3: [1 sc, inc] x6 (18)
Rnd 4: [2 sc, inc] x6 (24)
Rnd 5: [3 sc, inc] x6 (30)
Cut off the yarn and weave in ends on the wrong side.
Ear outside (make 2)
Color: 024 Mint
Rnd 1: Start with a magic ring. 6 sc in the magic ring
Rnd 2: 2 sc in each st (12)
Rnd 3: [1 sc, inc] x6 (18)
Rnd 4: [2 sc, inc] x6 (24)
Rnd 5: [3 sc, inc] x6 (30)
Now, crochet the ears together. Place one inside ear on top of an outside ear. The outside
ear must point towards yourself. Both ears must have the right side pointing outward.
Crochet through both ears, 30 sts in total, to join the two pieces into one ear. End with a sl st in the first st. Cut off the yarn but be careful to leave a long tail for sewing the ears onto the dragon.
Body
Color: 024 Mint
Rnd 1: Start with a magic ring. 6 sc in the magic ring
Rnd 2: 2 sc in each st (12)
Rnd 3: [1 sc, inc] x6 (18)
Rnd 4: [2 sc, inc] x6 (24)
Rnd 5: [3 sc, inc] x6 (30)
Rnd 6: [4 sc, inc] x6 (36)
Rnd 7: [5 sc, inc] x6 (42)
Rnd 8: [6 sc, inc] x6 (48)
Rnd 9: [7 sc, inc] x6 (54)
Rnd 10: [8 sc, inc] x6 (60)
Rnd 11: [9 sc, inc] x6 (66)
Rnds 12 -21: 1 sc in each st (66)
Rnd 22: [9 sc, dec] x6 (60)
Rnds 23-24: 1 sc in each st (60)
Rnd 25: [8 sc, dec] x6 (54)
Rnds 26-27: 1 sc in each st (54)
Rnd 28: [7 sc, dec] x6 (48)
Rnds 29-30: 1 sc in each st (48)
Rnd 31: [6 sc, dec] x6 (42)
Rnds 32-33: 1 sc in each st (42)
Rnd 34: [5 sc, dec] x6 (36)
Rnds 35-37: 1 sc in each st (36)
Rnd 38: [4 sc, dec] x6 (30)
Rnds 39-41: 1 sc in each st (30)
Rnd 42: [3 sc, dec] x6 (24)
Rnds 43-44: 1 sc in each st (24)
Cut off the yarn but be careful to leave a long tail for sewing the head onto the body.
Assembling
Body:
Take some fiberfill and stuff the body tight to make it become firm.
Head:
The head must point downwards a little. It can be helpful to pin the head to the body first.
Sew through the stitches of the body and then through the head. And finally, stuff some extra fiberfill into the neck before closing it completely to avoid a wobbly head. Weave in ends thoroughly.
Horns:
Stuff a bit of fiberfill into the horns. Sew the horns onto Dirk’s head. Place the horns about 10 rounds above the eyes with about 12 stitches in between. Weave in ends thoroughly.
Ears:
Fold the ears in half and sew them together through 3 sts to make the ear become flat in one side. Now, sew it onto Dirk’s head. Place the ears about 2 rounds behind the horns, and 4 sts further out to each side than the horns. Weave in ends thoroughly.
Legs:
Stuff fiberfill into the legs. Stuff the bottom of the leg well and a little less in the actual leg.
Leave a small space at the top without stuffing. Place the legs under the tummy. They should point outward a bit. Sew the legs on about 8 rounds from the beginning of the body. Weave in ends thoroughly.
Tip: you can also crochet the legs together the same way as the spikes before sewing them onto the body.
Arms:
Stuff the arms with fiberfill. Stuff the bottom of the arm well and a little less in the actual arm.
Leave a small space at the top without stuffing. Sew the arms on about 2 rounds from the top of the neck. Weave in ends thoroughly.
Tip: you can also crochet the arms together the same way as the spikes before sewing them onto the body.
Tummy:
Sew the tummy on at the center of Dirk’s body. Sew through the front loop only. Be careful to keep the tummy flat while sewing it on to avoid that it bulges out. Weave in ends thoroughly.
Tip: Sew on the arms and legs before sewing on the tummy, this will make it easier to place the tummy nicely.
Spikes:
Sew the first three spikes onto the head. Place one between the ears, one in the middle of the back head and the last one at the bottom of the head.
Place the next two spikes evenly on the body and sew them on. And finally, sew the last spike onto the tail. Weave in ends thoroughly.
Tail:
Sew the tail onto the back of the body. Stuff the tail firmly with fiberfill. Pin the tail to the body before sewing it on to make sure that Dirk can keep his balance and sit by himself. Weave in ends thoroughly.
Enjoy!