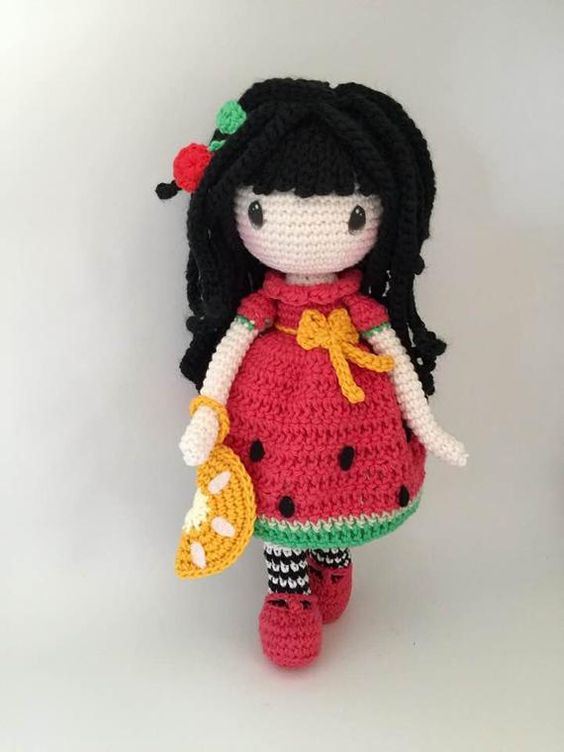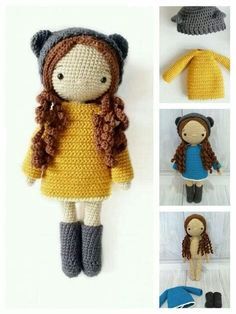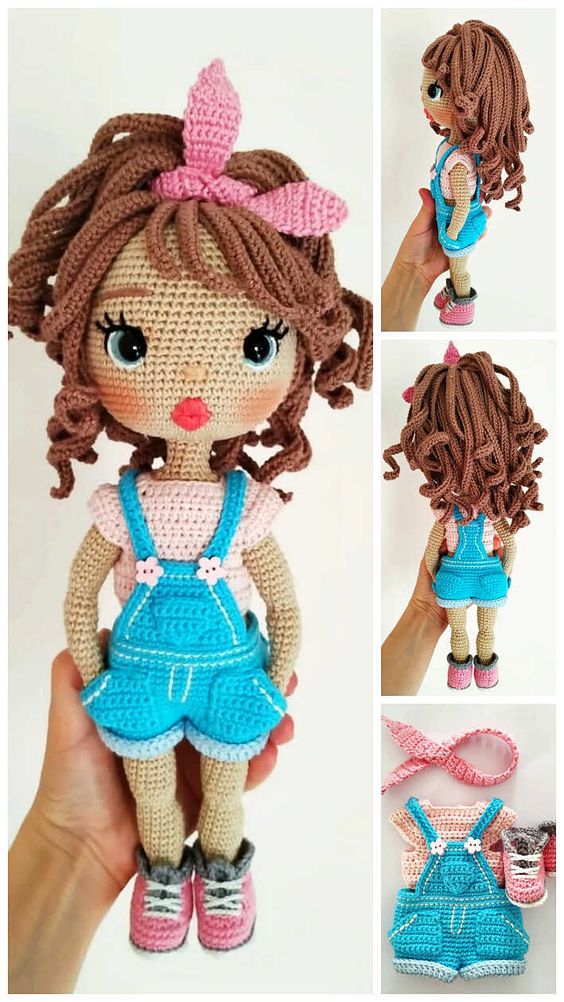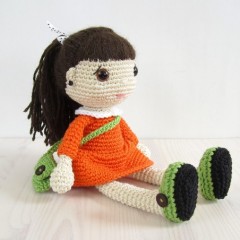
Toy Doll Amigurumi Crochet Pattern
Hello amigurumi lovers and beautiful visitors, I wanted to share the free amigurumi patterns for you here. In my article I will share 1 pattern and how to make it for you. At the end of my article, I will share amigurumi patterns that can generate ideas for you.
We will need:
•Threads. I used cotton thread, 110 m = 50 g
(120 yds = 50 g) / 8 ply / 11 wpi. You will need about 55 grams of beige, 35 grams of orange, 10 grams of green and 6 white and 35 alpaca threads.
• 2.25 – 2.75 mm hook (size 1/B – 2/C) or whatever suits your thread.
•Filler.
• 12 mm eyes on a secure mount.
• Thread for embroidery dark brown and pink.
•Satin ribbon.
•3 buttons for shoes and bags, 2 beads for earrings.
• Stitching needles, scissors, marking rings.
Colours:
A – Thread for the body, beige.
B – Thread for a dress, orange.
C – Thread for shoes and bags, green.
D – Collar thread, white.
E – Thread for the sole, black.
Head:
color A:
1: 6 sc in an amigurumi ring (6)
2: increase x 6 (12)
3: (sc, increase) x 6 (18)
4: (increase, sc 2) x 6 (24)
5: (sc 3, increase) x 6 (30)
6: sc, increase, (sc 4, increase) x 5, sc 3 (36)
7: (sc 5, increase) x 6 (42)
8: sc 2, increase , (sc 6, increase) x 5, sc 4 (48)
Place a marker between 24 and 25 loops on the 13th row, this will help us mark the middle of the face, which can be guided for when
setting the eyes.
9-14: sc in each loop (48)
15: sc 17, increase, sc, increase, sc 9, increase, sc, increase, sc 16 (52)
16-18: sc in each loop (52)
19: sc 17, decrease, sc, decrease, sc 4, decrease, sc 4, decrease, sc, decrease, sc 15 (47) 20: sc 2, decrease,
sc 6, decrease, sc 10, decrease, sc 3, Dec, sc 12, Dec, sc 4 (42)
Attach the eyes between the 13th and 14th rows, leaving 10 loops between them. Start stuffing the head and continue stuffing it during knitting.
The head should be stuffed tightly.
21: (sc 5, decrease) x 6 (36)
22: sc, decrease, (sc 4, decrease) x 5, sc 3 (30)
23: (sc 3, decrease) x 6 (24)
24: (decrease , sc 2) x 6 (18)
Finishing stuffing. Close off, cut the yarn leaving a long tail.
Ears (make 2):
Yarn color A:
1: ch 4, starting from 2 loops from the hook, sc, 2 half columns with a crochet in 1 loop, sl-st (4)
Knit, leave a long thread for sewing on.
Body:
Thread color B:
1: 6 sc in an amigurumi ring (6)
2: increase x 6 (12)
3: (sc, increase) x 6 (18)
4: (increase, sc 2) x 6 (24)
5 : (sc 3, increase) x 6 (30)
6: sc, increase, (sc 4, increase) x 5, sc 3 (36)
7-10: sc in each loop (36)
Knit 11 row only in the back loops .
11: sc in each loop (36)
12: (sc 10, decrease) x 3 (33)
13: sc in each loop (33)
14: sc 4, decrease, (sc 9, decrease) x 2, sc 5 ( 30)
15: sc in each loop (30)
16: (sc 8, decrease) x 3 (27)
Start stuffing the part, continue stuffing while knitting.
17: sc in each loop (27)
18: sc 3, dec, (sc 7, dec) x 2, sc 4 (24)
19: sc in each stitch (24)
Cast off, work the next 3 rows using the join method (shown at the end).
Color A:
20: sc, dec, (sc 2, dec) x 5, sc (18)
Work 21 rows in back st only.
21-22: sb in each loop (18)
Close knitting, leave the thread. Finishing detail.
Skirt:
Turn piece over and find 1 st of row 11. Attach yarn ss. Each row starts in ch and ends in sl-st do not count them
as loops.
yarn color B:
1: ch, (sc 8, increase) x 4, sl-st (40)
2: ch, sc 4, increase, (sc 9, increase) x 3, sb 5, sl-st (44) 3: ch
, (sc 10, increase) x 4, sl-st (48)
4: ch, sb 7, increase, (sc 15, increase) x 2, sb 8, sl-st (51)
5: ch, (sc 16, increase) x 3 , slst (54)
6: ch, sb 13, increase, sb 26, increase, sb 13, ss (56) 7:
ch, (sb 27, increase) x 2, ss (58)
8: ch, sb 14, increase, sc 28, increase, sc 14, sl-st (60)
9: ch, (sc 29, increase) x 2, sl-st (62)
10-11: ch, prs in a circle, sl-st (62)
12: ch, prs in a circle (62)
Close knitting, hide the thread.
Collar:
Turn the piece upside down so that the seam on the skirt is in the center of the back. Knit the collar in the front loops, attach the yarn right to the center
of the back.
Yarn color D:
1: ch 3, (dc, 2dc in 1 loop) x 3, dc, dc + half crochet, ch, slst, ch, half crochet + dc, (dc, 2dc in 1 loop) x
4 (27)
Close knitting and hide the thread.
Hands (make 2 pieces):
Use thread A:
1: 6 sc in the amigurumi ring (6)
2: increase x 6 (12)
3-5: sc in a circle (12)
6: (sc 2, decrease) x 3 ( 9)
7: (decrease, sbn) x 3 (6)
Stuff the arms strongly, continue to fill the part while knitting.
8-10: Sc in a circle (6)
Using yarn B:
11: (sc, increase) x 3 (9)
Knit 12 row only for the back loop.
12: sc in a circle (9)
13: sc 5, decrease, sc 2 (8)
14-18: sc in a circle (8)
19: sc 5, flatten the part and close the hole, as in the picture.
Close knitting, leave a long thread for sewing.
Cuffs:
Turn piece upside down and find 1 st of row 12. Attach a sl-st thread, each row start with ch and end with sl-st do not count them as
loops.
Using yarn color B:
1-3: ch, sc in each st, sl in 1 st (9)
Cast off and hide ponytails.
Legs (make 2 pieces):
Shoes and legs are knitted in 1 piece starting from the center of the sole. We knit shoes in a circle, start each row in ch and finish with ss, do not count them as loops.
Use color E:
1: ch 7, 2 sc in 2 sts from hook, sc 2, half double crochet 2, 5 half double crochets in 1 loop turn and work in the other direction of the half double crochet loop
2, sc 2, 2 sc in last stitch, slst (17)
2: ch, inc, sc 3, half double crochet 3, half double crochet in 1 stitch x 3, half double crochet 3, sc 3, inc, sl-st (25) 3: ch
,
bpsc in each loop (how to knit this stitch is shown below), sl-st (25)
Change the thread to color C:
4: ch, sc in each loop, sl-st (25)
5: ch, sc 7, half double crochet, 2 dc with 1 base x 5, half double crochet, sc 6, sl st (20)
Change the thread to color A:
6: ch, sc 7, decrease x 3, sc 7 (17 )
Fill the part, continue to fill while knitting. We continue to knit leg
7: sc 6, decrease x 3, sc 5 (14)
8: sc 5, decrease x 2, sc 5 (12)
9: sc 5, decrease, sc 5 (11)
10: sc in a circle (11 )
11: sc 5, decrease, sc 4 (10)
12-17: sc in a circle (10)
18: sc 6, decrease, sc 2 (9)
19-26: sc in a circle (9)
27: (sc 2 , decrease) x 2, sc (7)
Close knitting, leave a long tail for sewing. With the help of ss and a chain from ch, make a shoe strap between 5 and 6 rows.
Bag:
The bag is knitted in 1 piece starting from the bottom. We knit in a circle, starting with ch and ending with ss, do not include them when counting.
Yarn color C:
1: ch 9, 2 sc in 2 loops from the hook, sc 6, 4 sc in 1 loop, turn and work in the other side of the loops. sc 6, 2 sc in last
stitch, sl-st (20)
2-7: ch, sc in each stitch, sl-st (20)
Continue knitting the strap, the edge will look better if you sc in the back of the loop.
Strap: ch 45, start with 2 loops from the hook, sc in each loop, sl-st with 1 loop of the 7th row.
We continue to knit a bag.
We start with the following line:
8: sc 9, turn, leave the strap loops unfinished (9)
9-12: ch, sc 9, turn (9)
13: ch, sc 3, ch 3, skip 3 sts, sc 3, turn (9)
Check that the button fits snugly through the hole in row 13, you may need to make more or less loops.
14: ch, sc 3, sc in 3 loops of the chain, sc 3 (9)
Close knitting. Sew the other end of the strap to the bag, lower the cover down, mark the place for the button and sew it on. Hide all the ends
of the yarn.
Head:
a) Attach safety eyes after the end of the 20th row. If they do not hold tight, then add a little
filler between them.
1. Place eyes between rows 13 and 14 leaving 10 sts in between.
2. Make sure you like the look of the eyes and close the washer.
b) Embroider eyebrows, nose and mouth. Use floss threads that will not get dirty if they are accidentally wetted with water.
1. Insert the thread from the bottom of the head, leaving behind a short tail of yarn.
2. Embroider your eyebrows.
3. Embroider the nose and mouth.
4. Return to the bottom of the head and tie the ends together.
Hair:
a) Attach the hair to the head and tie it into a ponytail. The thinner the yarn, the more natural the hair will look.
1. Use yarn and sewing pins to mark the hairline.
2. Embroider bangs. Start with a few stitches to get an idea of what it will look like.
3. And then fill in the gaps.
4. Cut pieces of hair yarn, for this, wind them around a book, they will cut very well.
5. Use the needles to insert the hair
6. Remove the needle and adjust the yarn so that the ends are 1 length.
7. Leave gaps between your hair otherwise your ponytail will be too thick. We will fill in the gaps later.
8. Pin the hair around the hairline.
9. Collect hair in a ponytail and mark this place with a pin.
10. Make long stitches from the hairline to the pin, filling in any gaps.
11. They all go in circles.
12. Gather your hair into a ponytail and tie a ribbon around it. Sew the ribbon to your hair.
Feel free to tag me (@freeamigurumii) in your photos on Instagram or Facebook if you’d like!
All Finished.