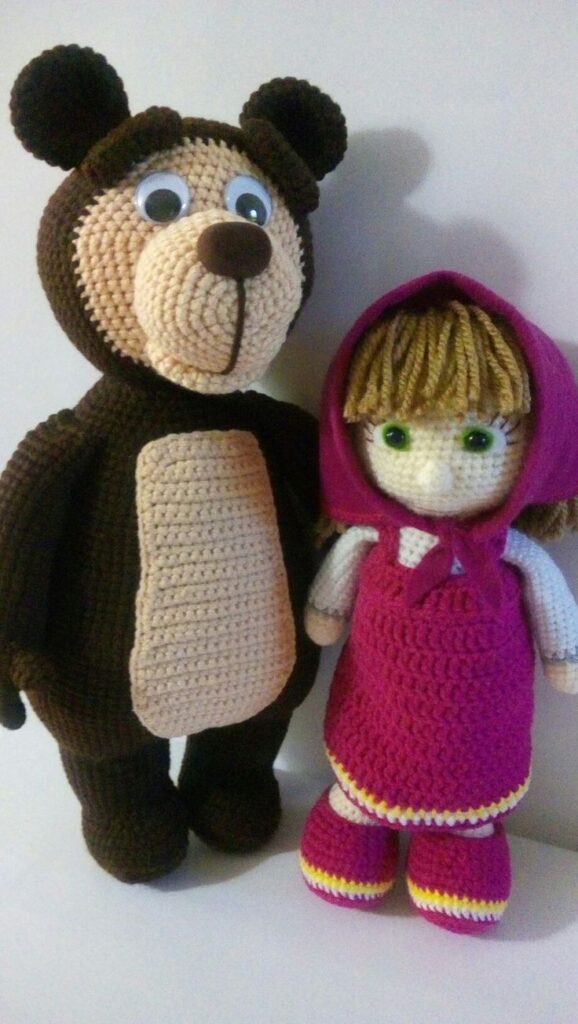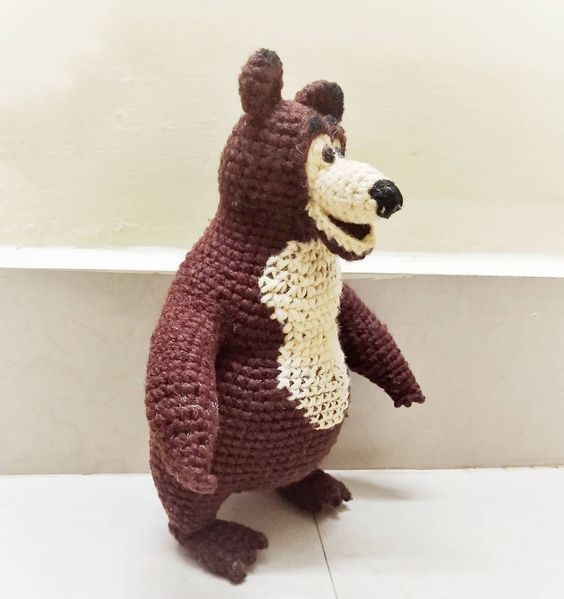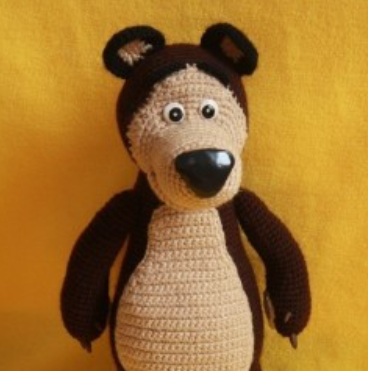
Masha and the Bear Amigurumi Crochet Pattern
Hello amigurumi lovers and beautiful visitors, I wanted to share the free amigurumi patterns for you here. In my article I will share 1 pattern and how to make it for you. At the end of my article, I will share amigurumi patterns that can generate ideas for you.
Materials:
acrylic yarn, hook 2.00 mm
for the nose, light parts, hook 1.5 mm.
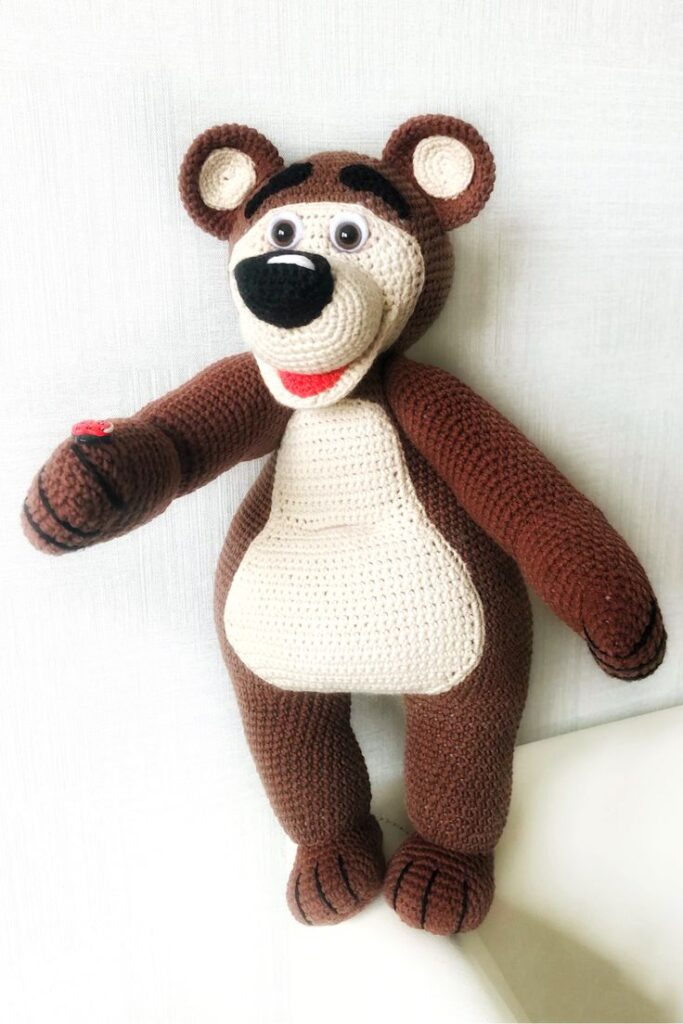
The height of the bear is 25 cm.
The yarn is dark brown, the yarn is dark beige (for the muzzle and a light spot on the body).
Hook of the right size.
Black and white thread (for eyes and nose).
Needle for sewing details.
Filler.
Knit in a spiral unless otherwise noted. Stuff the details gradually.
Abbreviations:
vp – air loop
ss – connecting column
sbn – single crochet
decrease – decrease, knit two sbn together
increase – increase, knit two sbn in one loop
Legs-torso
We start with the legs and knit further, moving to the torso.
Row 1: cast on 18 ch, connect into a ring. Mark each row with a marker.
Row 2-7: sc in each st (18)
Row 8: 6 sl st, 12 prs (18)
Row 9: sc in each st (18)
Row 10-12: sc in each st (18).
Repeat for the second leg. Attach the legs so that the inward bend is at the back. Leave a loop on one leg to connect the legs and move on to knitting the body.
Row 13: Next join the legs. Dial 4 ch, connect with the second leg of the bear, knit a row of sc. (44)
Row 14: 3 PRS, increase, 8 PRS, increase, 4 PRS, increase, (3 PRS, increase) x 2 times, 8 PRS, increase, 3 PRS, increase, 4 PRS, increase. (52)
Row 15: sc in each st (52)
Row 16: (7 sc, inc) x 6 times, 4 sc (58)
Row 17: sc in each st (58)
Row 18: inc, 2 sc, increase, 41 sc, increase, 2 sc, increase, 4 sc , increase, 4 sc (63)
Row 19-29: sc in each loop (63)
Row 30: (8 sc, decrease) x 6 times, 3 sc (57)
Row 31-33: sc in each loop (57)
Row 34: Dec, 2 sc, Dec, 44 Sc, Dec, 2 Sc, Dec, 1 Sc (53) Row
35-37: Sc in each st (53)
Row 38: 8 Sc, Dec, 5 Sc, Dec, 18 sc, decrease, 5 sc, decrease, 9 sc (49)
Row 39: sc in each loop (49)
Row 40: (6 sc, decrease) x 6 times, 1 sc (43)
Row 41-44: sc in each loop (43)
Row 45: (5 sc, decrease) x 6 times, 1 sc (37)
Row 46: (4 sc, decrease) x 6 times, 1 sc (31)
Row 47: (3 sc, decrease) x 6 times, 1 sc (25)
Row 48: (2 sc, decrease) x 6 times, 1 sc (19)
Row 49: sc in each loop (19).
Fasten the thread.
Head
Row 1: In the amigurumi ring 6 sc
Row 2: (raise) x 6 times (12)
Row 3: (1 sc, increase) x 6 times (18)
Row 4: (2 sc, increase) x 6 times (24 )
Row 5: (3 PRS, increase) x 6 times (30)
Row 6: (4 PRS, increase) x 6 times (36)
Row 7: (5 PRS, increase) x 6 times (42)
Row 8-13 : sc in each loop (42)
Row 14: (5 sc, decrease) x 6 times (36)
Row 15: (4 sc, decrease) x 6 times (30)
Row 16: (3 sc, decrease) x 6 times (24)
Row 17-18: Sc in each st (24)
Yarn fasten off, leaving tail for sewing.
Hand (2 pcs)
Row 1: in the amigurumi ring 6 sc
Row 2: (increase) x 6 times (12)
Row 3: (1 sc, increase) x 6 times (18)
Row 4-11: sc in each loop ( 18)
Row 12: 1 sc, 6 sl st, 11 prs (18)
Row 13-23: sc in each st (18)
Row 24: 2 sc, 6 sl st, 10 sc (18)
Row 25-28: sc in each st loop (18)
Row 29: 1 sc, 1 sl-st, turn
Row 30: skip the sl-st of the previous row, 9 sc, 1 sl-st, turn (9)
Row 31-33: 9 sc, 1 sl-st (in the loop of the previous row), turn (9)
Row 34: sc in each st (work full circle) (18)
Sole (2 pcs)
Row 1: ch 7, sc in 2nd from the hook, 4 sc, 3 sc in the last loop, turn to the second side of the chain, 4 sc, increase (14) Row 2: increase, 4 sc,
( increase) x 3 times, 4 sc, (increase) x 2 times (20)
Row 3-12: sc in each loop (20)
Row 13: 2 sc, decrease, 2 sc, (decrease) x 3 times, 2 sc , (decrease) x 2 times (14)
Row 14: decrease – to the end of the row.
Fasten the thread, pull the hole and hide the tail inside.
Ear (2 pcs)
Row 1: in the amigurumi ring 6 sc, turn
Row 2: (increase) x 6 az (12), turn
Row 3: (1 sc, increase) x 6 times (18), turn
Row 4: sc in each loop (18).
Fasten the thread.
Eyes (black, 2 pcs)
Eyes can be purchased at a specialty store or made from polymer clay. Another option is to knit them, for this it is better to take a thread that will be thinner than the one that was used to knit the bear.
Eyebrows
Dial a chain of air loops. Try on in the muzzle of a bear. If the chain length is the desired length, knit a row with single crochets. Fasten with pins on the head (in the form of a wave), sew. Sew chains of air loops over the loops.
Nose
Next, knit with a dark beige thread. The thread is thinner than the main thread of the bear, so that the nose is softer.
Row 1: in the amigurumi ring 6 sc
Row 2: (increase) x 6 times (12)
Row 3: (increase, 1 sc x -6 times (18)
Row 4: (increase, 2 sc) x 6 times (24)
Row 5: 3 sc in one stitch, 6 sc, 3 sc in one stitch, 16 sc (30)
Row 6-12: sc in each stitch (30)
Lower part (mouth)
Row 1: in the ring of amigurumi 6 sc
Row 2: (raise) x 6 times (12)
Row 3: (1 sc, increase) x 6 times (18)
Row 4-5: sc in each loop (18 )
Fold in half, knit, capturing 2 loops, 9 sc. Attach to the nose, find the most suitable place for attaching the lower part to the nose, attach with pins. Sew the mouth to the nose. Do not stuff the muzzle too tightly. Embroider the nose in the form of a triangle with black thread. Pull the stitches tight enough so that the bottom part goes inside.
The light part on the head of the bear
Dial a few VP, try on the muzzle. Calculate what will increase when knitting and the initial row of ch should be less than the final size. Tie the chain all the way around. Half is knitted sbn, the second half of the chain pssn (wider place on the muzzle).
For the light part on the body: knit in straight rows, applying to the body, from time to time making increases (if knitting from top to bottom) or decreases if knitting from bottom to top. Tie around with single crochets.
Sew a light spot to the head, sew on the nose, eyes and ears. Sew the head onto the body of the bear. Sew together the sole and leg, sew the arms and a light spot to the torso.
Feel free to tag me (@freeamigurumii) in your photos on Instagram or Facebook if you’d like!
All Finished.