Chihuahua Dog Amigurumi Free Crochet Pattern
Hello amigurumi lovers and beautiful visitors, I wanted to share the free amigurumi patterns for you here. In my article I will share 1 pattern and how to make it for you. At the end of my article, I will share amigurumi patterns that can generate ideas for you.
Supplies:
4mm crochet hook, 4/Medium weight yarn in any desired colors for body & collar. 8mm safety eyes, safety nose, black embroidery thread, tapestry needle, scissors, and stuffing.
Additional Information:
Difficulty: Easy
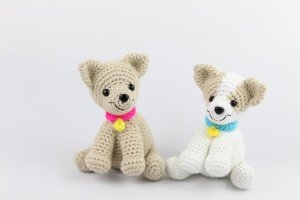
This pattern is to make a cute chihuahua! There are two types of bodies you can make, and the legs you will make depend on the body you decide to make. There is a “sitting” body and a “standing” body. Please see the photos in the pattern to decide which body you want to make.
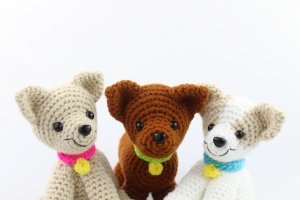
For colors, “Main Color” refers to the color you want the chihuahua to be. You can incorporate color changes if you desire, but this pattern is to make one full colored chihuahua with no color changes.
We start by making the nose, which leads into the head. Then, we make the ears and assemble the face. We then create the body, arms, legs, and tail. After we assemble the body and sew the head on, we create the collar. Then we are done!
Head
In Main Color
Round 1: 6 Sc in Magic Ring (6)
Round 2: *Inc* all around (12)
Round 3: *Inc, Sc in next 3 St* 3 times (15)
Round 4: *Sc* all around (15)
Round 5: *Inc, Sc in next 4 St* 3 times (18)
Round 6: Sc in next 6 St, Sc in next St, add different St marker to Sc just made. Sc in next 4 St, Sc in next St and add different colored St marker to Sc just made, Sc in next 6 St (18)
Round 6 eye markers look like this (above)
Round 7: Sc in next 6 St, *Inc* in the next 6 St, Sc in last 6 St (24)
Round 8: Sc in next 6 St, *Inc, Sc in next St* 6 times, Sc in last 6 St (30)
Round 9: *Inc, Sc in next 4 St* 6 times (36)
Round 10-14: *Sc* all around (36)
Round 15: *Dec, Sc 4* all around (30)
Round 16: *Dec, Sc 3* all around (24)
Round 17: *Dec, Sc 2* all around (18)
Stuff here. Add in Safety Eyes & Place Safety Nose.
Round 18: *Dec, Sc* all around (12)
Round 19: *Dec* all around (6)
Add any additional stuffing and finish off. Sew closed.
Ears: (Make 2)
In Main Color
Round 1: 4 Sc in Magic Ring (4)
Round 2: *Sc* all around (4)
Round 3: *Inc* all around (8)
Round 4: *Inc, Sc* all around (12)
Round 5: *Inc, 2 Sc* all around (16)
Round 6-7: *Sc* all around (16)
Finish off and pin to the head. Make sure to have ears bend inside in the middle for definition.
Smile Assembly: With Black Embroidery Thread
Insert needle adjacent to safety nose, about 4 stitches away. Pull needle out about 2 stitches away. Reinsert needle back through first insertion. Now pull needle through to other side of mouth, and repeat as steps 1-2. Now insert needle in the middle of the mouth, directly underneath the nose. Pull needle to left smile crease. Finally, insert needle to the other half of the smile. Pull through and sew in loose ends.
Chihuahua Bodies
There are 2 types of bodies. The “sitting” body and the “standing” body. The limbs you make will depend on the type of body you make. Sitting Body on the left. Standing body on the right.
Sitting Body
In Main Color
Round 1: 6 Sc in Magic Ring (6)
Round 2: *Inc* all around (12)
Round 3: *Inc, Sc* all around (18)
Round 4: *Inc, 2 Sc* all around (24)
Round 5: *Inc, 3 Sc* all around (30)
Round 6: *Inc, 4 Sc* all around (36)
Round 7: *Inc, 5 Sc* all around (42)
Round 8: *Inc, 6 Sc* all around (48)
Round 9-11: *Sc* all around (48)
Round 12: *Dec, Sc 6* all around (42)
Round 13-15: *Sc* all around (42)
Round 16: *Dec, Sc 5* all around (36)
Round 17-18: *Sc* all around (36)
Round 19: *Dec, Sc 4* all around (30)
Round 20: *Sc* all around (30)
Round 21: *Dec, Sc 3* all around (24)
Round 22: *Dec, Sc 2* all around (18)
Stuff here
Round 23: *Dec, Sc* all around (12)
Round 24: *Dec* all around (6)
Finish off and add any additional stuffing. Sew closed.
Legs: (Make 2)
Make these legs for the sitting body. In Main Color
Round 1: 6 Sc in Magic Ring (6)
Round 2: *Inc* all around (12)
Round 3: *Inc, Sc* all around (18)
Round 4: *Sc* all around (18)
Round 5: Sc in next 3 st, Dec 1 time, Sc in next 13 st (17)
Round 6: Sc 1, *Dec* 3 times, Sc in next 10 st (14)
Round 7: Sc 2, *Dec* 1 time, Sc in next 10 st (13)
Round 8-12:*Sc* all around (13)
Finish off and stuff. Pin to the bottom part of the body.
Arms: (Make 2)
Make these Arms for the sitting body. In Main Color
Round 1: 6 Sc in Magic Ring (6)
Round 2: *Inc* all around (12)
Round 3: *Inc, Sc* all around (18)
Round 4-5: *Sc* all around (18)
Round 6: Sc in next 3 st, Dec 6 times, Sc in next 3 st (12)
Round 7-11:*Sc* all around (12)
Round 12: Sc in next 3 St, *Dec* 1 time, Sc in nest 4 St, *Dec* 1 time, Sc in last St (10)
Round 13-15: *Sc* all around (9)
Finish off and stuff. Pin to the top inner part of the body.
Tail:
In Main Color
Round 1: 4 Sc in Magic Ring (4)
Round 2: *Sc* all around (4)
Round 3: *Inc* all around (8)
Round 4-6: *Sc* all around (8)
Finish off. Pin to the back of the body.
Assembly:
Reassemble any parts to your liking. Start by sewing on the legs, then the arms, then the tail. Last, sew on the head.
Standing Body:
In Main Color
Round 1: 6 Sc in Magic Ring (6)
Round 2: *Inc* all around (12)
Round 3: *Inc, Sc* all around (18)
Round 4: *Inc, 2 Sc* all around (24)
Round 5: *Inc, 3 Sc* all around (30)
Round 6-21: *Sc* all around (30)
Round 22: *Dec, Sc 3* all around (24)
Round 23: *Dec, Sc 2* all around (18)
Stuff here
Round 24: *Dec, Sc* all around (12)
Round 25: *Dec* all around (6)
Finish off and add any additional stuffing. Sew closed.
Legs: (Make 4)
Make these legs for standing body. In Main Color
Round 1: 6 Sc in Magic Ring (6)
Round 2: *Inc* all around (12)
Round 3-7: *Sc* all around (12)
Finish off and stuff. Pin to the bottom part of the body. Make tail as in page 6.
Assembly:
Make any readjustments to your liking. Sew on limbs, and stuff before fully sewing shut. Sew on tail. Finally, sew on the head.
Collar:
In any desired color
Round 1: Ch 22
Round 2: Turn, Hdc in 2nd Ch from hook, Hdc in next 20 St (21)
Finish off.
Collar Tag:
In Yellow
Round 1: 6 Sc in Magic Ring (6)
Round 2: Slst to next St. Finish off
Assembly:
Insert collar tag in the middle of the collar. Pull yarn through, reinsert into the tag, then reinsert into collar.
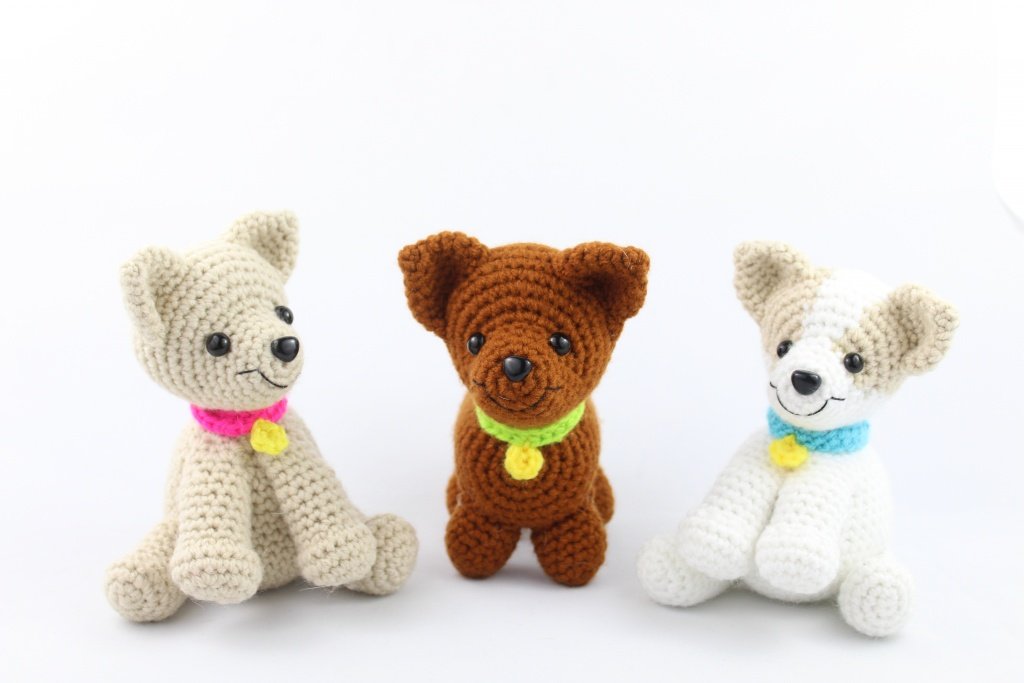
All Finished.
Feel free to tag me (@freeamigurumii) in your photos on Instagram or Facebook if you’d like!