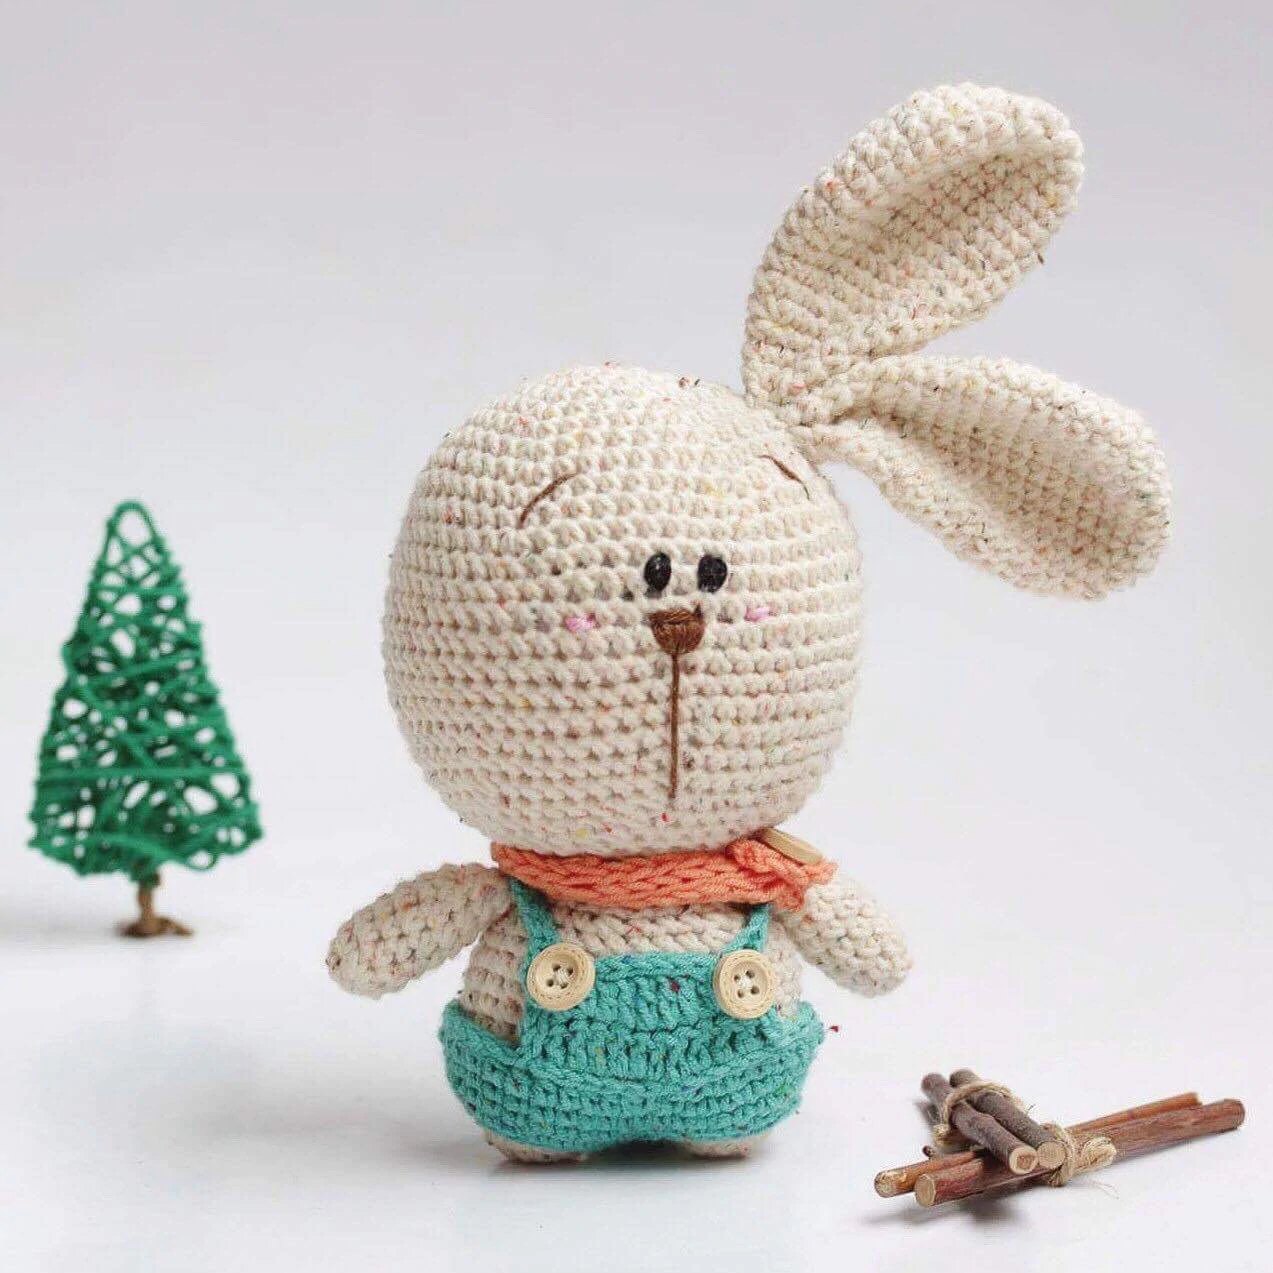
Bunny Free Amigurumi Pattern
Hello amigurumi lovers and beautiful visitors, I wanted to share the free amigurumi patterns for you here. In my article I will share 1 pattern and how to make it for you. At the end of my article, I will share amigurumi patterns that can generate ideas for you.
MATERIALS
YARN COLOR
• (A) white : Alize Cotton Gold Tweed 01 (100g, 330m)
• (B) organe : YarnArt Jeans 23 (50g, 160m)
• (C) green : Alize Cotton Gold 610 (100g, 330m)
OTHER MATERIALS
• Crochet hook size 2-2.5mm
• Knitting needles size 3.5-4mm
• 3 wooden button
• Black, brown and pink thread
• Tapestry needles, pins, stitch markers, scissors
ABBREVIATIONS – US TERMS
Ch Chain
Sc Single Crochet
Inc Single Crochet Increase
Dec Single Crochet Decrease
Hdc Half Double Crochet
Slst Slip Stitch
Mr Magic Ring
Dc Double Crochet
Tr Treble Crochet
(…) Work all stitches in the same stitch
[ ]…x Repeat instructions in
brackets…times
Bobble Bobble Stitch
BLO Back loop only
FLO Front loop only
Rnd Round
Sts Stitches
INSTRUCTIONS
LEGS (yarn A, X2)
rnd sts
1. sc 6 into a magic loop (6)
2. [sc 1, inc] 3x (9)
3. [sc 2, inc] 3x (12)
4. [sc 3, inc] 3x (15)
Break the yarn, make the second leg in the same way, but don’t break the yarn this time. Connect 2 legs together: sc 15 (leg 1) + sc 15 (leg 2) = 30. Move to the Body part
BODY (yarn A)
rnd sts
1. [sc 4, inc] 6x (36)
2. – 7. sc 36 (6 rows) (36)
8. [sc 4, dec] 6x (30)
9. sc 30 (30)
10. [sc 3, dec] 6x (24)
11. sc 24 (24)
12. [sc 2, dec] 6x (18)
13. sc 18 (18)
Break the yarn with a long rest. Stuff.
ARMS (yarn A, X2)
rnd sts
1 sc 6 into a magic loop (6)
2 [sc 1, inc] 3x (9)
3-7 sc 9 (5 rows) (9)
4 dec 1, sc 7 (8)
5 dec 1, sc 6 (7)
6 dec 1, sc 5 (6)
Break the yarn with a long rest. Stuff slightly. Sew 2 edges together.
HEAD (yarn A)
rnd sts
1. sc 6 into a magic loop (6)
2. inc 6 (12)
3. [sc 1, inc] 6x (18)
4. [sc 2, inc] 6x (24)
5. [sc 3, inc] 6x (30)
6. [sc 4, inc] 6x (36)
7. [sc 5, inc] 6x (42)
8. [sc 6, inc] 6x (48)
9. [sc 7, inc] 6x (54)
10. sc 54 (54)
11. [sc 8, inc] 6x (60)
12. – 19. sc 60 (8 rows) (60)
20. [sc 8, dec] 6x (54)
21. sc 54 (54)
22. [sc 7, dec] 6x (48)
23. [sc 6, dec] 6x (42)
24. [sc 5, dec] 6x (36)
25. [sc 4, dec] 6x (30)
26. [sc 3, dec] 6x (24)
27. [sc 2, dec] 6x (18)
Break the yarn with a long rest to sew later. Stuff.
INSTRUCTIONS
EARS (yarn A, X2)
rnd sts
1. sc 6 into a magic loop (6)
2. inc 6 (12)
3. [sc 1, inc] 6x (18)
4. [sc 2, inc] 6x (24)
5. – 10. sc 24 (6 rows) (24)
11. [sc 2, dec] 6x (18)
12. – 14. sc 18 (3 rows) (18)
15. [sc 1, dec] 6x (12)
16. – 17. sc 12 (2 rows) (12)
Break the yarn with a long rest, fold in half and sew two edges together.
TAIL (yarn B)
rnd sts
1. sc 6 into a magic loop (6)
2. [sc 1, inc] 6x (9)
3. sc 9 (9)
Break the yarn with a long rest to sew later. Stuff slightly.
CARROT BAG if you like (yarn B)
rnd sts
1. sc 3 into a magic loop (3)
2. inc 3 (6)
3. [sc 1, inc] 3x (9)
4. sc 9 (9)
5. [sc 2, inc] 3x (12)
6. sc 12 (12)
7. [sc 3, inc] 3x (15)
8. sc 15, change to green yarn (15)
9. (ch 4 , slst 1) 15x (75)
Make 45 chains with yarn C to make the strap. Connect the strap to the bag, use the brown thread to embroider on the bag to look more like a carot. Take a piece of yarn B through the 8th round and then tighten the mouth of the bag, tie the bow.
OVERALLS (yarn C)
rnd sts
1. ch 40, slst into the 1st ch to make a ring (40)
2. – 3. sc 40 (2 rows) (40)
4. sc 17, ch 6 (to make the hole for the tail),skip 6 sts, sc 17 (40)
5. sc 17, sc 6 into the 6 chain space, sc 17 (40)
Break the yarn, from now on we only work on the front side (the back side would have the hole). Join the yarn at the 36th stitch on the last rnd.
6. ch 3 (count as 1 dc), dc 11, turn (12)
7. ch 3 (count as 1 dc), skip 1 st, dc 9 (10)
Do not break the yarn, continue ch 20 to make the strap, slst 1 onto the back side of the overalls, break the yarn. Join the yarn at the other side of the straps, ch 20 to make the strap, slst 1 onto the back side of the overalls, attach 2 wooden buttons on the front side below the straps, hide the remaining yarn.
SCARF (yarn B, using Knitting Needles)
rnd sts
1. Cast on 6 st (6)
2. K6 (6)
3. P6 (6)
Repeat Rnd 2 and 3 till you reach 15cm then cast off, break the yarn, hide the remaning yarn. Use the tapestry needle to attach the wooden button to the scarf. That’s done J!
• Use black thread to embroider the eyes
• Use brown thread to embroider nose, mouth & eyebrows
• Use pink thread to embroider the cheeks.
Enjoy!