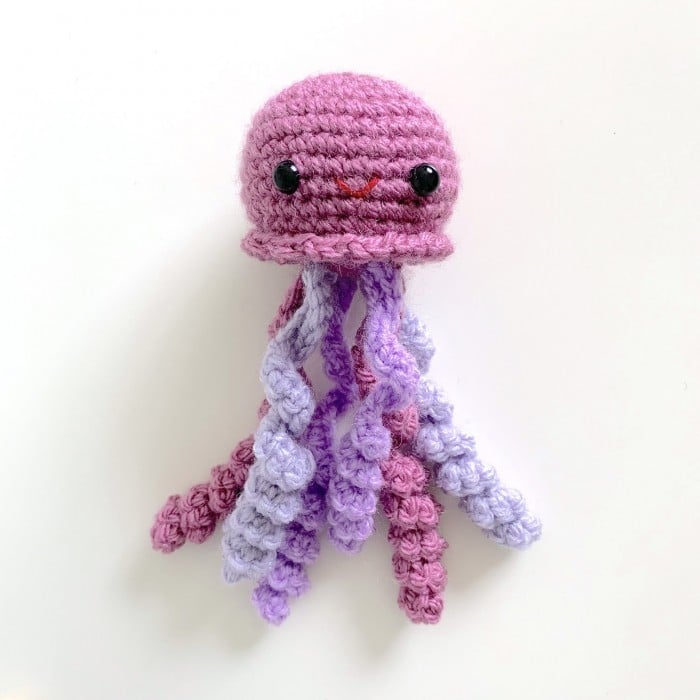
Baby Jellyfish Free Pattern
Hello amigurumi lovers and beautiful visitors, I wanted to share the free amigurumi patterns for you here. In my article I will share 1 pattern and how to make it for you. At the end of my article, I will share amigurumi patterns that can generate ideas for you.
Level: Beginner
Hook size: 3 mm and 4 mm (US size C and G)
Materials: Safety eyes (8 mm), stuffing, tapestry needle, scissors
Yarn: Amigo XL
Wisteria (#58) – 1 skein
Lavender (#59) – 1 skein
Vintage Pink (#49) – 1 skein
Abbreviations:
MR = Magic ring
ch = chain
sl st = slip stitch
sc = single crochet
hdc = half double crochet
inc = increase
dec = decrease
st(s) = stitch(es)
(xx) bracket after round = amount of stitches after ended round
BASE OF JELLYFISH
Use the 3 mm hook and head-colored yarn (vintage pink).
R1: in MR, 6 sc (6)
R2: inc x 6 (12)
R3: (sc, inc) x 6 (18)
R4: (2 sc, inc) x 6 (24)
R5: (3 sc, inc) x 6 (30)
Fasten off; no need to leave a long yarn tail.
TENTACLES (x6)
Use the 4 mm hook and tentacle-colored yarn (vintage pink, lavender, wisteria).
R1: ch 31
R2: 2 sc in 2nd ch from hook, 2 sc in each of the next 14 ch, 1 sc in each of the last 15 ch.
Fasten off with a long tail for sewing the base later. Make 6 tentacles (two of each color).
Note: If you plan to make more tentacles, make sure they can all fit comfortably underneath
the base.
HEAD
Use the 3 mm hook and head-colored yarn (vintage pink).
R1: in MR, sc 6 (6)
R2: inc x 6 (12)
R3: (sc, inc) x 6 (18)
R4: (2 sc, inc) x 6 (24)
R5: (3 sc, inc) x 6 (30)
R6: (4 sc, inc) x 6 (36)
R7-R10: 1 sc in each st (36)
R11: (10 sc, dec) x 3 (33)
R12: (9 sc, dec) x 3 (30)
Do not fasten off. You will be attaching the head to the base and crocheting one more round of “frills” around the jellyfish later in the finishing instructions. For now, insert 8 mm safety eyes between R9-R10, 7 sts apart. If desired, sew a mouth on your jellyfish.
ASSEMBLY/FINISHING
- Using a tapestry needle and the yarn tail from the tentacles, sew each of them one by one onto the right side of the base. Make sure all yarn tail ends are pulled through the base.
- Take the base and match it up with the bottom of the head, tentacles pointing outwards of course.
- Continuing with the unfastened-off end from the head, sl st to join the base to a st in the head. Then, sl st around the entire jelly so that you are attaching the base to the head. (Make sure you stuff the jellyfish before you close it up completely!) Join at the end with a sl st to the first sl st (30)
- Ch 2, (2 hdc in same st, sl st) around.
- Finally, fasten off and weave in the ends.
Congratulations on finishing your Baby Jellyfish!
Happy crocheting 🙂