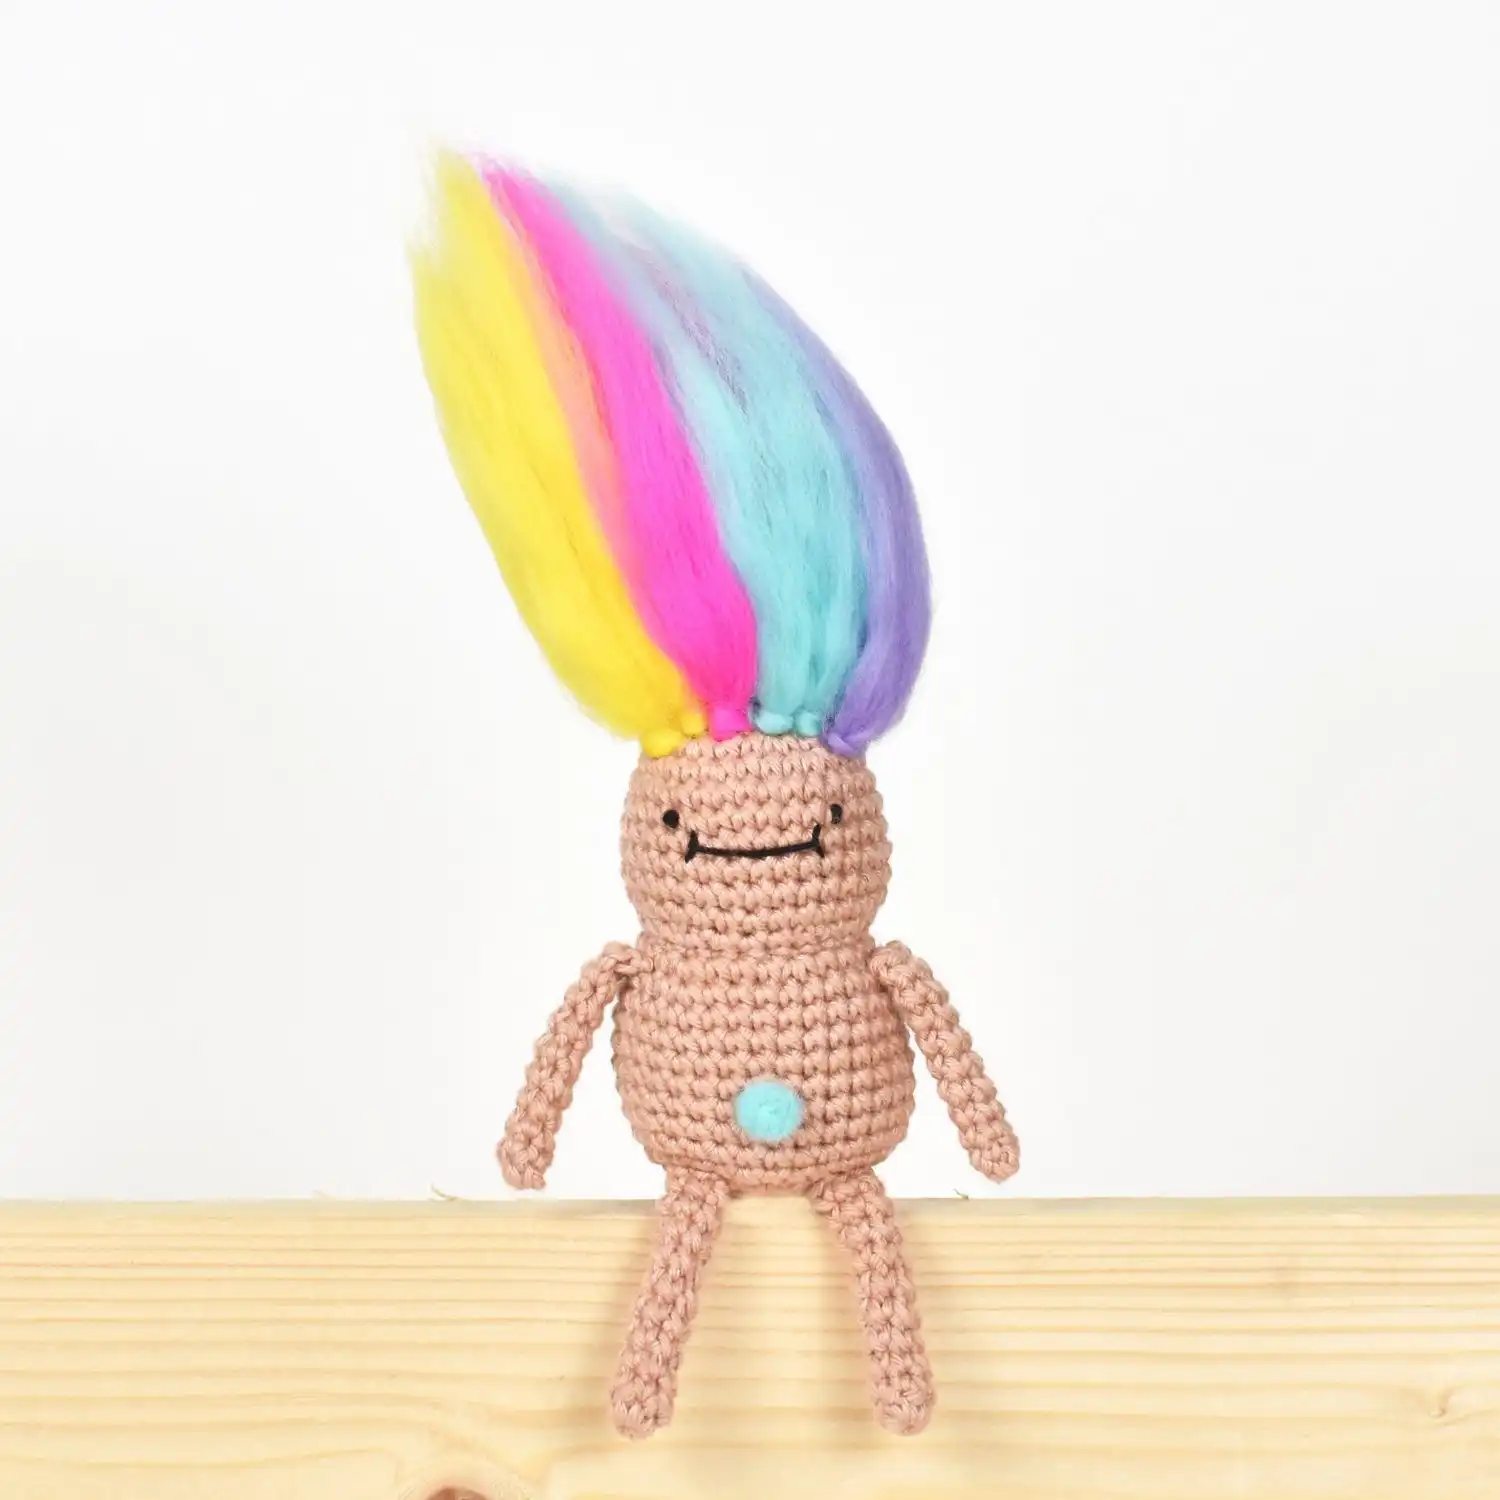
Amigurumi Troll Doll Free Crochet Pattern
Hello amigurumi lovers and beautiful visitors, I wanted to share the free amigurumi patterns for you here. In my article I will share 1 pattern and how to make it for you. At the end of my article, I will share amigurumi patterns that can generate ideas for you.
MATERIALS (MY RECOMMENDATIONS PARENTHESES)
Light weight yarn (DK, light-worsted, or 4-ply) in beige (Rico Design Ricorumi DK in Clay)
Wool yarn or roving in any color for hair (Loopy Mango Merino No. 5 scraps)
Embroidery floss in black for face (DMC Embroidery Floss in black)
2.75mm (C) hook (Clover Amour)
Toy stuffing (Fairfield Poly-Fil)
Needle-felting tool (Clover Pen Styling Needle-Felting Tool)
Stitch marker (Clover Quick Locking Stitch Markers Small – I LOVE these, they don’t leave big holes in your work!)
Embroidery/sewing needle (DMC Embroidery Needle)
Tapestry needle (DMC Tapestry Needle Size 16)
Scissors (Gingher Stork Scissors)
GAUGE
Gauge isn’t important for this pattern. Just make sure your stitches are tight to avoid stuffing show through. My finished amigurumi Troll Doll measures 4 inches tall (not including her luscious hair!
CROCHET STITCHES & ABBREVIATIONS (US TERMINOLOGY)
mr – magic ring
ch – chain
rnd(s) – round(s)
st(s) – stitch(es)
sl st – slip stitch
sc – single crochet
inc – single crochet increase
inv dec – invisible decrease
x – times (indicates number of times to repeat)
[ ] – repeat steps between brackets for the specified number of times
( ) – the number of stitches you should have at the end of each round
NOTES
All sections are worked in a continuous round.
Mark the beginning of each round with a stitch marker.
Make pieces in the order presented.
Not all yarns are created equal! Yarns listed as the same weight frequently differ in size and stretch.
Ricorumi DK is on the thinner end of light weight yarns.
AMIGURUMI TROLL DOLL
HEAD
rnd 1: With beige, make a mr, sc 6 (6 sts)
rnd 2: inc 6x (12 sts)
rnd 3: [sc 1, inc 1] 6x (18 sts)
rnd 4: [sc 1, inc 1, sc 1] 6x (24 sts)
rnd 5: [sc 3, inc 1] 6x (30 sts)
rnd 6-11: sc around (30 sts for 6 rnds)
rnd 12: [sc 3, inv dec 1] 6x (24 sts)
Sl st into next st. Fasten off, leaving an 8 inch tail for weaving in. Embroider face, stuff, and set aside
EMBROIDER FACE NOW
Using the photo as a guide, embroider the face using all 6 strands of embroidery floss and an embroidery needle. Make a french knot for the eyes and backstitch for the mouth. The eyes are on the 7th rnd with 6 sts between them. The mouth is between rnds 8-9 and is 6 sts wide.
BODY
rnds 1-5: Repeat rnds 1-5 from Head above.
rnd 6: [sc 9, inc 1] 3x (33 sts)
rnds 7-13: sc around (33 sts for 7 rnds)
rnd 14: [sc 9, inv dec 1] 3x (30 sts)
— Stuff the body now and continue stuffing until closed. —
rnd 15: [sc 3, inv dec 1] 6x (24 sts)
rnd 16: [sc 1, inv dec 1, sc 1] 6x (18 sts)
rnd 17: [sc 1, inv dec 1] 6x (12 sts)
rnd 18: inv dec 1 6x (6 sts)
Sl st into next st. Fasten off and finish off. Weave in ends.
LEG (Make 2)
rnd 1: Make a mr, sc 6 (6 sts)
rnds 2-10: Sc around (6 sts for 9 rnds)
Sl st into next st. Fasten off, leaving an 8-inch tail for attaching. Set aside.
ARM (Make 2)
rnd 1: Make a mr, sc 5 (5 sts)
rnds 2-9: Sc around (5 sts for 8 rnds)
row 10: fold arm opening in half, sc 2 through both front and back sts (2 sts)
Fasten off, leaving an 8-inch tail for attaching. Set aside.
ASSEMBLING YOUR DOLL
Using your tapestry needle and yarn tail from the head, attach your amigurumi Troll Doll’s head on top of the body. The base of the head should sit above rnd 5 of body. Add more stuffing as needed to get the right shape. Attach legs to bottom of body over rnd 15 with 3 sts between legs. Attach arms to each side of Amigurumi Troll Doll between rnds 5 and 6.
HAIR
How to crochet hair? I used scraps of Loopy Mango Merino No. 5 yarn. I recommend using 100% wool yarn or wool roving for the hair so you can brush it out and achieve a similar look.
How to crochet hair tutorial with layout of where to put Troll Doll Hair.
Step 1: Cut your wool into 7 inch pieces. I used 24 pieces for my Amigurumi Troll Doll’s hair. You want your yarn weight to be similar to a worsted weight yarn. Because I am using a chunky yarn, I’ve separated each strand in 2.
Step 2: Plot where you’d like your hair to go. I dispersed my hair clumps like this.
Step 3: Insert hook from back to front, fold yarn in half and drape over hook.
Step 4: Pull through yarn only this much. Then bring yarn ends through loop. Pull tight.
Step 5: Using a wire brush, brush out hair. Cut hair to desired shape.
BELLY GEM
Step 1: Attach a piece of wool yarn (same method as hair) over rnd 11 of body.
Step 2: Twist and shape yarn into a circle. Using a needle-felting tool, make the gem more compact.
Finished!