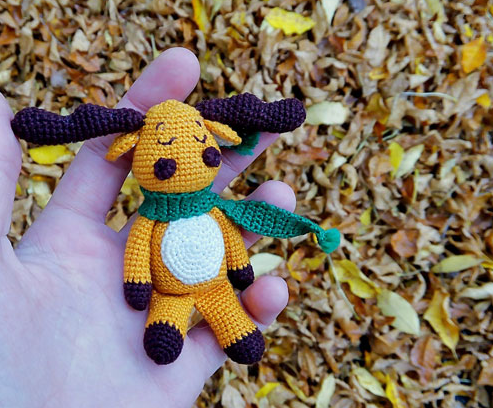
Amigurumi Toy Elk Crochet Pattern
Hello amigurumi lovers and beautiful visitors, I wanted to share the free amigurumi patterns for you here. In my article I will share 1 pattern and how to make it for you. At the end of my article, I will share amigurumi patterns that can generate ideas for you.
You will need:
– light brown yarn
– dark brown yarn
– white or beige yarn
– green yarn
Legend:
sbn – single crochet
pr – increase
dec – decrease
VP – air loop
ss – connecting column
Head
We knit with a light brown thread.
1 row: 6 sc in the amigurumi ring
2 row: 6 inc = 12
3 row: (1 sc, inc) * 6 = 18 4
row: (2 sc, inc) * 6 = 24
5 row: (3 sc, inc) *6 = 30
6 row: (4 sb, inc) *6 = 36
7 row: (5 sb, inc) *6 = 42
8 row: (6 sb, inc) *6 = 48
9-12 row (4 rows ): 48 sc
13 row (6 sc, dec) * 6 = 42
14 row: 42 sc
15 row: (5 sc, dec) * 6 = 36
16 row: 36 sc
17 row: (4 sc, dec) * 6 = 30
18-20 row (3 rows): 30 sc
21 row: (3 sc, dec) * 6 = 24
22 row: 24 sc
23 row: 12 dec = 12
24 row: 6 dec = 6
Fasten the thread, leave the tail for sewing. The end of knitting is the top of the head!!
Horns (2 parts)
We knit with a dark brown thread.
1 row: 6 sc in the amigurumi ring
2 row: (inc, 2sc) * 2 = 8
3-5 row (3 rows): 8 sc
6 row: 2 inc, 6 sc = 10
7 row: sc, 2 inc, 7 sc = 12
8 row: 2 sc, 2 inc, 8 sc = 14
9 row: 3 sc, 2 inc, 9 sc = 16
10 row: 3 sc, 2 dec, 9 sc = 14
11 row: 2 sc, 2 dec , 8 sc = 12
12 row: sc, 2 UB, 7 sc = 10
13 row: 2 sc, inc, 7 sc = 11
14 row: 3 sc, inc, 7 sc = 12
15 row: 4 sc, inc, 7 sc = 13
16 row: 5 sc, inc, 7 sc = 14
17 row: 6 sc, inc, 7 sc = 15
18 row: 7 sc, inc, 7 sc = 16
19 row: UB, 2 sc, 3 dec, 2 sc, 2 dec = 10
20 row: 5 dec
Fasten the thread, leave the tail for sewing.
Ears (4 parts, then tie together in pairs)
First, we knit one part with a light thread:
1 row: 6 sc in the amigurumi ring
2 row: 6 inc = 12
3 row: (2 inc, 1 sc) * 4 = 20
Next, we knit the second part with a light brown thread according to the same pattern, and without cutting the thread, we knit / sew the light and dark parts in a circle as one, one eyelet is obtained.
Fasten the thread, leave the tail for sewing.
Then we knit the second ear according to the same description.
Nostrils (2 parts)
We knit with a dark brown thread.
1 row: 6 sc in the amigurumi ring
2 row: (inc, 2 sc) * 2 = 8
Fasten the thread, leave the tail for sewing. The nostrils are bulging, wrong side out!!
Body
We knit with a light brown thread.
1 row: 6 sc in the amigurumi ring
2 row: 6 inc = 12
3 row: (4 sc, 2 inc) * 2 = 16
4 row: (5 sc, inc, sc, inc) * 2 = 20
5 row: ( 6 sb, inc, 2 sb, inc) * 2 = 24
6 row: (7 sb, inc, 3 sb, inc) * 2 = 28 7
row: (8 sb, inc, 4 sb, inc) * 2 = 32
8 row: (9 sc, inc, 5 sc, inc) * 2 = 36
9-20 row (11 rows): 36 sc
21 row: (6 sc, 6 dec) * 2 = 24
22 row: (3 sc, 4 dec) * 2 = 14
23 row: 7 dec
Fasten the thread, cut and hide inside the body.
Abdomen
We knit with a white or beige thread.
1 row: 6 sc in the amigurumi ring
2 row: 6 inc = 12
3 row: (1 sc, inc) * 6 = 18 4
row: (2 sc, inc) * 6 = 24
5 row: (3 sc, inc) * 6 = 30
6 row: (4 sc, inc) * 6 = 36
Fasten the thread, leave a long tail for sewing in a circle.
Upper paws (2 parts)
We start with dark brown yarn.
1 row: 6 sc in the amigurumi ring
2 row: 6 inc = 12
3-5 row (3 rows): 12 sc
Change color to light brown.
6-19 row (14 rows): 12 sc
Stuff the hoof tightly, fill the paw loosely. Fold the foot in half and knit together 5 sc. Fasten the thread, leave the tail for sewing.
Lower paws (2 parts)
We start with dark brown yarn.
1 row: 6 sc in the amigurumi ring
2 row: 6 inc = 12
3 row: (1 sc, inc) * 6 = 18
4-6 row (3 rows): 18 sc
Change the thread to light brown.
7-16 row (10 rows): 18 sc.
Stuff the hoof tightly, fill the paw loosely. Fold the foot in half and knit together 8 sc. Fasten the thread, leave the tail for sewing.
Tail
Knit with a light brown thread.
1 row: 6 sc in the amigurumi ring
2 row: 6 inc = 12
Fasten the thread, leave the tail for sewing.
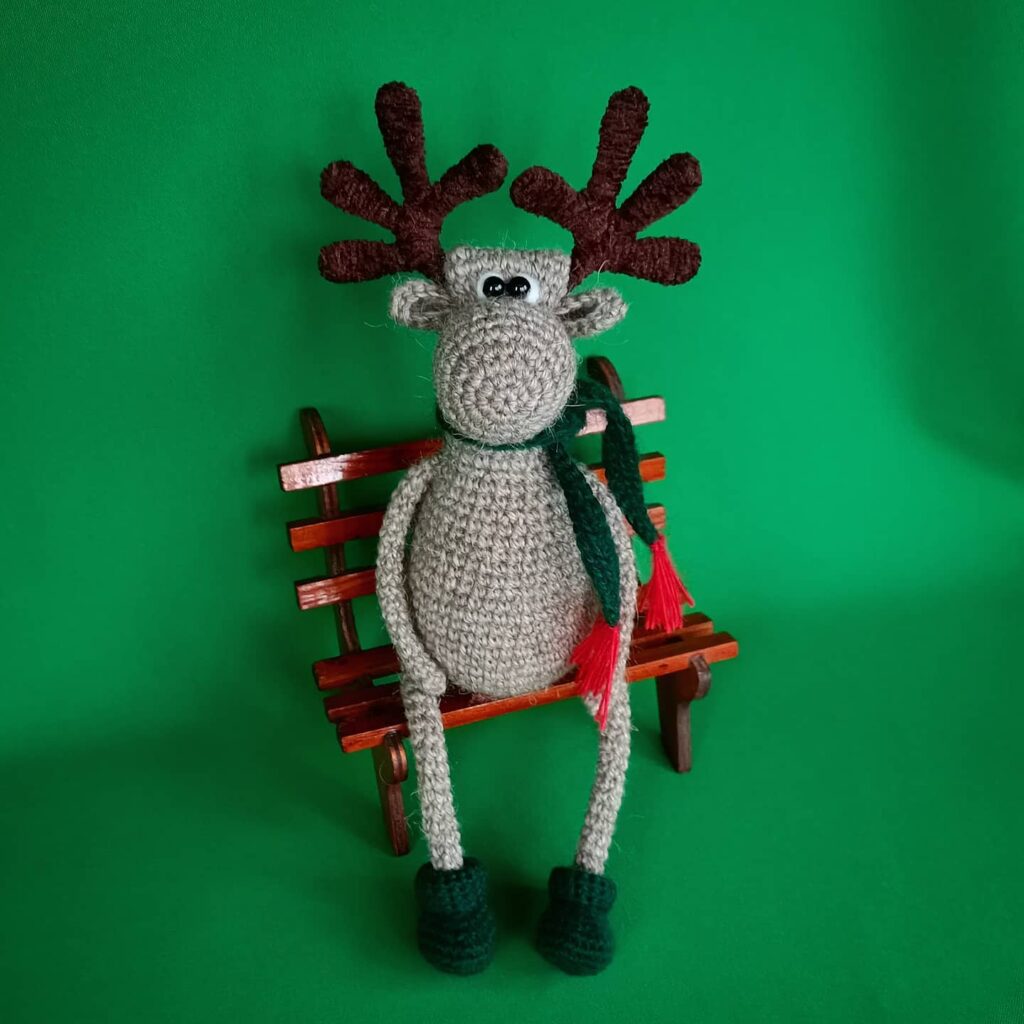
Scarf
We knit with a green thread.
1st row: knit 6 ch
2nd row: 5 sbn, ch
3rd row: 5 sbn, ch
Continue knitting to the length we need and knit the last row:
4 sbn, ss
Cut off and hide the thread. You can tie small pieces of thread to the ends of the scarf like a fringe (dark brown or green yarn).
Assembly:
Do not forget that the end of the knitting of the head is its top!
1) Sew the nostrils to the head at a height of 11-13 rows, counting from below.
2) Sew the ears to the head at a height of 18-19 rows, counting from below.
3) Sew the horns to the head at a height of 20-21 rows, counting from the bottom.
4) We embroider eyes and eyebrows on the head.
5) We sew the abdomen to the body in a circle, placing it with two corners up.
6) Sew the upper paws to the body at a height of 4-5 rows, counting from above.
7) Sew the lower paws perpendicular to the body. Right paw – from the center of the final ring (the last row of the body) we go to the right and down when we sew. Left paw – from the center of the final ring (the last row of the body) we go to the left and down when we sew.
8) Sew the tail to the body at a height of 18-19 rows, counting from above.
9) We sew the head to the body in such a way that the 6 initial sc of the head are slightly in front of the body, visible, and not sewn to it.
Feel free to tag me (@freeamigurumii) in your photos on Instagram or Facebook if you’d like!
All Finished.