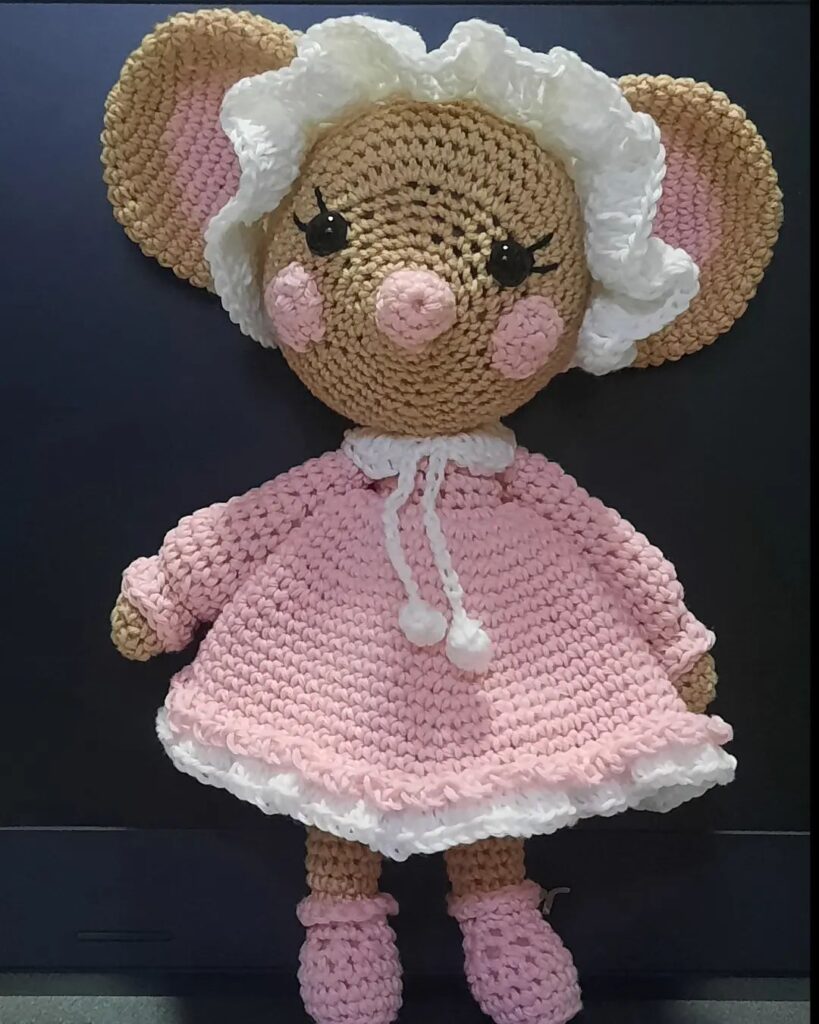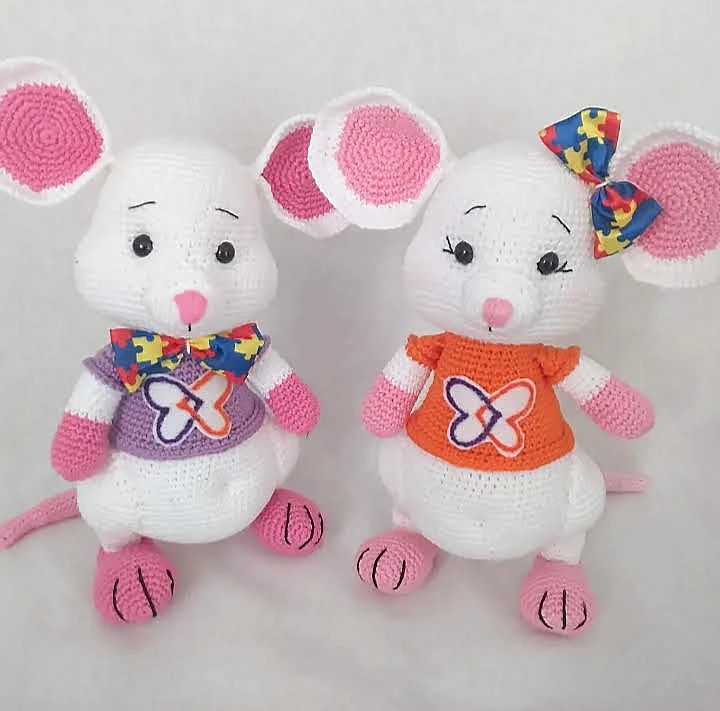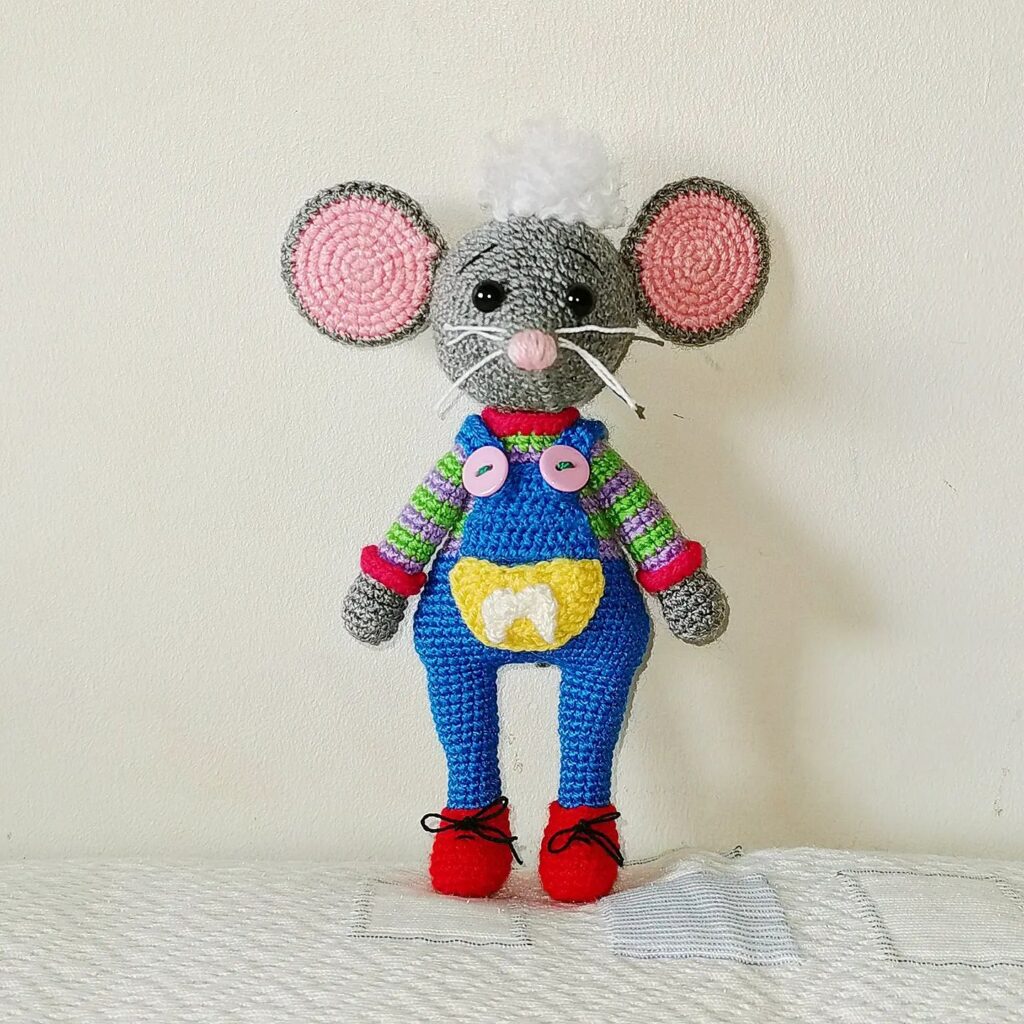
Amigurumi Mouse Crochet Pattern
Hello amigurumi lovers and beautiful visitors, I wanted to share the free amigurumi patterns for you here. In my article I will share 1 pattern and how to make it for you. At the end of my article, I will share amigurumi patterns that can generate ideas for you.
Necessary tools and materials:
Hook No. 1.75
Needle for sewing knitwear
Scissors
Marker
Yarn of two colors
Thin thread for embroidering eyebrows and spout
Holofiber
Two beads for an eyelet
Legend:
RLS – single crochet
PR – increase (two RLS in one loop)
UB – decrease (knit two RLS together)
SS – connecting column
We start knitting with the
Muzzle
1 row: 6 RLS in the amigurumi ring (6)2 row: 1 PR, repeat 6 times (12)3 row: (1 RLS, PR) repeat 6 times (18)4 row: unchanged (18)5 row: (2 sc, pr) repeat 6 times (24)6 row: unchanged (24)7 row: (3 sc, pr) * 6 (30)8 row: 12 sc, 6 pr, 12 sc (36 )9 row: in this row we make 6 more PRs in this way – we knit RLS to the place where there was an increase in the previous row and we do 1 PR in it. And so on – in each increase from the previous row we make PR (between them we get 1 RLS) and we knit the row with single crochets.Where we make increases, the rise for the eyes and forehead will be formed, so the beginning of the row should be at the bottom of the head, from the side of the fastening with the neck.12 RLS, (PR, RLS) * 6, 12 RLS (42)10 row: in this row you need to evenly make 4 PR:12 RLS, PR, 3 RLS, PR, 5 RLS, PR, 3 RLS, PR, RLS up to end in a row. (46)Row 11: Similar to Row 10: +4 CR evenly at the top of the head – do 1 CR in each increase of the previous row, all other loops are just sc. (50)12 – 17 row: unchanged (50)18 row: (23 sc, dec) * 2 (48)19 row: (6 sc, dec) * 6 (42)20 row: (5 sc, dec) * 6 (36)21 row: (4 RLS, UB) * 6 (30)22 row: (3 RLS, UB) * 6 (24)23 row: (2 RLS, UB) * 6 (18)We stuff the part.24 row: (1 RLS, UB) * 6 (12)25 row: 6 UB.We close knitting. We fasten and cut the thread.
Ears
1 row: 8 sc in the amigurumi ring (8)
Turn knitting:
2 row: lifting loop, inc, 6 sc, inc (10)
Turn knitting:
3 row: 10 sc.
We fix and cut the thread, leaving the end for sewing.
Body
Knit from the bottom up. We take the yarn of the color that was chosen for the clothes.
1st row: 6 sc in the amigurumi ring (6)
2nd row: 1 pr, repeat 6 times (12)
3rd row: (1 sc, pr) repeat 6 times (18)
4th row: (2 sc, pr) repeat 6 times (24)
5 row: (3 sc, pr) repeat 6 times (30)
6 row: (4 sc, pr) repeat 6 times (36)
7 row: (5 sc, pr) repeat 6 times (42)
8 row : (6 sc, pr) repeat 6 times (48)
9-13 row: no change (48)
14 row: (6 sc, dec) * 6 (42)
15-16 row: no change (42)
17 row: 6 UB, 30 RLS (36)
18 row: unchanged (36)
19 row: (4 RLS, UB) * 6 (30)
20 – 24 row: unchanged (30)
25 row: (3 RLS, UB) * 6 (24)
This is where the neck starts. We take the main color.
26 row: (2 RLS, UB) * 6 (18)
27 row: (1 RLS, UB) * 6 (12)
We fix the thread and cut it off, leaving the required length for sewing.
Handles
We start knitting with the main color:
1 row: 6 RLS in the amigurumi ring (6)
2 row: PR * 6 (12)
3 row: (1 RLS, PR) * 6 (18)
4 – 6 row: unchanged (18)
7 row: 3 UB, 12 RLS (15)
8 – 10 row: unchanged (15)
11 row: (3 RLS, UB) * 3 (12)
We stuff the part. Be very careful with filler. It is not necessary to fill the part completely, only the lower part. Otherwise, the handles will stick out strongly to the sides. Change the yarn (clothing color).
12 – 15 row: unchanged (12)
16 row: UB * 6 (6). We close knitting.
We fix and cut the thread.
Legs
We knit with yarn of the main color.
1 row: 6 sc in the amigurumi ring (6)
2 row: CR *6 (12)
3 row: (1 sc, pr) *6 (18)
4 row: (2 sc, pr) *6 (24)
5 row : (3 RLS, CR) * 6 (30)
6 – 8 row: unchanged (30)
9 row: 6 UB, 18 RLS (24)
10 row: unchanged (24)
11 row: 4 UB, 16 RLS ( 20)
12 – 16 row: unchanged (20)
We fill the part in half.
The upper part of the foot should be left empty so that it fits better to the body.
17 row: (UB, 8 RLS) * 6 (18)
18 row: unchanged (18)
19 row: (1 RLS, UB) * 6 (12)
20 row: UB * 6 (6). We close knitting.
We fix the thread and cut it off.
Tail
1 row: 6 sc in the amigurumi ring (6)
2 row: (1 sc, pr) * 3 (9)
3 row: (1 sc, dec) * 3 (6)
, fasten and cut the thread, leaving the desired length for sewing.
Shoes
1-5 rows are knitted in the same way as the legs (up to 30 loops with single crochets), but you need to crochet half a size larger.
6 row: two air loops (hereinafter ch) and behind the back wall 30 CCH, SS (30)
7 row: 2 ch, 30 CCH for two walls, SS (30)
8 row: 9 RLS, 6 UB SSN, 9 SSN, SS (24).
We fix the thread and cut it off. We tie a rope or ribbon to the back wall of the shoes and wrap it around the legs.
Flower on the head
1st row: 9 sc in the amigurumi ring (9)
2nd row: 3 dc in each loop (27)
3rd row: 2 dc in each loop (54)
To make the flower lush, in the third line you can do 3 CR SSN in each loop. For the rope, we collect the required amount of v.p.
Decoration:
Sew on the head. We sew the arms and legs with a rope fastening to move. For a skirt, we use a ribbon 20-30 cm long. We string it on a thread or elastic band and sew it to the belly on the row where the reductions began. So that the flower from the head is not lost, for reliability it is better to sew it with a thin thread behind the inner wall of the loops. We make out the muzzle – sew on the eyes, embroider the nose and eyebrows.
Feel free to tag me (@freeamigurumii) in your photos on Instagram or Facebook if you’d like!
All Finished.