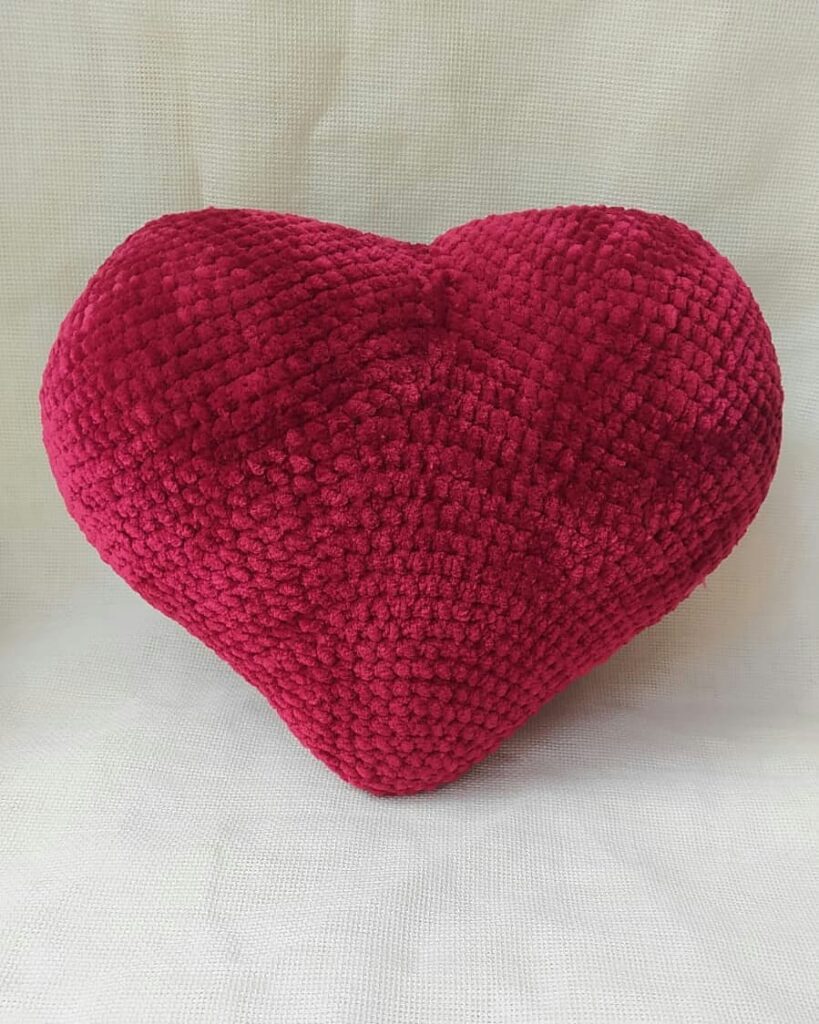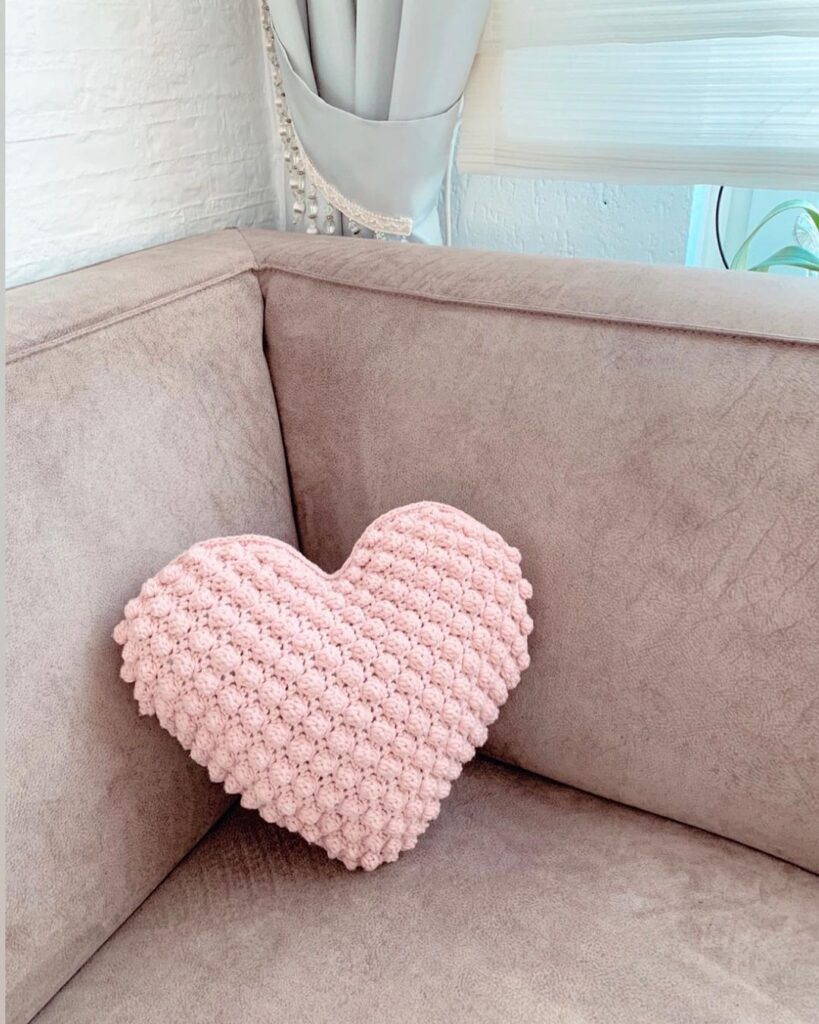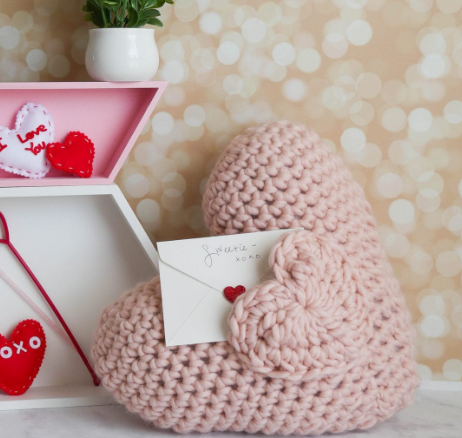
Amigurumi Love Filled Pilow Crochet Pattern
Hello amigurumi lovers and beautiful visitors, I wanted to share the free amigurumi patterns for you here. In my article I will share 1 pattern and how to make it for you. At the end of my article, I will share amigurumi patterns that can generate ideas for you.
Knitting terms
ch: chain (v.p)
mr = Magic ring (KA)
sc: single crochet (sbn)
inc = increase (pr)
dec = decrease (ub)
R : Row
Rnd : round
ch: chain
mr = Magic ring
sc: single crochet
inc = increase (2 sc in the next stitch)
dec = decrease (single crochet 2 stitches together)
BLO: Back loop only
FLO: Front loop only
( )* 6 = repeat whatever is between the brackets the number of times stated
st, sts : stitch, stitches
Materials:
-2 Skeins Crazy Sexy Wool from Wool and the Gang in Cameo Rose
-Size N/P 10mm crochet hook
-Large eye tapestry needle
*For the entirety of this project don’t join rounds, simply place a stitch marker in the first stitch of each round and move it with each round
Top bumps of the heart:
*make 2
Make a magic ring, 6 Sc inside ring (6)
Round 2: 2 Sc in each around (12)
Round 3: 2 Sc in first, Sc in next, repeat around (18)
Round 4: 2 Sc in first, Sc in next 2, repeat around (24)
Rounds 5-8: Sc in each around (24)
– After working first bump of the heart, break yarn, finish off and start second bump
– After working Round 8 of the second bump, don’t finish off
Round 9: Join to the next st after you finished off on the first bump of the heart with a Sc, Sc in each st around that bump and then in each st around the second bump (36)
– Now the bumps are joined and you continue working around the body of the heart
Body of the heart:
Round 10: Sc next 11, Sc decrease, Sc next 22, Sc decrease, Sc next 11 (46)
Round 11: Sc next 11, Sc decrease, Sc next 20, Sc decrease, Sc next 11 (44)
Round 12: Sc next 10, Sc decrease, Sc next 20, Sc decrease, Sc next 10 (42)
Round 13: Sc next 10, Sc decrease, Sc next 18, Sc decrease, Sc next 10 (40)
Round 14: Sc next 10, Sc decrease, Sc next 16, Sc decrease, Sc next 10 (38)
Round 15: Sc next 11, Sc decrease, Sc next 14, Sc decrease, Sc next 11 (36)
Round 16: Sc next 11, Sc decrease, Sc next 12, Sc decrease, Sc next 11 (34)
Round 17: Sc next 11, Sc decrease, Sc next 10, Sc decrease, Sc next 11 (32)
Round 18: Sc decrease, Sc next 2, repeat around, Sc in last (25)
Round 19: Sc in each around (25)
– Stuff until firm with polyfil stuffing & continue stuffing after each round
Round 20: Sc decrease, Sc, repeat around, Sc in last (17)
Round 21: Sc in each around (17)
Round 22: Sc decrease around, Sc, repeat around, Sc in last (11)
Round 23: Sc in each around, finish off leaving a long tail for sewing (11)
– Thread tail on a tapestry needle, finish stuffing and sew up the bottom of the pillow (see video above to see my trick!)
– With a spare piece of yarn, sew with a whip stitch between bumps to sew up gap from joining during Round 9, weave ends
Pocket:
– Follow the Easy Crochet Heart in 3 Sizes Pattern – make the medium size heart
– Sew only the bottom half of the heart to the center front of the pillow
Feel free to tag me (@freeamigurumii) in your photos on Instagram or Facebook if you’d like!
All Finished.