Amigurumi Hedgehog Baby Crochet Pattern
Hello amigurumi lovers and beautiful visitors, I wanted to share the free amigurumi patterns for you here. In my article I will share 1 pattern and how to make it for you. At the end of my article, I will share amigurumi patterns that can generate ideas for you.
Supplies:
4mm crochet hook, 4/Medium weight yarn in Main Fur Color, light brown, and white. 8mm safety eyes for big hedgehog, 6mm safety eyes nor the nose, and baby hedgehog, tapestry needle, scissors, and stuffing.
Additional Information:
Difficulty: Easy
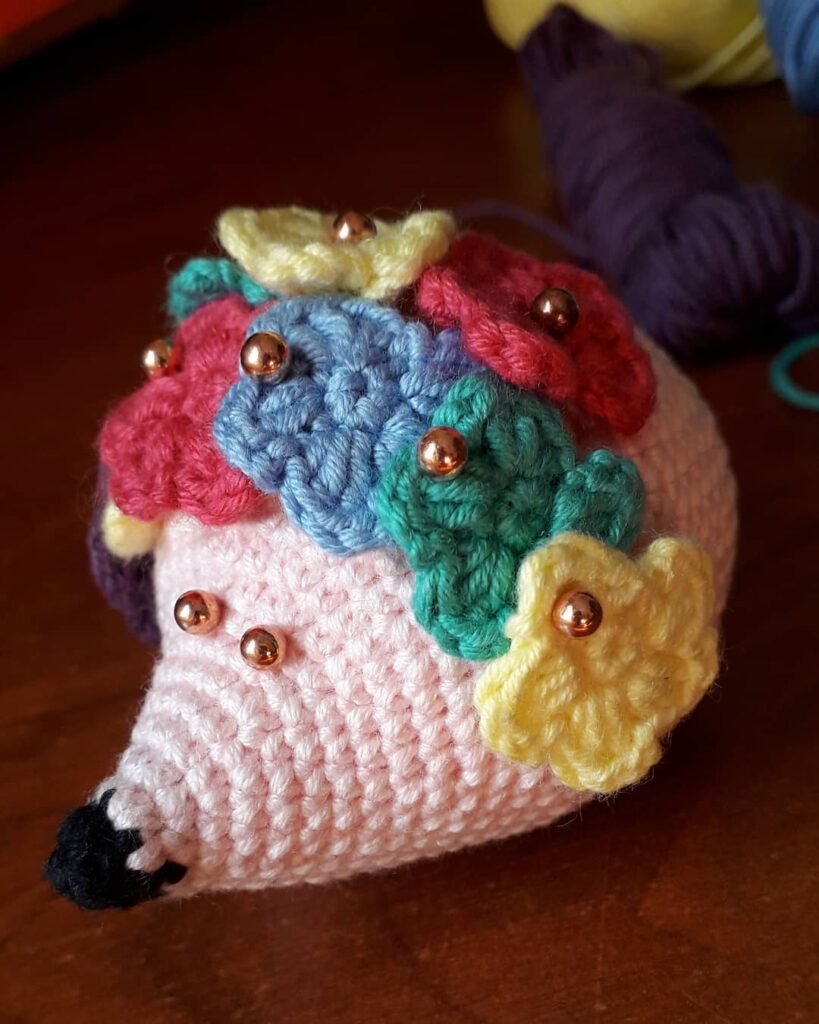
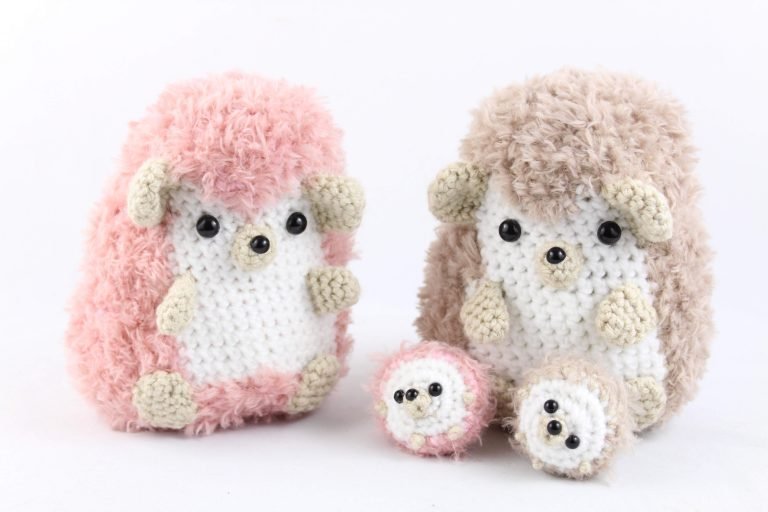
This pattern refers to “Main Color”. This is the main color you will use for your hedgehog. I used a furry color in pink for my main color. We start by making the head, which then works into the body. The head and body are one piece. We then make the muzzle, ears, arms & legs. Then we are done with the big hedgehog! Last, we make the baby hedgehog. Done!
Note about yarn: This pattern uses Red Heart’s Hygge Fur yarn. Since crocheting with fuzzy yarn can be really hard, I pair it with a regular 4 weight yarn in a similar color. If you crochet with the strands of fuzzy yarn and regular yarn together, it will be much easier to see your stitches. Please remember that this pattern is designed for fuzzy yarn. So if you make this pattern with regular yarn it may come out pretty different. The fuzzy yarn requires less shaping in the pattern, so if you use regular yarn your hedgehog may come out looking more blobby and smaller.
Another note: If you have your hedgehog facing wrong side out, he will be much fuzzier. I have my big hedgehogs facing wrong side out.
Head/Body:
In Main Color
Round 1: 6 Sc in Magic Ring (6)
Round 2: *Inc* all around (12)
Round 3: *Inc, Sc* all around (18)
Round 4: *Inc, 2 Sc* all around (24)
Round 5: *Inc, 3 Sc* all around (30)
Round 6: *Inc, 4 Sc* all around (36)
Round 7-9: *Sc* all around (36)
Round 10: Sc in next 12 St. Switch to White and Sc in next 4 St, Switch to Main Color and Sc in next 4 St, Switch to White and Sc in next 4 St, Switch to Main Color and Sc in last 12 St (36)
Round 11: Sc in next 12 St. Switch to White and Sc in next 5 St, Switch to Main Color and Sc in next 2 St, Switch to White and Sc in next 5 St, Switch to Main Color and Sc in last 12 St (36)
Round 12: Sc in next 12 St. Switch to White and Sc in next 12 st. Switch to Main Color and Sc in last 12 St (36)
Round 13: Sc in next 8 st, *Inc* in the next 3 st, Sc in the next st. Switch to White and Sc in next 2 st. Sc in the next st and add a different colored st marker to the Sc just made. This marks where to place the eye. Sc in the next 5 st. Sc in the next st and add a different st marker to the Sc just made. Sc in the next 3 st. Switch to Main Color. Sc in the next st. *Inc* in the next 3 st*, Sc in the last 8 st (42)
Round 13 eye markers pictured below
Round 14-17: Sc in the next 15 st. Switch to White and Sc in the next 12 st. Switch to Main Color and Sc in the next 15 st (42)
Add safety eyes here.
Round 18-21: Sc in the next 14 st. Switch to White and Sc in the next 14 st. Switch to Main Color and Sc in the next 14 st (42)
Round 22: Sc in the next 2 st. Repeat *Inc in next st, Sc in next 3 st* 3 times, Switch to White and Sc in the next 14 st. Switch to Main Color and Sc in the next 2 st. Repeat *Inc in next st, Sc in next 3 st* 3 times (48)
Round 23-25: Sc in the next 17 st. Switch to White and Sc in the next 14 st. Switch to Main Color and Sc in the next 17 st (48)
Round 26: Repeat *Dec, Sc in the next 6 st* all around (42)
Round 27: *Dec, Sc 5* all around (36)
Round 28: *Dec, Sc 4* all around (30)
Stuff here. Continue adding stuffing after each round.
Round 29: *Dec, Sc 3* all around (24)
Round 30: *Dec, Sc 2* all around (18)
Round 31: *Dec, Sc* all around (12)
Round 32: *Dec* all around (6)
Finish off. Stuff any additional stuffing now and sew closed.
Muzzle:
In Light Brown
Round 1: 6 Sc in Magic Ring (6)
Round 2: *Sc* all around (6)
Round 3: *Inc, Sc 2* all around (8)
Finish off. Insert a 6mm safety eye (or nose) into the very middle of the muzzle. Pin to the head as shown. Sew on.
Ears: (Make 2)
In Light Brown
Round 1: 6 Sc in Magic Ring (6)
Round 2: *Inc* all around (12)
Round 3-5: *Sc* all around (12)
Finish off. Pin onto the head as shown. Sew on.
Arms: (Make 2)
In Light Brown
Round 1: 7 Sc in Magic Ring (7)
Round 2-5: *Sc* all around (7)
Finish off. Pin to the arm area as shown and sew on.
Legs: (Make 2)
In Light Brown
Round 1: 6 Sc in Magic Ring (6)
Round 2: *Inc, Sc 2* all around (8)
Round 3-6: *Sc* all around (8)
Finish off. Pin to the hedgehog as shown and sew on.
Baby:
In Light Brown
Round 1: 4 Sc in Magic Ring (4)
Round 2: *Sc* all around (4)
Switch to White
Round 3: *Inc* in the first st. Sc in the next st and add a different colored st marker to the Sc just made. This marks where to place the eye. Sc in the same st. Sc in the next st. Sc in that same st and add a different colored st marker to the Sc just made. *Inc* in the last st (8)
Round 3 eye markers pictured below
Round 4: *Inc* in the next st. *Inc* 2 times in each of the next 2 st, *Inc* in the next 5 st (20)
Round 5: *Sc* all around (20)
Switch to Main Color. Add eyes in now. Place 6mm safety eye/nose into very middle of muzzle.
Round 6-7: *Sc* all around (20)
Round 8: *Dec, Sc 2* all around (15)
Round 9: *Dec* 7 times, Sc in the last st (8)
Stuff and sew closed.
Arms and legs:
In light Brown
With a long piece of light brown yarn, insert the needle into the body and pull out where you will put the arm. Tie a knot in this spot 3 times. This will make an arm. Insert needle one stitch over and pull out to the leg area. Repeat making the 3 knots, and pull out to the next leg area. Repeat the knots, and pull out to the arm area. Make the knots and finish off.
Feel free to tag me (@freeamigurumii) in your photos on Instagram or Facebook if you’d like!
All Finished.