Amigurumi Chick Crochet Pattern
Hello amigurumi lovers and beautiful visitors, I wanted to share the free amigurumi patterns for you here. In my article I will share 1 pattern and how to make it for you. At the end of my article, I will share amigurumi patterns that can generate ideas for you.
This is what you need to make Amigurumi Chick Crochet Pattern:
— Fine weight yarn;
— 2.5 mm crochet hook;
— Some brown lace yarn for eyes;
— Soft stuffing;
— Yarn needle, sewing needle, scissors;
If you prefer to work continuously, you should use a stitch marker.
Note:
You can use this pattern to make larger or smaller toy by using finer or bulkier yarn.
Don’t forget to choose the right hook size (I recommend you to pick crochet hook one size smaller than suggested on your yarn label, so you will get more tightly fabric).
Yarn and colors:
Color 1: YarnArt #03 (white)
Color 2: YarnArt #35 (yellow)
Color 3: Gazzal Baby Cotton #3452 (mint)
Abbreviations:
ch = chain(s)
rnd(s) = round(s)
sc = single crochet
dc = double crochet
sl st = slip stitch
tog = together
blo = back loop only
sc2tog = sc next 2 stitches together
[ ] × … = repeat instructions in brackets … times
(…) = total amount of stitches in round
LET’S START!
1. Body+Head:
Color 1
Start with a magic ring
1 rnd: 6 sc into the magic ring (6)
2 rnd: 2 sc in each next sc (12)
3 rnd: [1 sc in next sc, 2 sc in next sc] × 6 (18)
4 rnd: [1 sc in next 2 sc, 2 sc in next sc] × 6 (24)
5 rnd: [1 sc in next 3 sc, 2 sc in next sc] × 6 (30)
6 rnd: [1 sc in next 4 sc, 2 sc in next sc] × 6 (36)
7 rnd: [1 sc in next 5 sc, 2 sc in next sc] × 6 (42)
8–11 rnds: 1 sc in each next sc (42) — total 4 rounds
12 rnd: [1 sc in next 12 sc, sc2tog] × 3 (39)
13 rnd: 1 sc in each next sc (39)
14 rnd: [1 sc in next 11 sc, sc2tog] × 3 (36)
15 rnd: 1 sc in each next sc (36)
16 rnd: [1 sc in next 10 sc, sc2tog] × 3 (33)
17 rnd: 1 sc in each next sc (33)
18 rnd: [1 sc in next 9 sc, sc2tog] × 3 (30)
19 rnd: 1 sc in each next sc (30)
Stuff the piece and continue working
20 rnd: [1 sc in next 3 sc, sc2tog] × 6 (24)
21 rnd: [1 sc in next 2 sc, sc2tog] × 6 (18)
22 rnd: [1 sc in next sc, sc2tog] × 6 (12)
Stuff it a little more and continue
23 rnd: [sc2tog] × 6 (6)
Once you finished leave yourself a long tail. Thread your needle with the tail, insert the needle under back loop of your stitch, pull through, repeat in every next sc until you’ve made it all the way around. Pull the yarn until you have tightly closed the hole. Fasten off and weave in tail.
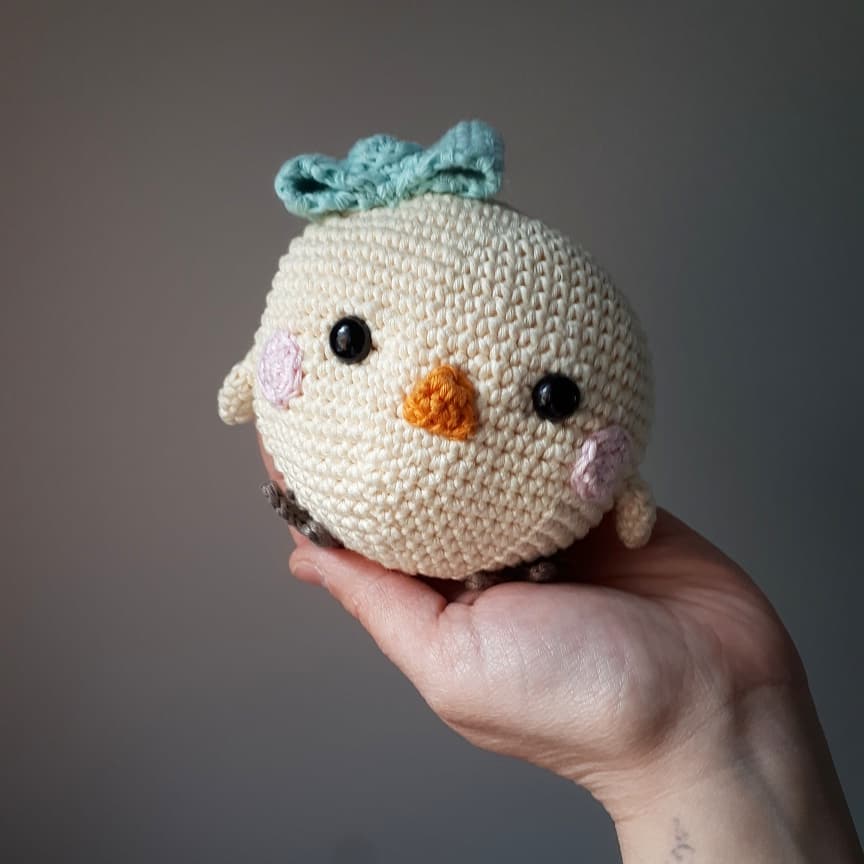
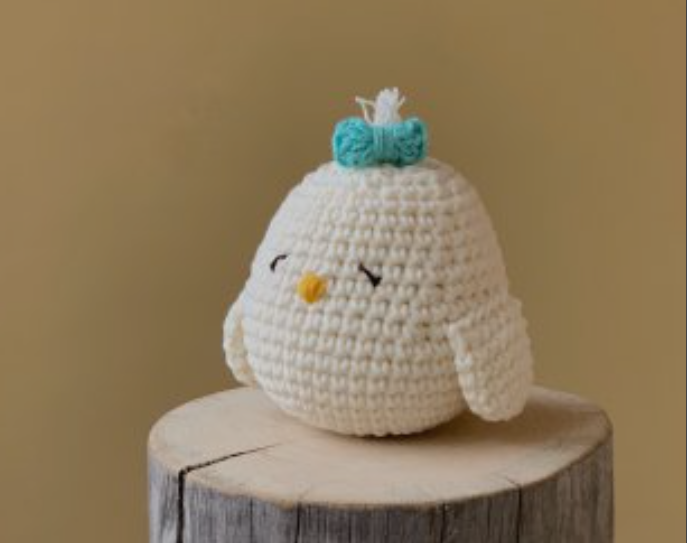
Make a beak with Color 2 as in shown at the picture. Make eyes with brown lace yarn. Fasten off and weave in all tails.
2. Wings × 2 :
Color 1
Start with a magic ring
1 rnd: 6 sc into the magic ring (6)
2 rnd: 2 sc in each next sc (12)
3–7 rnds: 1 sc in each next sc (12) — total 5 rounds
Fasten off and leave a long tail.
3. Sew the wings to the body.
Make a little topknot as it shown at the picture. Fasten off and weave in all ends.
4. Make a little bow:
Color 3
Do 12 dc into a magic ring. Join with a sl st. Fold it in a half and yarn over several times. Fasten off and leave a long tail. Sew the bow to the Head.
Feel free to tag me (@freeamigurumii) in your photos on Instagram or Facebook if you’d like!
All Finished.