Amigurumi Bunny Free Pattern
Hello amigurumi lovers and beautiful visitors, I wanted to share the free amigurumi patterns for you here. In my article I will share 1 pattern and how to make it for you. At the end of my article, I will share amigurumi patterns that can generate ideas for you.
Equipements; this project is perfect for left over yarn, as you don’t need much. I prefer cotton yarn tho. Make the bunny any color, I made mine white. Adjust your hook size to be suitable for the yarn you use (make sure to use a hook on the lower range of the recommended size for your yarn)
Here are my yarn suggestions; DROPS Safran – DMC Natura Just Cotton – Schachenmayr Catania – Dale Vipe
Hook size 2.0-2.5(-3.0) mm
You’ll also need safety eyes, filling (like poleyester filling), a needle, and pink stamp or something similar if you’d like to make «blush»
Abbreviation
Regular us terms
Inc – 2 sc in one (increase)
Dec – 2sc together (decrease)
Make sure to fill as you go. Arms are attached to body in the end. Fasten off loose thread (hide them inside the doll), and cut off.
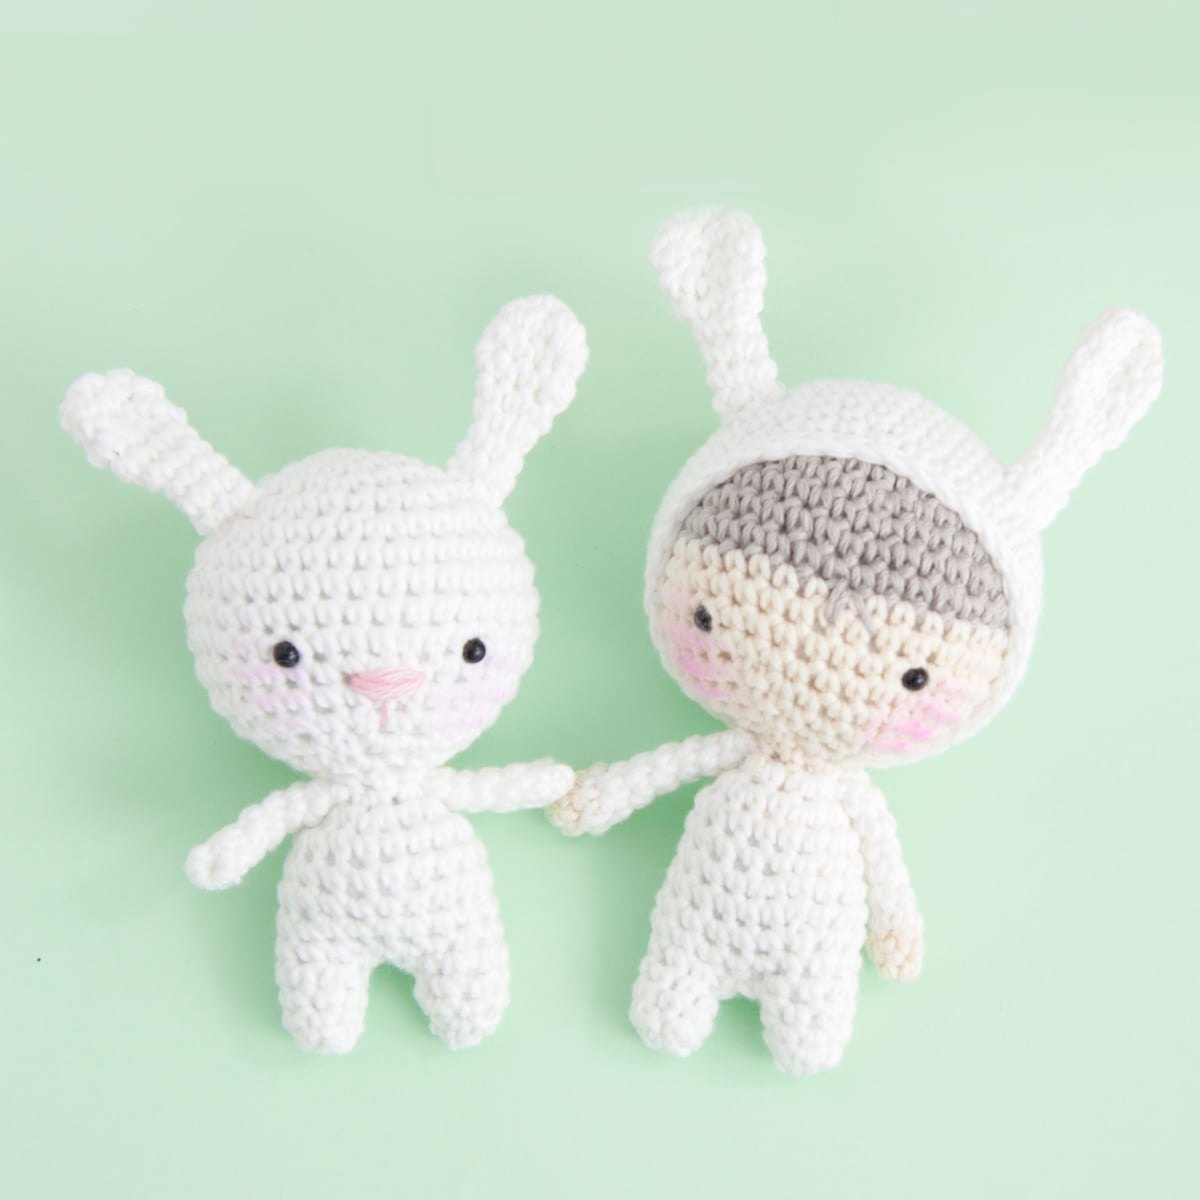
Crochet Mini Bunny
HEAD
R1: 6 i MR
R2: inc x6 (12)
R3: (sc, inc) x6 (18)
R4: (sc, inc, sc) x6 (24)
R5: (inc, sc3) x6 (30)
R6: (4sc, inc) x6 (36)
R7-11 (5 rounds): 36 sc
R12: (dec, 4sc) x6 (30)
R13: (dec, 3sc) x6 (24)
R14: (dec, 2sc) x6 (18)
Attach eyes between R10-11-12, 6-7 sts apart, start filling
R15: (dec, sc) x6 (12)
R16: (2sc, dec) x3 (9)
BODY
Continue from head;
R1: (2sc, inc) x3 (12)
R2: (sc, inc) x6 (18)
R3: 18sc (18)
R4: (8sc, inc) x2 (20)
R5: 20sc (20)
R6: (8sc, dec) x2 (18)
R7: 18 sc (18)
Fill body
LEGS
Continue from body;
How to crochet legs directly from body; Turn the so far doll up-side-down. From the bottom of the body; Visualize a «ring» of 8sts on one side, place hook thru the two st closest to the center. Crochet-tog, then work around like a circle. For the next leg you’ll do the exact same on opposite side. (It’s the same technique as with my Love Heart Mouse. (check this picture the get the idea)
R1: 6sc, inc (8)
R2-3 (2rnds): 8sc
add some filling
R4: (dec, 2sc)x2 (6)
repeat on opposite side for leg2
ARMS (2) (don’t fill arms)
With color A;
R1: 6 in MR
R2-6 (5rnds): 6sc (6)
EARS (2) (don’t fill)
R1: 6 i MR
R2: inc x6 (12)
R3: (4sc, dec) x2 (10)
R4: (3sc, dec) x 2 (8)
R5: 8sc (8)
R6: (2sc, dec) x2 (6)
R7-9 (3rnds): 6sc
Attach to R5-6 of head and R11 if hood
Crochet Bunny Boy
Color A: white (or opinional)
Color B: skin color
HEAD
R1: 6 i MR
R2: inc x6 (12)
R3: (sc, inc) x6 (18)
R4: (sc, inc, sc) x6 (24)
R5: (inc, sc3) x6 (30)
R6: (4sc, inc) x6 (36)
R7-9 (3 rounds): 36 sc
R10-13 (4 rounds): 36sc
R14: (dec, 4sc) x6 (30)
R15: (dec, 3sc) x6 (24)
R16: (dec, 2sc) x6 (18)
Attach eyes between R12-13, 6-7 sts apart, start filling
R17: (dec, sc) x6 (12)
R18: (2sc, dec) x3 (9)
BODY
Continue from head; change to color A
R1: (2sc, inc) x3 (12)
R2: (sc, inc) x6 (18)
R3-4 (2 rounds): 18sc
R5: (8sc, inc) x2 (20)
R6: 20sc (20)
R7: (8sc, dec) x2 (18)
R8: 18 sc (18)
Fill body
LEGS
Continue from body; Change to color D;
How to crochet legs directly from body; Turn the so far doll up-side-down. From the bottom of the body; Visualize a «ring» of 8sts on one side, place hook thru the two st closest to the center. Crochet-tog, then work around like a circle. For the next leg you’ll do the exact same on opposite side. (It’s the same technique as with my Love Heart Mouse. (check this picture the get the idea)
R1: 6sc, inc (8)
R2-3 (2rnds): 8sc
add some filling
R4: (dec, 2sc)x2 (6)
repeat on opposite side for leg2
ARMS (don’t fill arms)
With color A;
R1: 6 in MR
R2: 6sc
change color B;
R3-9 (7rnds): 6sc (6)
HOOD
R1: 6 i MR
R2: inc x6 (12)
R3: (sc, inc) x6 (18)
R4: (sc, inc, sc) x6 (24)
R5: (inc, sc3) x6 (30)
R6: (4sc, inc) x6 (36)
R7: 17sc, inc x2(38)
R8-13 (6 rnds): 38sc (38)
R14: (dec, 17sc) x2 (36)
R15: sl st 36
EARS (2)
R1: 6 i MR
R2: inc x6 (12)
R3: (4sc, dec) x2 (10)
R4: (3sc, dec) x 2 (8)
R5: 8sc (8)
R6: (2sc, dec) x2 (6)
R7-9 (3rnds): 6sc
Attach to R11 of hood