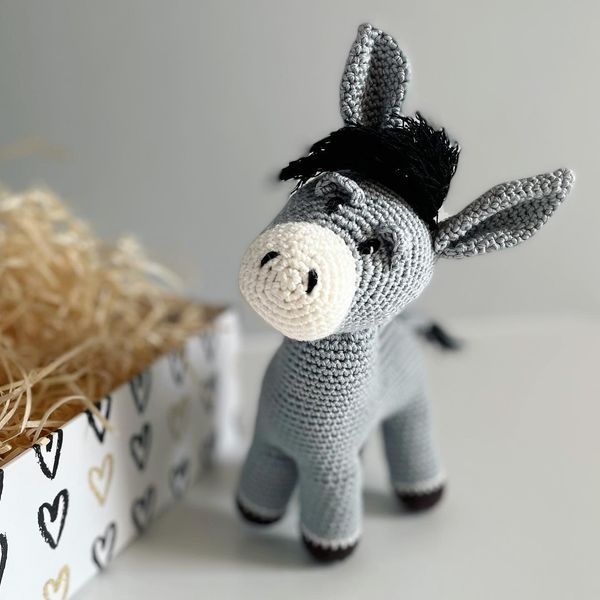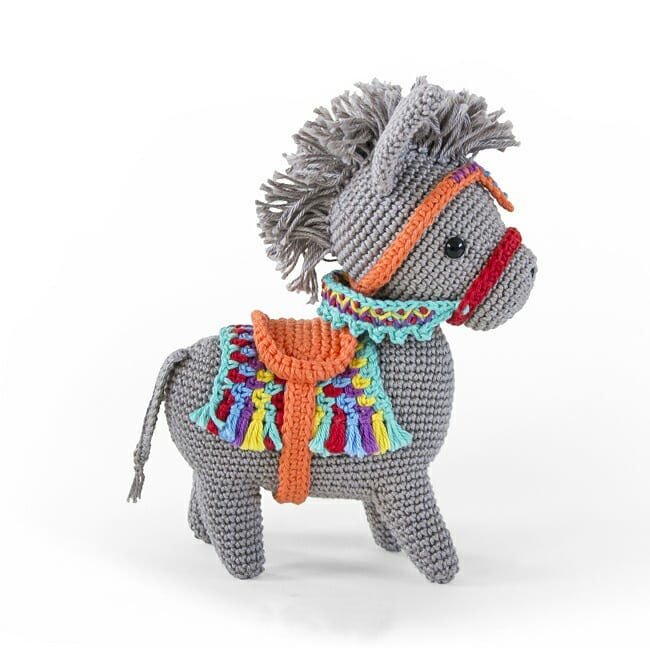
Free Crochet Donkey Pattern
Hello amigurumi lovers and beautiful visitors, I wanted to share the free amigurumi patterns for you here. In my article I will share 1 pattern and how to make it for you. At the end of my article, I will share amigurumi patterns that can generate ideas for you.
You will need
Any DK yarn (why not try the Paintbox Simply DK 100g/276m), 1 ball of each:
- Silver Grey
- Black
- White
- Chocolate
a 3.5mm hook
Pipe cleaners (optional)
Abbreviations
You can find a full list of all abbreviations we use in our abbreviations and conversions guide. This free crochet donkey pattern is written in UK terminology but you can easily convert it to US terms using the guide
Notes
Parts of this pattern use the amigurumi spiral method, where instead of joining each round with a ss you instead just keep working around in a spiral. You will want to stuff the donkey neck and body firmly to keep the head and neck in position.
Body
The shaping in the middle of the donkey body is worked with a short row.
Using Silver Grey, make a crochet magic loop
Round 1 Ch1 and 6dc into the loop. Ss to the first dc to join before tightening the loop.
Round 2 Ch1, (2dc in each st), ss to the first dc to join. [12 sts]
Round 3 Ch1, (2dc in next, dc in next st) six times, ss to the first dc to join. [18 sts]
Round 4 Ch1, dc in each st around, ss to the first dc to join. [18 sts]
Round 5 Ch1, (2dc in next st, dc in next 2 sts) six times, ss to the first dc to join. [24 sts]
Round 6 Ch1, dc in each st around, ss to the first dc to join. [24sts]
Round 7 Repeat row 6.
Round 8 Ch1, (dc2tog, dc in next 2 sts) six times, ss to the first dc to join. [18 sts]
Round 9 Ch1, dc in each st around, ss to the first dc to join. [18 sts]
Round 10 Ch1, dc in next 12 sts, ss in next st, turn.
The following is a short row:
Next row Ch1, dc in next 6 sts (skip st at base of ch), ss in next, turn.
Round 11 Ch1, dc in next 6 sts (skip st at base of ch), ss in the end of the first short row, 1dc in same st as the dc on the end of the short row, 5dc to complete round, ss to the first ch to join.
Round 12 Ch1, dc in next 5 sts, dc in ss at end of short row, dc in next 6 sts along the short row, dc in ss at end of row, dc in next 6 sts to complete round, (first of these six is in the same st as dc at end of short row) ss to the first ch to join. [19 sts]
Round 13 Ch1, dc in each st around, ss to the first dc to join. [19 sts]
Round 14 Ch1, (2dc in next st, dc in next 2 sts) six times, dc in next st, ss to the first dc to join. [25 sts]
Round 15 Ch1, dc in each st around, ss to the first dc to join. [25 sts]
Round 16 Ch1, (dc2tog, dc in next 3 sts) five times, ss to the first ch to join. [20 sts]
Round 17 Ch1, (dc2tog, dc in next 2 sts) five times, ss to the first ch to join. [15 sts]
Round 18 Ch1, (dc2tog, dc in next st) three times, ss to the first ch to join. [12 sts]
Stuff here.
Round 19 Ch1, (dc2tog) six times, ss to the first ch to join. [6 sts]
Fasten off, top up stuffing and sew up hole.
Neck
Using Silver Grey, Ch21 and ss to the first ch to join to make a loop, being careful not to twist the chain.
Round 1 Ch1, dc in each ch around, ss to the first dc to join. [21 sts]
Round 2 Ch1, dc2tog, dc in next 17 sts, dc2tog, ss to the first dc to join. [19 sts]
Round 3 Ch1, dc in each st around, ss to the first dc to join. [19 sts]
Round 4 Ch1, dc2tog, dc in next 15 sts, dc2tog, ss to the first dc to join. [17 sts]
Round 5 Ch1, 1 dc, (dc2tog, dc in next 3 sts) three times, dc in next st, ss to the first dc to join. [14 sts]
Round 6 Ch1, dc2tog, dc in next 10 sts, dc2tog, ss to the first dc to join. [12 sts]
Round 7 Ch1, dc in each st around, ss to the first dc to join. [12 sts]
Row 8 Ss in next 4 sts.
At this point work back and forth in rows to make the piece that will form the back of the head.
Row 9 Ch1, dc in next 8 sts, turn. [8 sts]
Row 10 Ch1, dc2tog, dc in next 4 sts, dc2tog, turn. [6 sts]
Row 11 Ch1, dc in next 6 sts, turn.
Row 12 Ch1, dc2tog, dc in next 2 sts, dc2tog, turn. [4 sts]
Row 13 Ch1, dc2tog twice. [2 sts]
Fasten off.
Sew the wider end to the body, and stuff as much as possible while leaving the head hole open.
Head
Using White, make a crochet magic loop
Round 1 Ch1 and 6dc into the loop.
Without closing off the round with a ss, continue to work in the amigurumi spiral method making another 2 rounds of 6dc.
Round 4 (2dc in next st, dc in next st) twice. [8 sts]
Change to Silver Grey
Round 5 & 6 Dc in each st around. [8 sts]
Round 7 (2dc in next, dc in next st) 4 times [12 sts]
Round 8 (2 dc in next, dc in next 2 sts) 4 times [16 sts]
Round 9 Dc in each st around. [16 sts]
Round 10 (Ears) Dc in next 7 sts, *ch5, dc in 2nd ch from hook, dc in next ch, htr in next ch, dc in next ch, ss in same place as last dc before ch5**, dc in next 2 sts; rep from * to **, dc in remaining 7 sts.
Fasten off, stuff the neck. Position the flap of the neck behind the head and sew the two together.
Legs (make 4)
Using Black, make a crochet magic loop
Round 1 Ch1 and 6dc into the loop. Do not join with a ss, continue working in the amigurumi spiral method
Round 2 Dc into the back loop only of each st. [6 dc]
Change to Silver Grey
Round 3 Dc2tog, and then continue working a single dc in each st until the leg measures 4cm. Fasten off
Fold a piece of pipe cleaner in half and twist together to make one doubled 4cm length and push into the leg. Sew the leg to the body.
Saddlebags
Using Chocolate, ch9 and dc in the 2nd ch from the hook and in each following ch.
Continue making rows of 8dc until the strip measures 16cm. Fasten off.
Fold over 3cm at either end and sew the sides together to make pockets. Make a single row of 10dc and use this as a strap to fasten the saddlebags underneath the donkey – sew each end of the strap to the back of the pockets.
To make up
Sew a 5cm tassel to the body for the tail. Make 3 or 4 small tassels down the back of the neck for a mane. With 2 strands of white embroidery thread sew several straight stitches on either side of the head to make the background for the eyes and sew black seed beads on top. With black embroidery thread sew a straight line for the mouth and two dots for the nose.
Feel free to tag me (@freeamigurumii) in your photos on Instagram or Facebook if you’d like!
