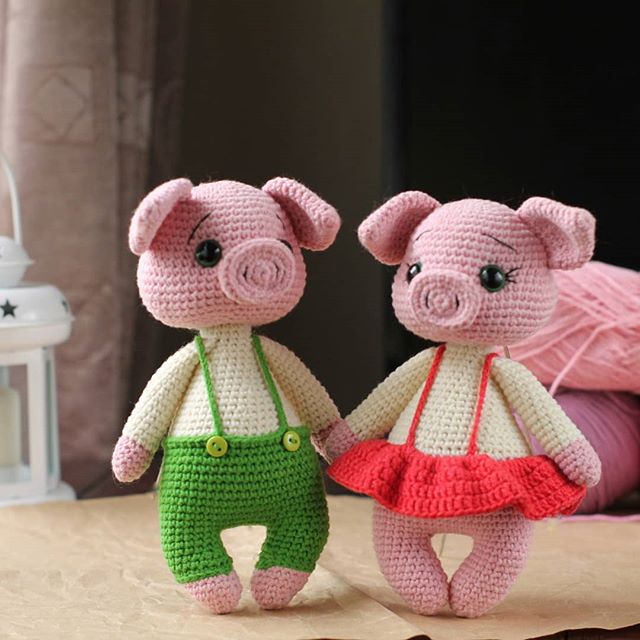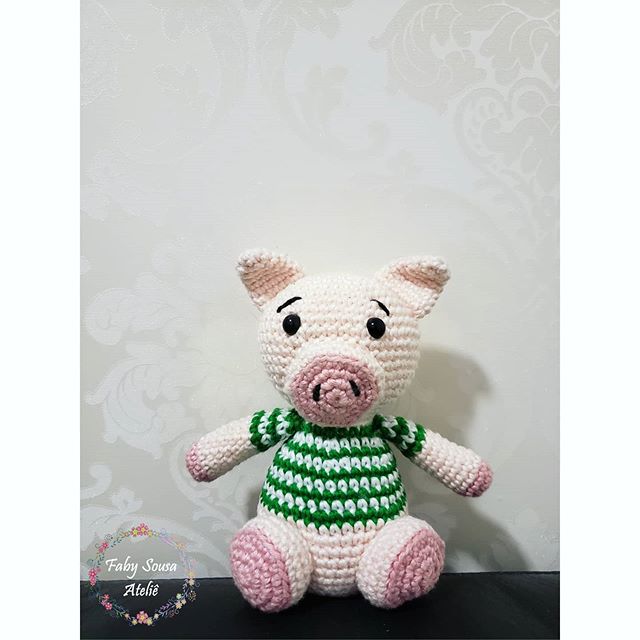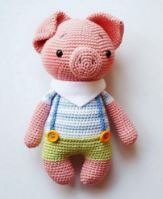
AMIGURUMI LITTLE PIGLET FREE CROCHET PATTERN
Hello amigurumi lovers and beautiful visitors, I wanted to share the free amigurumi patterns for you here. In my article I will share 1 pattern and how to make it for you. At the end of my article, I will share amigurumi patterns that can generate ideas for you.
First leg:
1. Rd.: 6sc in Mc (6)
2. Rd.: (2sc in next sc) (12)
3. Rd.: (sc, 2sc in next sc) (18)
4. Rd.: (2sc, 2sc in next sc) (24)
5. Rd.: sc (24)
6. Rd.: sc2togx2, 9sc, 2sc in scx2, 9sc (24)
7. Rd.: sc (24)
8. Rd.: sc2togx2, 9sc, 2sc in scx2, 9sc (24)
9. Rd.: sc (24)
10. Rd.: sc (24)
11. Rd.: sc2togx2, 9sc, 2sc in scx2, 9sc (24)
12. Rd.: sc (24) Cut the yarn and sew it up.
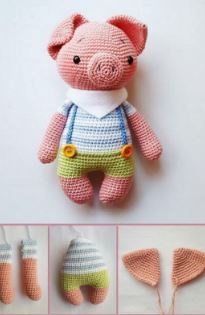
What you`ll need:
- Schachenmayr Catania in pink, light green,
- white, light blue and dark blue
- Dark grey yarn for eyebrows+ nostril
- Crochet hook in 2,5mm
- Polyfill to stuff
- Needle, scissors
- Safety eyes in 8mm
- Pins
- White felt
- 2 buttons
- Pink blush for cheeks
Abbreviations:
Mc = Magic Circle
sc = single crochet
sl st = slip stitch
inc. = increase = 2sc in next sc
sc2tog = single crochet decrease
(…) = repeat the stitches until the
end of this round
Rd = round
St = stitch
Crochet Freddy in spiral rounds. Stuff the legs, the body and the head with lot of polyfill! If you can
see the polyfill between the stitches, try to crochet with a hook that is one size smaller! Now we can
start!
Second leg:
Now crochet the second leg in the same way. Repeat round 01-12 but don`t cut the yarn! At the end of Rd. 12
crochet 2sc, and now 6 ch(s) with light green and continue with body.
Body: Crochet hook 2,5mm, light green, white and light blue.
Connect both legs with a sc in the first leg, next to the last st of Rd. 12. It is important that the tips of feet look
to each other.
Crochet now 23 sc around the first leg + 6sc in the chains + 24sc around the second leg + 6sc in the chains = 60
sc
1. Rd.: sc (60)
2. Rd.: sc (60)
3. Rd.: sc (60)
4. Rd.: sc (60)
5. Rd.: sc (60)
6. Rd.: 12sc, sc2tog, 28sc, sc2tog., 16sc (58)
7. Rd.: sc (58)
8. Rd.: 12sc, sc2tog, 27sc, sc2tog., 15sc (56)
9. Rd.: sc (56)
10. Rd.: 12sc, sc2tog, 26sc, sc2tog., 14sc (54)
11. Rd.: sc (change to white) (54)
12. Rd.: 12sc, sc2tog, 25sc, sc2tog., 13sc (52)
13. Rd.: sc (change to light blue) (52)
14. Rd.: 12sc, sc2tog, 24sc, sc2tog., 12sc (50)
15. Rd.: sc (change to white) (50)
16. Rd.: 12sc, sc2tog, 23sc, sc2tog, 11sc (48)
17. Rd.: sc (change to light blue) (48)
18. Rd.: 12sc, sc2tog, 22sc, sc2tog, 10sc (46)
19. Rd.: sc (change to white) (46)
20. Rd.: 12sc, sc2tog, 21sc, sc2tog, 9sc (44)
21. Rd.: sc (change to light blue) (44)
22. Rd.: 12sc, sc2tog, 20sc, sc2tog, 8sc (42)
23. Rd.: 12sc, sc2tog, 19sc, sc2tog, 7sc (40) (change to white)
24. Rd.: 12sc, sc2tog, 18sc, sc2tog, 6sc (38)
25. Rd.: 12sc, sc2tog, 17sc, sc2tog, 5sc (36) (change to light blue)
26. Rd.: 12sc, sc2tog, 16sc, sc2tog, 4sc (34)
27. Rd.: 12sc, sc2tog, 15sc, sc2tog, 3sc (32) (change to white)
28. Rd.: 12sc, sc2tog, 14sc, sc2tog, 2sc (30)
Fasten off leaving a long tail for sewing. Stuff the body!
Head:
Crochet hook 2,5mm, light pink. Place the safety eyes between round 18 and 19, 17sc between them.
1. Rd.: 6sc in MC (6)
2. Rd.: (2sc in next) (12)
3. Rd.: (sc, 2sc in sc) (18)
4. Rd.: (2sc, 2sc in next sc) (24)
5. Rd.: (3sc, 2sc in next sc) (30)
6. Rd.: (4sc, 2sc in next sc) (36)
7. Rd.: (5sc, 2sc in next sc) (42)
8. Rd.: (6sc, 2sc in next sc) (48)
9. Rd.: sc (48)
10. Rd.: (7sc, 2sc in next sc) (54)
11. Rd.. sc (54)
12. Rd.: (8sc, 2sc in next sc) (60)
13. Rd.: (9sc, 2sc in next sc) (66)
14. Rd.: (10sc, 2sc in next sc) (72)
15. Rd.: sc (72)
16. Rd.: (11sc, 2sc in next sc) (78)
17. Rd.: sc (78)
18. Rd.: (12sc, 2sc in next sc) (84)
19. Rd.: sc (84)
20. Rd.: sc (84)
21. Rd.: (12sc, sc2tog) (78)
22. Rd.: (11sc, sc2tog) (72)
23. Rd.: (10sc, sc2tog) (66)
24. Rd.: (9sc, sc2tog) (60)
25. Rd.: (8sc, sc2tog) (54)
26. Rd.: (7sc, sc2tog) (48)
27. Rd.: (6sc, sc2tog) (42)
28. Rd.: (5sc, sc2tog) (36)
29. Rd.: (4sc, sc2tog) (30)
Fasten off and sew up.
Snout:
(light pink) Crochet hook 2,5mm
1. Rd.: 6sc in Mc (6)
2. Rd.: (2sc in next sc) (12)
3. Rd.: (sc, 2sc in next sc) (18)
4. Rd.: (2sc, 2sc in next sc) (24)
5. Rd.: (3sc, 2sc in next sc) (30)
6. Rd.: sc in back loops (30)
7. Rd.: (3sc, sc2tog) (24)
Arms:
Crochet hook 2,5mm, light pink, white and light blue, make two of them! Change the colour on the
back of the arms. Change to white in round 20, change after two rounds to light blue, after two rounds to white
and after two rounds to light blue again. Crochet last round (28) in blue.
Stuff only the hands with polyfill!
1. Rd.: 6sc in Mc (6)
2. Rd.: (2sc in next sc) (12)
3. Rd.: (sc, 2sc in next sc) (18)
4. -7.Rd.: sc (18) 4 rounds
8. Rd.: sc2tog x2, 14sc (16)
9. – 16.Rd.: sc (16) 8 rounds
17. Rd.: 10sc, sc2tog., 4sc (15)
18. -24.Rd.: sc (15) 7 rounds
25. Rd.: 11sc, sc2tog, 2sc (14)
26. Rd.: sc (14)
27. Rd.: sc (14)
28. Rd.: Fold together and crochet both sides together. Perhaps you
have to crochet another sc first, it is important, that the sc2tog x2
look to the side.
Pair of braces: Crochet hook 2,5mm, dark blue
1. Rd.: 41ch(s) (41)
2. Rd.: insert in 2° st from hook, 40sl st (40)
Fasten off leaving long tail for sewing.
Ears:
light pink, Crochet hook 2,5mm
1. Rd.: 6sc in Mc (6)
2. Rd.: (sc, inc) (9)
3. Rd.: (2sc, inc) (12)
4. Rd.: (3sc, inc) (15)
5. Rd.: (4sc, inc) (18)
6. Rd.: (5sc, inc) (21)
7. Rd.: (6sc, inc) (24)
8. Rd.: (7sc, inc) (27)
9. Rd.: (8sc, inc) (30)
10. Rd.: (9sc, inc) (33)
11. Rd.: (10sc, inc) (36)
12. -14. Rd..: sc (36) 3 rounds
Fasten off leaving a longer tail for sewing.
Curly tails:
Crochet hook 2,5mm, light pink
1. Rd.: 10ch(s) (10)
2. Rd.: insert in 2° st from hook, inc each st (18)
Fasten off leaving long tail for sewing.
Combining all pieces:
*Sew the head to the body.
*Sew the arms under the seam of the head.
*use the light green yarn and make sl st(s) at the colour shift (body), start at the back!
*Cut the neckpiece out of the white felt, and sew it together in the neck.
*Sew the ears onto the head 4 rounds between. Fold one of them and sew the top of the ear onto the head.
*Sew the curly tails onto the back.
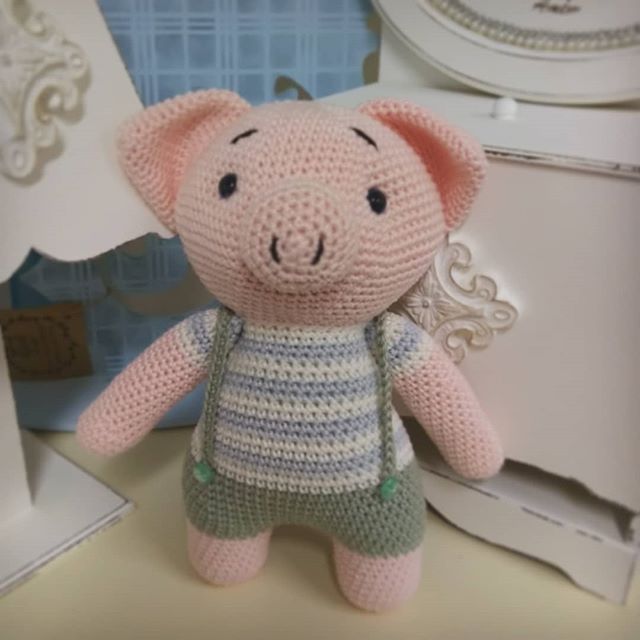
*Sew the pair of braces as you can see in the pictures.
*Stitch the eyebrows and the nostrils with the dark grey yarn.
*Sew the buttons onto the body.
Ready!!!!! Have fun with your little Freddy. Would love to see your pictures of your Freddy
More Amigurumi Pigs Ideas:
