Amigurumi Winter Bunny Crochet Pattern
Hello amigurumi lovers and beautiful visitors, I wanted to share the free amigurumi patterns for you here. In my article I will share 1 pattern and how to make it for you. At the end of my article, I will share amigurumi patterns that can generate ideas for you.
Supplies for :
Red Heart Comfort yarn in any color A small amount of yarn for the nose and eyes
I did not measure out how much yarn I used. Please see question #3 here for the amount that’s in the rolls of yarn I buy, for the bunny you need less than 1 package of Red Heart Super Saver. Same goes for all the accessories.
4mm hook I used a 5mm but I crochet fairly tight so a smaller hook (4mm) will be a better choice for you depending on tension.
blunt end yarn needle for sewing
scissors
100% polyester stuffing
optional 6 pipe cleaners for the limbs and ears
Abbreviations:
st = stitch
sc = single crochet
ch1 = chain one
sl st = slip stitch
2tog = crochet 2 stitches together
f/o = finish off
How to read the rows: Each row has a sequence as given below. Example: 1sc then 2sc in next st means repeat that sequence 1sc then 2sc in next st followed by 1sc then 2sc in next st over and over to the end of that particular row. The number inside the parentheses ( ~ ) is the number of stitches you should have at the end of that particular row. Work in continuous rounds. Add a marker to the last stitch and move the marker at the end of each row.
There is an assembly section at the bottom of this page. Please note I use pins to pose all my amigurumi. They will not stand on their own.
Head: starting at the top of the head working down to the nose
1) magic circle with 6s (6)
2) 2sc in each st (12)
3) 1sc then 2sc in next st (18)
4) 1sc in next 2st then 2sc in next st (24)
5) 1sc in next 3st then 2sc in next st (30)
6-10) 1sc in each st for 5 rows
11) 1sc in next 3st then 2tog (24)
12) 1sc in each st for 1 row
13) 1sc in next 2st then 2tog (18)
14) 1sc in each st for 1 row
15) 1sc then 2tog (12) stuff most of the head at the end of this row. It’s important to shape as you stuff. You will continue to stuff the head until you close up the last round
16) 1sc in each st for 1 row
17) 1sc in next 2st then 2tog (9)
sl st next st and f/o leaving a bit of a tail. Weave in and out of the remaining stitches then stuff more. Use a stuffing stick or you finger to push the stuffing all around the nose area and anywhere else you need it. Once you are satisfied there is the right amount of stuffing and the head shape looks good, pull the yarn tail tightly and knot off. Carry the yarn tail inside the head to hide it. Using yarn or embroidery thread, whip stitch a nose just above where you finished off. See photos in assembly section below.
Body: starting at the bottom of the body working to the top which will remain open
1) magic circle with 6sc (6)
2) 2sc in each st (12)
3) 1sc then 2sc in next st (18)
4) 1sc in next 2st then 2sc in next st (24)
5) 1sc in next 3st then 2sc in next st (30)
6) 1sc in next 4st then 2sc in next st (36)
7-9) 1sc in each st for 3 rows
10) 1sc in next 4st then 2tog (30)
11-12) 1sc in each st for 2 rows
13) 1sc in next 3st then 2tog (24)
14-15) 1sc in each st for 2 rows
16) 1sc in next 2st then 2tog (18)
17) 1sc in each st for 1 row
f/o leaving a long tail for sewing. Stuff the body. Weave in and out all the stitches of the last row and pull to close up the body but leave a bit open as pictured, knot off. You will use the remaining yarn tail to sew the head and body together.
Ears:
1) magic circle with 6sc (6)
2) 2sc in each st (12)
3) 1sc then 2sc in next st (18)
4) 1sc in each st for 1 row
5) 1sc in next 4st then 2tog (15)
6) 1sc in each st for 1 row
7) 1sc in next 3st then 2tog (12)
8-9) 1sc in each st for 2 rows
10) 1sc in next 4st then 2tog (10)
11) 2tog then 1sc in next 8st (9)
12) 1sc in each st for 1 row
sl st next st then f/o leaving a tail for sewing. Do not stuff the ears. You can push a pipe cleaner inside if desired, this will help pose the ears but it’s not necessary.
Arms:
1) magic circle with 6sc (6)
2) 1sc in next 2st then 2sc in next st (8)
3-4) 1sc in each st for 2 rows
5) 1sc in next 2st then 2tog (6)
6-11) 1sc in each st for 6 rows
sl st next st and f/o leaving a long tail for sewing. Add in folded pipe cleaner or wire to make the arms poseable. If you use wire as I have, make sure to use masking tape on the end that will be in the hand part so it’s not at risk of poking through. Wrap the masking tape enough times to make it a bit bulky. You can add in a thumb just by wrapping yarn in the same spot a few times. Or add in a couple hdc’s. Knot off when done and hide the yarn tails inside the arm.
Legs:
1) magic circle with 6sc (6)
2) 2sc in each (12)
3-4) 1sc in each st for 2 rows
5) 1sc in next 2st then 2tog (9)
6) 1sc in each st for 1 row
7) 2tog then 1sc in next 7st (8)
8-10) 1sc in each st for 3 rows
sl st next st and f/o. Bend a pipe cleaner and push the bend to the end , using a stuffing stick, stuff the foot up to row 5, bend the leg at row 6 then stuff the rest of the leg.
Tail: make a pom pom
In the hat and scarf pattern I show how to make a pom pom and there’s also a video link if needed. For the pom pom tail on this Winter Bunny I wrapped the yarn around 3 fingers and wrapped about 50 times. Look for the pom pom tutorial here.
Assembly: sew in order given for best results
1) sew the head to the body. Take your time to position it just right. Make sure you sew all the way around and there’s no gaps when you’re done.
2) Sew the arms and legs on. The arms are whip stitched to or about the 16th row. See the photo below for placement of the legs.
3) sew the tail to the back of the body.
4) sew the ears on and about the 6th row. Pin them in place first, this will help hold them while you sew and also helps you determine they are even and look good before sewing.
5) with black yarn put in the eyes. Put them where you think looks best. The ones pictured are wrapped around the 12th row with 5 visible stitch holes between them. I went in through the side of the head, came out where the first eye would go, put in a couple wraps then back into the head, go down a bit so you don’t see the black through the white yarn, and come out where the next eye will go. Put in a couple wraps and then bring the yarn back out where the other yarn tail is hanging. Knot them off then hide the knot inside the head. After this step was done I went over the black yarn with black paint just to make those parts look more solid then added a dot of white paint. It’s up to you if you want to do the same. If you have any troubles putting the eyes in, watch this clip where I show how to do this on another doll.
Feel free to tag me (@freeamigurumii) in your photos on Instagram or Facebook if you’d like!
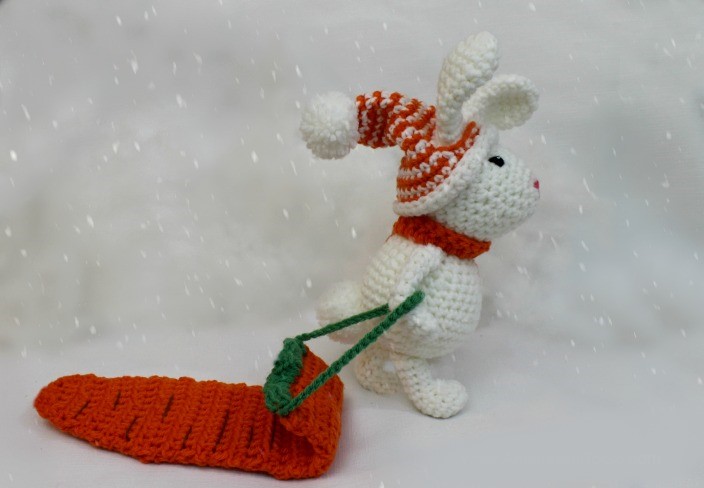
All Finished.
